
Subscribe to Our Youtube Channel
Related Manuals for Westermann WR 840 Battery


Summary of Contents for Westermann WR 840 Battery
- Page 1 WR 870 Battery WR 870 Battery PRO strong efficiently WR 870 Honda user-friendly WR 870 Honda PRO Operating instruction...
-
Page 2: Table Of Contents
Table of contents 1 EC Declaration of Conformity ............5 2 Legal information ................. 7 3 Important basic information ............8 3.1 Scope of supply ..............8 3.2 Conventions............... 9 3.2.1 Symbols and signal words ..........9 3.2.2 Pictogram overview ............ 10 3.3 Marking on the machine ............11 3.3.1 Warning pictogram on the machine ......... 11 3.4 Ordering spare parts ............12 4 Safety.. ................. 13 4.1 Intended use of the machine .......... - Page 3 Table of contents 9.2 Adjusting the brush ............. 28 9.3 Starting the engine WR 870 Honda | Pro ........29 9.3.1 Opening the fuel valve ..........29 9.3.2 Cold start .............. 30 9.3.3 Starting at operating temperature ........ 30 9.3.4 Starter cord ............30 9.3.5 After the cold start ..........30 9.4 Sweeping direction determine WR 870 Honda | Pro ...... 31 9.5 Stopping the engine WR 870 Honda | Pro ........32 9.6 Charging the WR 870 Battery ..........33 9.6.1 Blown fuse ............33 9.7 Starting the WR 870 Battery | Pro ........... 34 10 Operation................35 10.1 Operation description ............
- Page 4 Table of contents 19 Spare parts list................54 19.1 WR 870 Honda | PRO ............... 58 19.2 Base frame WR 870 Hond | PRO .......... 60 19.3 Support wheel with spindle WR 870 Honda | PRO ..... 61 19.4 Push handle WR 870 Honda | PRO ........62 19.5 Control lever WR 870 Honda | PRO ........63 19.6 Guide pulley WR 870 Honda | PRO ........64 19.7 Tensioner WR 870 Honda | PRO ........... 65 19.8 Drive shaft assembly WR 870 Honda | PRO ......65 19.9 brush WR 870 Honda | PRO..........66 19.10 WR 870 Akku | PRO ............
-
Page 5: Ec Declaration Of Conformity
EC Declaration of Conformity EC declaration of conformity in accordance with Machinery Directive 2006/42/EC Annex II 1.A The manufacturer / distributor: Westermann GmbH & Co. KG Schützenhof 23 D – 49716 Meppen hereby declares that the following product Product name: WR 870 Battery | Make: Westermann GmbH & Co. KG Serial number: _ _. _ _ _ _ Model / type description: WR 870 Description: The Westermann Radial Sweeper is built exclusively for the general sweeping of hard surfaces such as yards, roads, parking lots, silo slabs and stables. - Page 6 EC Declaration of Conformity The following harmonised standards were applied: EN ISO 12100:2010 Safety of machinery - General principles for design - Risk assessment and risk reduction (ISO 12100:2010) The following other technical specifications were applied: Name and address of the person authorised to compile the technical documen- tation: Westermann GmbH & CO. KG Mr Alfons Westermann Tel.: 05931 | 496 90 0 Schützenhof 23 E-Mail: info@westermann-radialbesen.de 49716 Meppen URL: www.westermann-radialbesen.de Location: 49716 Meppen Date: 19.01.2017 _______________________________ (Signature) Alfons Westermann Managing Director...
-
Page 7: Legal Information
Legal information Issuer: Westermann GmbH & Co.KG Publisher: Westermann GmbH & CO. KG Mr Alfons Westermann Phone: +49 (0) 5931 | 496 90 0 Schützenhof 23 Fax: +49 (0) 5931 | 496 90 99 49716 Meppen E-Mail: info@westermann-radialbesen.de Internet: http://www.westermann-radialbesen.de Managing Director: Alfons Westermann Form of organisation: Limited partnership Location: 49716 Meppen Commercial Register Osnabrück, HRA 100274 Personally liable partner: Westermann Beteiligungs-GmbH, HRB Osnabrück no. 100562, UST-ID no.: 193643718, Copyright notice: The contents of this document are protected by copyright under German copyright law and inter- national treaties. All copyrights to the contents of this document are owned by UPAS GmbH unless and to the extent that another author is expressly indicated or obviously recognisable. The user is not granted or reserved any industrial property rights, rights of use or other rights by the provision of the contents. The user is prohibited from registering rights of any kind for the know-how or parts thereof. The passing on, transfer and other dissemination of the contents of this document to third parties, the making of copies, duplicates and other reproductions as well as the utilization and other use – even in part – are prohibited without the prior, express and written consent of the author, unless and insofar as mandatory statutory provisions permit such use. -
Page 8: Important Basic Information
Important basic information Scope of supply The operating manual is part of the working equipment and must be kept accessible in the immediate vicinity of the machine at all times. The operating manual contains important information for safe and effective operation of the machine. Therefore, the operator must read and understand this operating manual carefully. The basic requirement for safe working is compliance with all safety instructions and operating procedures given in this operating manual. The local accident prevention regulations and general safety regulations for the specific application must also be observed. -
Page 9: Conventions
Important basic information Conventions 3.2.1 Symbols and signal words Symbol / signal word Meaning Indicates the handling and effects of the safety information. Alerts you to a dangerous situation that, if not DANGER avoided, will result in death or serious injury. Alerts you to a dangerous situation that, if not WARNING avoided, may result in death or serious injury. Alerts you to a dangerous situation that, if not CAUTION avoided, may result in minor or moderate injury. Indicates possible damage to property and other NOTICE important information. -
Page 10: Pictogram Overview
Important basic information 3.2.2 Pictogram overview he safety instructions contained in this operating manual, which can cause danger to persons and the machine if ignored, are specially marked with the following pictograms. Pictogram Importance General warning sign Falling hazard Automatic start-up hazard Opposing rollers hazard (Entanglement risk) Harmful or irritating substances hazard Toxic substances hazard Hand injuries hazard Hot surface hazard Crushing hazard Slip hazard Electrical voltage hazard Obstacles on the ground hazard... -
Page 11: Marking On The Machine
Important basic information Marking on the machine The Radial Sweeper WR 870 has a nameplate that contains all basic data. Components and accessories from suppliers have their own nameplates. 3.3.1 Warning pictogram on the machine Article number: AUF-00-00016 Article number: AUF-00-000028 Labels must always be kept clean. Missing or damaged NOTICE labels must be replaced. -
Page 12: Ordering Spare Parts
Important basic information Ordering spare parts When ordering spare parts or accessories, state the type NOTICE designation, machine number and year of manufacture. The use of accessories and spare parts from other manu- facturers is only permitted after consultation with the manufacturer. Original accessories and manufacturer-authorised acces- sories are provided for safety. Use of other accessories may void liability for consequential damages. -
Page 13: Safety
Safety Intended use of the machine The Westermann Radial Sweeper WR 870 is to be used exclusively for the intended use described here. The Radial Sweeper WR 870 is a hand-guided machine. Areas of application of the working machine are the sweeping of hard surfaces such as yards, paths, parking lots, silo slabs and stables, clea- ring snow or similar work. The Radial Sweeper WR 870 only has the brush in its basic version. The approved attachments can be found under the accessories chapter. Any use over and above this is considered improper. The manufacturer is not liable for damage resulting therefrom. The risk is borne by the user alone. Proper use also includes compliance with the operating, maintenance and service conditions prescribed by the manufacturer. Machine naming information The Radial Sweeper WR 870 Honda or Radial Sweeper WR 870 rechargeable battery is referred to below simply as the machine, Radial Sweeper or... -
Page 14: Requirements For The Operator
Safety 4.3 Requirements for the operator Danger due to misuse! WARNING Fehlgebrauch kann zu gefährlichen Situationen führen. Deshalb: P Refrain from any use beyond the intended use or different use. P Strictly comply with all information in this operating manual and, where applicable, the associated documents. P Switching operations on the controls can only be carried out by instructed persons. P Maintenance and servicing must be carried out exclusively by trained maintenance personnel. P Refrain from modifying, converting or altering the design or individual pieces of equipment with the aim of changing the area of application or usability. P Only use the equipment with the aids specified in the operating manual. P Only use the equipment in a technically perfect condition. P Use in areas with an explosive atmosphere is prohibited. P Do not exceed the carrying capacity of the equipment. P Avoid transporting persons with the equipment. Maintenance and repair NOTICE Maintenance and repair work is part of the intended use and must be carried out in compliance with the maintenance intervals. -
Page 15: Danger Area
Safety Danger area Danger while staying in the danger area! WARNING Staying in the danger zone involves risks that unauthorised persons cannot assess. Therefore: P Always monitor the danger zone during the work process and ensure that no persons are present there. P If an unauthorised person enters the danger zone, warn the person and stop operating immediately. The area surrounding the machine with a safety distance of at least one meter is defined as a danger area. This area must be free of persons during the operation in order not to influence the work process and to cause hazards. Attachments and ejected debris can increase the danger area of the machine, depending on their size. (Fig. 1 - Danger area) -
Page 16: Foreseeable Misuse | Reasonably Foreseeable Misuse
Safety Foreseeable misuse | Reasonably foreseeable misuse All use deviating from the intended use is considered misuse and is not permitted. These include, for example • Transport of humans and animals • Use as a climbing aid • Use outside the permissible operating limits Behaviour in case of emergency keep save inform calm people first aiders 4.6.1 Personal injury If during use an event occurs from which personal CAUTION injury results, the measures taken depend on the severity of the injury. 4.6.2 Case of fire In the event of a fire, immediate action must be taken. • Protect people • Fight the fire • Repair damage fire extinguisher 4.6.3 Technical complications If technical complications occur during use, they must be remedied by a... -
Page 17: Application
Safety Application The area of application includes all locations worldwide that enable safe use of the machine. Use must be in accordance with the specified intended use. 4.7.1 Local requirements The area of application includes all locations worldwide that enable safe use of the machine. To this end, the following criteria must be met. -
Page 18: Obligations Of The Operator
Safety 4.8.1 Obligations of the operator The operator is responsible for ensuring the machine is good working order. P The operator must regularly check all safety equipment for functio- nality and completeness. P The operator must ensure that prescribed maintenance is carried out as scheduled. P The operator must inform the manufacturer immediately of any da- mage detected. P The operator must provide the personnel with the necessary protecti- ve equipment and check, maintain and replace defective parts in accor- dance with regulations. P The operator must request a new copy of the instruction manual if it is in poor condition or parts are missing. P The operator must immediately replace all labels, signs or stickers that are in poorly readable condition or have been lost. -
Page 19: Personal Responsibility
Safety 4.9 Personal responsibility Basic requirements P Only persons who are expected to observe the safety regulations and perform their work reliably may enter the danger zone. P Persons whose ability to act is influenced by drugs, alcohol, medicines or the like are not permitted. P When selecting personnel, the age and occupation-specific regulations applicable at the place of work must be observed. P The user must be at least 16 years old! Qualifications In general, persons may only perform the activities for which they have the necessary qualifications. Specialists for installation and start-up Able to carry out the work entrusted and to independently recognize and avoid dangerous situations due to professional training, knowledge and experience as well as knowledge of the relevant provisions. Service staff for maintenance and start-up Able to carry out the work entrusted and to independently recognize and avoid possible danger due to professional training, knowledge and expe- rience as well as knowledge of the relevant provisions. -
Page 20: Observance Of The Operating Manual
Safety 4.10 Observance of the operating manual The operating manual is provided by the manufacturer or supplier of the product in order to provide the user with essential knowledge for the proper and safe use and to point out dangers in handling the machine. Before starting up the machine, the operating manual must be worked through; it must be observed carefully during start-up. We point out that we accept no liability for damage and malfunctions resulting from non-compliance with the operating manual. The illustrations and information contained in the operating manual are subject to technical modifications necessary for the improvement of the machine. 4.11 Residual hazards and protective measures The knowledge and technical implementation of the safety instructions contained in this documentation is a prerequisite for a faultless product. -
Page 21: Personal Protection
Safety 4.13 Personal protection The Personal Protective Equipment (PPE) is not included in the scope of delivery. Responsibility for the availability, testing and proper use of PPE therefore lies with the operator. P Wear PPE according to the instructions below. P Do not enter the danger area without PPE. P On the equipment follow the attached instructions for PPE. Wear foot protection Protection of the feet from heavy falling parts, slip prevention, piercing of footwear by sharp-edged parts. Wear protective clothing Close-fitting workwear with low tear resistance, with tight sleeves and no protruding parts. Predominantly serves as protection from being drawn into rotating machine parts. When working on the electrical system, wear work clothing with arc protection. Use hand protection Protection of hands from friction, abrasions, punctures and cuts, as well as from contact with hot surfaces. When working on live parts, use insulated gloves. -
Page 22: Safety Instructions For The Operator/User
Safety instructions for the operator/user If other persons are to operate the machine, they must be instructed in the operation of the machine and the operating manual must be read and understood in order to avoid accidents. Before removing safety devices, for example a safety cover, make sure that all moving parts of the machine have come to a standstill. Removed parts must be re-attached after maintenance. Pay attention to persons, animals, obstacles etc. in the vicinity of the machine before using the machine to avoid personal injury or material damage. Never transport people on the machine or on attachments. The surface to be swept must first be cleaned of larger foreign bodies. Even stones, wires, pieces of wood and the like can be ejected uncontrollably under certain circumstances by the Radial Sweeper. Observe the marked hazard area specified in chapter 4.4 on page 11 Notes WR 870 Honda NOTICE Please never leave the machine unattended! -
Page 23: Technical Specifications
Technical specificationsta General technical data WR 870 Basic dimensions WR 870 Battery WR 870 Honda Unit Machine length 1,8 1,8 meters (m) Machine length + swath plate: 2,3 2,3 meters (m) Machine width 0,86 0,86 meters (m) Working width 0,86 0,86 meters (m) Machine height 0,45 0,66 meters (m) Total height 1,00 1,00 meters (m) Machine lenght Working width... -
Page 24: General Technical Data Wr 870
Technical specificationsta General technical data WR 870 Technical WR 870 WR 870 WR 870 WR 870 specifications Battery Battery PRO Honda Honda PRO Engine 12 V DC motor Honda GCV 160 OHC H onda GXV 160 Period of operation up to 2,5 h/battery charge continuous Handlebar h eight adjustable h eight adjustable Working width a bout 870 mm a bout 870 mm l eft | right left | right Direction of rotation Weight... -
Page 25: Assembly, First Start-Up
Assembly, first start-up Safety To ensure the safety of man and machine easy and NOTICE risk-minimised installation/handling was taken into consideration during construction. Thus, the handling machine is subject to all applicable DIN EN standards. Operator training and instruction are required and fur ther reduce the safety risk. 7.2 Assembly The complete assembly and first start-up is carried out exclusively by the manufacturer. The machines are subjected to a thorough test run and are supplied only after successful acceptance. First start-up Before first start-up, check the entire vehicle for NOTICE possible damage. -
Page 26: Product Description
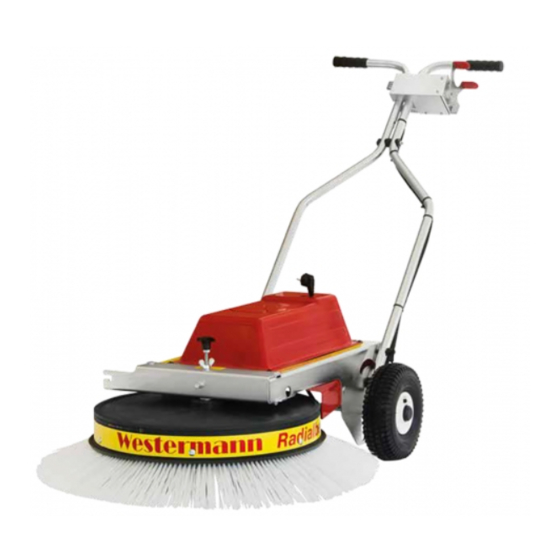
Product description The Westermann WR 870 is designed and implemented for the demanding user. It is possible to sweep hard surfaces such as yards, paths, parking lots, silo slabs, stables as well as snow. The powerful battery or the 4-stroke petrol engine ensures effortless working with a high degree operational readiness. Thanks to the rocker switch on the handrail or the Bowden cable on the base frame, the WR 870 Battery and WR 870 Honda are easy to operate and they allow maximum flexibility when setting the direction of rota- tion. Furthermore, it is possible by the arrangement of the three wheels to use the WR 870 in almost every corner. Thanks to the brush angle any unevenness can be compensated for. The hand-guided sweeper has a mechanical device that, as soon the front part is raised, automatically brings the sweeper into a resting position. The bristles are lifted off the ground. -
Page 27: Battery Wr 870 Rechargeable Battery
Product description Battery WR 870 rechargeable battery The machine has a battery with a voltage of 12 volts and 66 Ah. 8.1.1 Charge cycle The machine MUST, after EVERY use be properly NOTICE connected to the charging station again to prevent a deep discharge of the battery. Deep discharge of a battery begins when it falls below the discharge cut-off voltage. This is a set voltage up to which the battery may be discharged. Batteries of this type can undergo deep discharged even when not in use, solely due to self-discharge. The batteries used have a cycle lifetime of three times that of conventional batteries. (Fig. 4 - Battery) 8.1.2 Connecting the machine The battery charger is integrated in the machine and gives the operator maximum flexibility. For proper charging of the machine, the ambient conditions according to this operating manual must be observed. The power plug is located on top of the cover. The special charger also has an automatic shutdown as overload protection. -
Page 28: Start-Up
Start-up Start-up For start-up the hand-held sweeper is brought from the rest position to the working position. Adjusting the handle height To adjust the height of the handle, a handle height adjustment is provided allowing the height to be set without tools. Thus, the handle height can be easily, quickly and ergonomically adjusted for different body heights. 9.1.1 Adjustment process P Unlock locking bolts according to the diagram on both sides. P Move the handle into the desired working position. P Lock the latch bolt properly in the bore hole again. (Fig. 6 - Handle height) Einstellen des Kehrbesens Depending on the degree of wear of the bristles or depending on the de- bris, the height of the brush can be varied continuously, e.g. for long-fi- bered debris (hay, straw) a higher setting is required than, for example, for sand. The brush height is adjusted via the wing nut. P Loosen the wing nut. P Turn the adjusting knob until the desired brush height is reached. Observe the directional markings for lifting and lowering on the sweeper. -
Page 29: Starting The Engine Wr 870 Honda | Pro
Start-up Starting the engine WR 870 Honda | Pro Before starting the engine, make sure that the lever to reverse the direction of rotation is in the neutral position (as shown) and the brush is in the rest position. (Fig. 8 - Engine start) 9.3.1 Opening the fuel valve P The fuel valve is located on the left in the direction of travel, below the fuel tank. P Rotation to the left » Open (see also embossing on the top (Fig. -
Page 30: Cold Start
Start-up 9.3.2 Cold start P Slide the throttle into the rearmost position (choke). P START (Fig. 10 - Cold start controller) 9.3.3 Starting at operating temperature P Slide the throttle into the position slightly above idle. P Between MIN and MAX (Fig. 11 - Operating temperature controller) 9.3.4 Starter cord P First pull the handle of the starter cord lightly until resistance is felt: then pull hard. -
Page 31: Sweeping Direction Determine Wr 870 Honda | Pro
Start-up Determining sweeping direction WR 870 Honda | PRO The Radial Sweeper is equipped with a robust mechanism for reversing the direction of rotation. The desired direction of rotation is set by me- ans of a hand lever, which can be easily reached from the normal working position. (Fig. 14 - Determine the direction of sweeping) Pull the lever up to remove the retaining pin from the hole. Now swing the lever into the desired position and then push the retaining pin into the provided hole. Since the power transmission from the engine to the brush element is via a V-belt drive that requires some friction, you should press the direction selector lever in the desired direction until there is a noticeable resis- tance (no force necessary) and then fix it in the hole. Depending on the degree of wear of the belt, it may be necessary after a certain period of use to fix the lever in the next additional hole. -
Page 32: Stopping The Engine Wr 870 Honda | Pro
Start-up Stopping the engine WR 870 Honda | Pro Move the direction selector lever to the neutral position to stop the brush element from rotating. Now slide the throttle into the position „Min“, then into the stop position. (Fig. 15 - Engine STOP) Now close the fuel valve if you do not want to operate the brush again immediately. -
Page 33: Charging The Wr 870 Battery
Start-up Charging the WR 870 Battery Westermann Radial Sweepers are equipped with a maintenance-free battery. The enclosed charger plugs into a standard 220V mains socket. Then the adapter of the charger is inserted into the socket on the back of the brush. Now the battery charges automatically! The battery charger is equipped with overload protection, so that over- charging is prevented. The charging time depends on the battery level. Securing slot (Fig. 16 - Battery charging) The WR 870 Battery is equipped with overcharging protection in the form of a fuse which switches off the machine before it can be damaged. -
Page 34: Starting The Wr 870 Battery | Pro
Start-up Starting the WR 870 Battery | Pro To start, the sweeper must be on a level surface to ensure proper brush startup. Make sure that the fuse required for operation is in the slot provided. Securing slot (Fig. 17 - Machine start WR 870 Battery) A lever is mounted on the handle of the sweeper with which the direction of rotation can be selected in a comfortable way. The lever is adjusted in such a way that when the lever is released, the Radial Sweeper stops turning in the rest position. Depending on the desired direction of rotation, the lower part of the lever is now pulled upwards by hand against the handle or the upper part of the lever is pressed by hand against the handle. By releasing the lever, the rota- tion is slowed down and the sweeper comes to a standstill. -
Page 35: Operation
Operation 10.1 Operation description Start in rest position, then bring from rest position into working position JDepending on the debris and sweeping amount, a reaction force is felt on the hand-held machine, and must be countered by the operator accordingly. If the reaction force is too strong for the operator, the al- ready formed „swath“ must be picked up. Too strong a reaction force can also be caused by a wrong set brush height. If this is the case, the brush height must be adjusted according to ch. 9.2. A sudden reaction force (kickback) can also occur when pushing with the rotating swee- ping brush against a firm resistance. Caution is needed! 10.2 Service interval The first 50 hours of operation have a major impact on the perfor- mance and life of the machine. The following considerations should be taken into account to ensure you enjoy your WR 870 for a long time. -
Page 36: Attachment
Attachments Attachments The following attachments can be mounted on the Westermann Radial Sweeper. This ensures a variety of uses. Windrow maker • The attachments themselves must not be changed! • The safety regulations in chapter 4 apply. • The conversion or modification of the attachments by the operator or a third person, causes liability for the resulting damage to expire. -
Page 37: Attachment Of The Windrow Maker
Attachments 11.1 Attachment of the windrow maker (Fig. 18 - Inserting the windrow maker) The windrow maker is mounted on the side of the frame of the Radial Swee- per. For this purpose, the connecting rod of the swath plate is inserted slightly at an angle into the frame. The windrow maker is fixed in place using the illustrated spring pin. (Fig. 19 - Locking the windrow maker) -
Page 38: Transport Position Of Windrow Maker
Attachments 11.2 Transport position of windrow maker (Fig. 20 - Inserting the windrow maker) If the swath plate is not needed, it can be placed on the machine as shown. To do this, the linkage of the swath plate is pulled out of the frame at a slight angle and then inserted into the rear slot. The swath plate then lies on the handle. (Fig. 21 - Locking the windrow maker) -
Page 39: Maintenance And Servicing
Maintenance and servicing 12.1 General All maintenance, repair and modification work on the WR 870 is only to be carried out at a standstill and with the power supply disconnected or the engine switched-off. The procedure described in the opera- ting manual for stopping the machine must be strictly adhered to. The WR 870 is to be checked to ensure it is in a safe condition and secured to prevent it rolling away. The safety regulations in chapter 4 apply. Modification of or changes to the machine is/are only permitted after consultation with the manufacturer. Original replacement parts and manufacturer-authori- sed accessories are provided for safety. The use of other parts releases the manufacturer from liability for the consequences thereof. Note before starting work: P Check for externally visible damage and defects! Immediately report any changes (including those regarding operating behaviour) to the responsible service personnel! If necessary, take the machine out of service immediately! P Check the completeness and functionality of all accessories. Worn parts, or those whose functionality has been impaired must be replaced. Replacement parts must be ordered from the manufacturer. P Monitor the completeness and legibility of all type and information labels as well as the operating manual. Replace missing or illegible signs and documents. -
Page 40: Engine Wr 870 Honda
Maintenance and servicing Please note during regular maintenance: • If necessary, electronically stored instructions for maintenance must be available in paper form during maintenance. • For maintenance work involving components from third-party manufacturers, consult the documentation of the third-party manufacturer if necessary. • Maintenance work requiring specialist knowledge can only be carried out by service personnel. • The intervals specified in the maintenance schedule must be adhered to as a maximum, but they can also be shorter, depending on operator specifications and environmental conditions. • Correct safety-relevant defects immediately! • Only use original spare parts and manufacturer approved accessories/ tools. • Only use components that meet the required specifications. 12.2 WR 870 Honda engine Details of maintenance and care of the engine can be NOTICE found in the enclosed operating instructions. It contains all necessary maintenance steps such as oil change, spark plug replacement or inspection intervals that affect the engine. 12.3 Cleaning Clean the brushes and the jockey wheel from stuck dirt. By simply lifting the front part of the sweeper (press on the handle), the lifting device is folded into the rest position and the bristles no longer touch the ground. -
Page 41: Exchange Of The Brush Element
Maintenance and servicing 12.5 Replacement of the brush element In the case of signs of wear or defects on the brush, you have the option of replacing the brush ring with a new one. To do this please follow the following steps. 12.5.1 Removal and installation of the brush element On the WR 870 Honda, empty the fuel tank before tipping over the brush. Then tilt the sweeper for rear access (handles on the ground for a stable grip and safe access). DANGER Crushing hazard due to dropping of the Radial Sweeper! The tilting of the Radial Sweeper can happen uncontrol- led by external influences and cause hazards. Therefore: e Carefully follow the steps listed below when tilting the Radial Sweeper. e Secure the position of the Radial Sweeper by putting additional weight on the handle. -
Page 42: V-Belt Replacement | V-Belt Tightening
Maintenance and servicing 12.6 V-belt replacement | V-belt tightening Loosen the two V-belt tensioning screws as shown in the figure and slide the plate towards the centre of the machine. Push the sheet in until the V-belt, which runs in the groove of the brush element, relaxes as far as possible. Groove (Fig. 23 - Belt tensioning screws) Now lever the V-belt from bottom to top out of the groove (possibly with the help of a screwdriver). Turn the brush element so that the V-belt slides completely up out of the groove. BezDrive belt label: SPZ 2137 Please only use original fabric V-belts from the authorised dealer! The assembly takes place in reverse order. T he V-belt tensioning screw must now be adjusted again so that optimum power transmission from the engine to the brush element is ensured. The tensioning of the V-belt takes place with the help of appropriate tools (e.g. screwdriver), which can be inserted into the above-mentioned grooves, in order to achieve the force required to tension the V-belt via the lever action. Please make sure that the plate and the tensioning NOTICE screws are not over tightened, otherwise the bearing of the engine or brush could be damaged. If you can push in the V-belt about 20mm with two fingers, the tension is sufficient to transfer the force. -
Page 43: Replacement Of Change-Of-Direction Belt Wr 870 Honda
Maintenance and servicing 12.6.1 Replacement of change-of-direction belt WR 870 Honda Drive belts Guide roller * The tensioning screw is located on the top of the housing Motor drive plate clockwise toothed belt Sweepting direction guide roller anti-clockwise toothed belt Drive pulley for belt Drive pulley (Fig. 24 - Replacing the direction change belt) 12.6.2 The clockwise V-belt / toothed belt (internal combustion engine only) If necessary, loosen the tensioning screw on the top of the housing of the V-belt / timing belt, so that you can lever out the toothed belt from the groove of the drive disc. Now it can be replaced with a new toothed belt. -
Page 44: The V-Belt Rotating Clockwise (Only Internal Combustion Engine)
Maintenance and servicing 12.6.3 The V-belt rotating clockwise (only internal combustion engine) Dismantling takes place after removal of the anti-clockwise V-belt / toothed belt. After disassembling the above-mentioned belt, remove the two screws of the belt guide plate. Belt guide plate (Fig. 25 - Replacement clockwise belt) Then you can pry the V-belt from the engine drive pulley and the drive pulley and replace it with a new V-belt. Install the new V-belt in the groove of the engine drive pulley and drive pulley in reverse order. Finally, mount the belt guide plate, the anti-clockwise V-belt / toothed belt and the drive belt according to the technical specifications in this operating manual. -
Page 45: Screw Connections
Maintenance and servicing 12.7 Screw connections Check bolts and nuts for the first time after five hours of operation and then tighten them regularly (every 50 hours of operation). • All torques MA are standard values for metric standard threads accor- ding to DIN. Friction coefficient 0.14 - new bolts - unlubricated. The values were recommended as guide values by different bolt manufac- turers. We cannot assume liability for use. • Self-locking nuts must be replaced after each dismantling. Torque MA Thread 10.9 12.9 3.43 4.51 8.73 10.3 14.71 17.65 8.24 10.79 21.57 25.50 35.30 42.17 16.67 21.57 42.17 50.01 70.61 85.32 28.44 38.25 73.55 87.28 122.58... -
Page 46: Procedures After Maintenance
Maintenance and servicing 12.9 Procedures after maintenance After completing the maintenance, perform the following steps: • Make sure that all previously loosened screw connections are tightened. • Ensure all previously removed guards and covers are properly reinstalled. • Ensure all tools, materials, and other equipment used have been re moved from the work area. • Clean work area and remove cleaning material such as cloths, etc. • Make sure all safety devices are working properly. 12.10 Notes regarding maintenance work For maintenance work and related replacement of NOTICE components, only the use of original spare parts is permitted. 12.11 Documentary list Incidents and interference must be recorded in a docu- NOTICE mentary list. The documentary lists must be stored electronically and/or in paper form. -
Page 47: Residual Risks
Residual risks Electrical hazards CAUTION Risk of injury due to electrical voltage! Defective or improperly attached battery pole caps can lead to hazards due to electrical voltage in the event of damage. Therefore: P Operation may only be carried out by trained personnel. P Perform all operating steps in accordance with the instructions in this operating manual. P Before operation, make sure all battery terminals are properly connected and undamaged. P Use the provided personal protection equipment! Hot surfaces DANGER Risk of injury due to hot surfaces! Parts and components of the machine may become very hot in the event of excessive use and may result in injury if they come into direct contact with the skin. Therefore: P Operation may only be carried out by trained personnel. P Perform all operating steps in accordance with the instructions in this operating manual. P Mark affected components with warning signs. - Page 48 Residual risks Improper operation DANGER Risk of injury due to improper operation! Improper operation can lead to personal injury or property damage. Therefore: P Operation may only be carried out by trained personnel. P Perform all operating steps in accordance with the instructions in this operating manual. P Before operation, make sure all fasteners are properly connected and undamaged. P Pay attention to order and cleanliness! Loosely stacked or objects lying around, such as tools, cables and components are potential sources of accidents. Operation movements DANGER Risk of injury due to moving components! During operation, individual components or compo- nents of the machine can move and lead to dangerous situations. Therefore: P Always monitor the danger zone during operation and ensure that no persons are present there. P Switch off the equipment before carrying out work on the main switch and secure it against being switched on again. P Perform all operating steps in accordance with the instructions in the operating manual.
- Page 49 Residual risks Machine recoil DANGER Risk of injury due to unpredictable machine movements! Unpredictable machine movements could lead to personal injury or property damage. Therefore: P Operation may only be carried out by trained personnel. P Perform all operating steps in accordance with the instructions in this operating manual. P Sweepings and the volume thereof must be taken into account. P Check brush height. P Avoid collisions with solid objects.
-
Page 50: Storage Conditions
Storage conditions Park the Westermann WR 870 in a dry and clean place and secure against unplanned start-up. NOTICE (Fig. 27 - T-handle switch) The machine MUST, after EVERY use be properly connected to the charging station again to prevent a deep discharge of the battery. Risk of accident! The radial sweeper is to be checked to ensure it is in a CAUTION safe condition and secured to prevent it rolling away. • Park the machine level in its resting position. (Fig. 28 - Rest position) Check vehicle for possible damage! Clean the WR 870 NOTICE thoroughly, if necessary. Dirt attracts moisture and leads to corrosion. Repair paint damage if necessary. (Fig. 29 - WR 870) -
Page 51: Cleaning
Cleaning For cleaning, the following points must be observed. • • Cleaning with water or high-pressure cleaner is not permitted. • Cleaning may only be carried out with compressed air or with other aidssuch as hand brushes. Dirt attracts moisture and leads to rusting. -
Page 52: Troubleshooting
Troubleshooting 16.1 WR 870 Honda | PRO Fault Cause Remedy Engine will not • Engine malfunction • Refer to troubleshooting in start the engine manual • Direction selector lever not • Move the direction selector in neutral position lever to the neutral position brush does not • Wrong sweeping height • Adjust the sweeping height terurn correctly to the conditions • Loose screw connections • Check screws and tighten if necessary Brush does not • V-belt defective • Check V-belt; replace turn or stops at • Toothed belt defective if necessary low resistance • Drive belt pretension • Tighten the drive belt insufficient • Direction of rotation change • Move the direction selector lever not in the correct lever to a drive position position... -
Page 53: Wr 870 Battery | Pro
Troubleshooting 16.2 WR 870 Akku | PRO Fault Cause Remedy Motor will not • Flat battery • Charge the battery start • Fuse defective • Replace fuse. • Pole terminals connection • Tighten pole terminal fault screws • Oxidation at pole terminals • Clean with pol-grease if necessary Battery is not • Oxidation at the mains plug • Clean contact charging or charger • Overload protection • Switch on the overload triggered by the charger protection on the charger Abnormal noises, • Loose screws on the device • Check screw connections ratting or similar retighten if necessary. Brush does not • Wrong sweeping height • Adjust the sweeping return correctly height to the conditions. -
Page 54: Decommissioning
Decommissioning 17.1 Decommissioning After finishing operation, the must WR 870 be stored properly: When storing the machine, the following points must be observed: • The WR 870 must be placed in such a way that it cannot tip over or fall. • At the storage site, the ambient conditions must meet the required conditions (see technical data). • The machine, which does not have sufficient protection itself, must be protected against the effects of the weather and corrosive substances if these can impair safety. If the machine is to be shut down for a long time, it may be necessary to take preservation measures to prevent corrosion and other damage. 17.2 Dismantling / Disposal Disassembly/disposal should be carried out by a specialist. Using spe- cialists in the recycling and waste management sectors ensures that waste is disposed of correctly and recycled. The existing raw mate- rials of the Radial Sweeper must be sorted according to disposal type and material. The copper-containing components such as cables can be recycled. Equipment such as fuses, batteries, capacitors, regula-... -
Page 55: Warranty Policy
Warranty policy The following policy for the Westermann warranty is valid as of 01.01.2002. 1. When using Westermann products in the consumer goods sector (private use), which were sold through Westermann dealers, the warranty period from the date of sale to the end customer is 2 years. When using Westermann products in the capital goods sector (commer- cial/professional), which were sold through Westermann dealers, the warranty period from the date of sale to the end customer is 1 year. 2. The warranty covers defects that can be attributed to material and/or manufacturer errors. Any faults resulting from a Westermann product defect or production defect during the warranty period will be recogni- sed and remedied by repair or replacement of parts via a Westermann dealer. Exempted from this are wear parts such as Bowden cables, starter cord, V-belts, bearings, clutch plates, tires, air filters, spark plugs, glow plugs, fuel filters, oil filters, sweeping brushes, rubber lips, batteries as long as these do not exhibit obvious material defects. Warranty claims are generally excluded in case of poor maintenance and care. Regular maintenance and cleaning of the product according to the instructions in the Westermann operating manual is imperative. Damage due to improperly performed maintenance and cleaning work cannot be accepted as a valid guarantee claim. 5. The operating instructions for the respective product as well as safety instructions must be observed. Damage caused by operating errors, im- proper use or use of accessories not approved by Westermann GmbH &... - Page 56 Warranty policy 7. From 01.01.2002 only the Westermann warranty claim process is to be used. The warranty claim information is mandatory. Exceptions cannot be made. Warranty claims without the required information cannot be processed and will be returned for completion of the missing information. 8. The Westermann Machine and Warranty certificate (warranty document) is to be completed within 4 weeks of the date of sale of the product, including the data of the end customer, the end customer‘s signature as well as the indication of use (private | commercial | professional) to Westermann customer service. 9. The warranty period for original Westermann spare parts is 2 years if the installation is certified by a Westermann dealer (for wear parts the restric- tion under point 3 applies). For warranty claims relating to replacement parts or warranty repairs, we ask you to keep the parts in question for 2 months after receipt of the warranty claim. We will, if necessary, request the relevant part for examination. 10. The ordering of required spare parts for warranty purposes can only be made via Westermann customer service for logistical reasons as of 01.01.2002. From Monday to Friday between 08:00 and 16:30 telephone orders can be placed. Please state the item number, the serial number of the device in question and your customer no. Our telephone no. is: +49 (0) 5931 / 49690-0. In addition, there is the possibility to fax us your order for warranty repla- cement parts. Our fax no. is: +49 (0) 5931 / 49690-99. 11. Should your warranty claim be rejected, the ordered spare parts will be charged to you at their usual purchase conditions. Invoicing also occurs if no warranty claim has been received by Westermann Customer Service wit- hin 4 weeks. If a Westermann spare part for warranty repairs is not avai- lable at short notice (within 2 working days) and you use an original Westermann spare part from your stock to repair the damage, a free repla- cement delivery will be made by us when available or deliverable by Westermann customer service. If a replacement part is no longer available, the purchase price paid by you will be refunded. 12.
- Page 57 Warranty policy 13. The warranty claim must be submitted to Westermann customer service no later than 5 working days after the repair has been completed, in order to ensure fast processing. Warranty claims received 3 months after the repair cannot be processed. 14. All previous warranty policies as well as the conditions in the General Terms and Conditions and point 7 hereby become invalid. _______________________________ Westermann GmbH & Co. KG...
-
Page 58: Spare Parts List
Spare parts list WR 870 Honda / Pro 19.1 WR 870 Honda | PRO Pos. 1 Grundrahmen / base frame... - Page 59 Spare parts list 19.1 WR 870 Honda | PRO MENGE/ POS-NR. Artikel BENENNUNG part name quantity s.u. Grundrahmen WR baseframe WR support wheel with spindle WR870 VMBG-00-00083/84 Aufstellbock WR 870 mit Spindel support wheel with spindle W870 VMBG-00-00081/84 (Pro) Aufstellbock WR 870 Pro mit Spindel VMBG-00-00082 Schiebeholm WR 870 Honda push handle WR 870 Honda...
-
Page 60: Base Frame Wr 870 Hond | Pro
Spare parts list Pos. 1 Grundrahmen / base frame 19.2 Base frame WR 870 Honda|PRO MENGE/ POS-NR. Artikel BENENNUNG part name quantity LA-00-00569 Motorblech WR 870 Honda engine plate WR 870 POS-N PE-00-00030 Untergestell WR 870 rot subframe WR 870 red LA-00-00563 Aufnahme Stützrad WR 870 support wheel retainer WR870... -
Page 61: Support Wheel With Spindle Wr 870 Honda|Pro
Spare parts list Pos. 2 Aufstellbock mit Spindel / support wheel with spindle 19.3 Support wheel with spindle WR 870 Honda|PRO ENGE/ uantity MENGE/ POS-NR. Artikel BENENNUNG part name quantity SB-00-00065 SBG Drehstütze WR 870 rotating support WR 870 LA-00-00567 Radhalter wheel holder LA-00-00566... -
Page 62: Push Handle Wr 870 Honda|Pro
Pos.3 Schiebeholm WR 870 Honda / push handle Spare parts list 19.4 Push handle WR 870 Honda|PRO POS-NR. Artikel BENENNUNG part name MENGE DIN-985-M8 Sechskantmutter M8 selbsts. sqaure nut M8 self locking DIN-912-M8x80 Zylinderschraube M8x80 cylinder head screw M8x80 DIN-9021-6,4 Kotflügelscheibe 6,4 fender washer 6,4 DIN-931-M6x80... -
Page 63: Control Lever Wr 870 Honda|Pro
DIN-985-M8 Sechskantmutter M8 selbstsichernd hexagon nut M8 self locking Pos.4 Verstellhebel gesamt / control lever Spare parts list Pos.4 Verstellhebel gesamt / control lever 19.5 Control lever WR 870 Honda|PRO POS-NR. Artikel BENENNUNG part name MENGE LA-00-00572 Verstellblech WR 870 adjustment plate WR 870 POS-NR. -
Page 64: Guide Pulley Wr 870 Honda|Pro
Spare parts list Pos. 7 Umlenkrolle / guide pulley 19.6 Guide pulley WR 870 Honda|PRO POS-NR. Artikel BENENNUNG part name MENGE DR-00-00126 Achse Umlenkung axle for guide pulley SB-00-00066 SBG Hebel Umlenkung lever for guide DR-00-00129 Riemenscheibe 2 rillig v-belt pulley 2 flutes KT-00-00538 Rillenkugellager DIN 625 - 6004 grooved ball bearing 6004... -
Page 65: Tensioner Wr 870 Honda|Pro
Spare parts list Pos.9 Spannrolle / tensioner 19.7 Tensioner WR 870 Honda|PRO Pos.9 Spannrolle / tensioner POS-NR. Artikel BENENNUNG MENGE DR-00-00139 Achse Excenter Spannrolle POS-NR. Artikel BENENNUNG MENGE DR-00-00128 Keilriemenscheibe (Spannrolle) DR-00-00139 Achse Excenter Spannrolle KT-00-00538 Rillenkugellager DIN 625 - 6004 DR-00-00128 Keilriemenscheibe (Spannrolle) DIN-471-A20... -
Page 66: Brush Wr 870 Honda|Pro
Spare parts list Pos.5 Bürste WR 870 / 870 Pro pos.5 brush WR 870 / 870Pro POS-NR. 19.9 Brush WR 870 Honda|PRO... - Page 67 DIN-471-AS-25 Sicherungsring DIN 471 25x2 circlip DIN 471 25x2 DIN-6885-8x7x25 Passfeder 8 x 7 x 25 DIN 6885 parallel key 8x7x25 DIN 6885 Spare parts list 19.9 Brush WR 870 Honda|PRO POS-NR. Artikel BENENNUNG part name MENGE KT-00-00304 Bürstenring 870 (PPN) brush ring 870 (PPN) KT-00-00452...
-
Page 68: Wr 870 Akku|Pro
Spare parts list POS-NR. WR 870 Akku / Akku Pro 19.10 WR 870 Akku|PRO POS-NR WR 870 Akku / Akku Pro 19.10 WR 870 Akku|PRO DETAIL F Schalter / switch DETAIL F Schalter / switch... - Page 69 Spare parts list 19.10 WR 870 Akku|PRO MENGE/ POS-NR. Artikel BENENNUNG part name quantity LA-00-00557 Grundrahmen base frame LA-00-00558 Motorkonsole engine bracket PE-00-00030 Untergestell WR 870 rot lower frame WR 870 red DR-00-00054 Radachse wheel axle RE-00-00007 Luftrad 260 x 85 air wheel 260x85 KT-00-00186 Radkappe 20er RAL 9011...
-
Page 70: Support Wheel Wr 870 Akku|Pro
DETAIL F Spare parts list Schalter / switch 19.11 Support wheel WR 870 Akku|PRO DETAIL C Baugruppe Aufstellbock / support wheel VMBG-00-00083 Aufstellbock Pro / support wheel for Pro VMBG-00-00081... - Page 71 Spare parts list 19.11 Support wheel WR 870 Akku|PRO POS-NR.
- Page 72 Sattelscheibe 3/4" Rohr C=8,3 KT-00-00227 saddle plate 3/4" pipe A=27-29 Flachkappe PVC rot 30x3mm KT-00-00242 flat cover PVC red 30x3x45mm Spare parts list 45mm lang KT-00-00793 Rastriegel GN912.8-8-M16x1,5-A locking pin M16x1,5 19.11 Support wheel WR 870 Akku|PRO DIN-912-M8x80 Zylinderschraube M8x80 8.8 cylinder head screw M8x80 8.8 DIN-7981-4,8-13 Blechschraube 4,8x13 galv.
-
Page 73: Brush Wr 870 Akku | Pro
Spare parts list 19.12 Brush 870 Akku|PRO Topfbürste WR 870 Topfbürste WR 870 PRO Brush 870 Akku / brush Brush 870 Akku PRO / brush MENGE/ POS-NR. Artikel Benennung part number quantity KT-00-00304 Bürstenring (PPN) brush ring (PPN) KT-00-00303 Bürstentopf brush pot LA-00-00352 *Blechring WR870 Pro... -
Page 74: Plans And Other Information
Plans and other information Plans and other information 20.1 Current-flow plan... -
Page 75: List Of Figures
List of figures Fig. 1 - Danger area ..............15 Fig. 2 - Dimensions ............... 23 Fig. 3 - Technical data ..............24 Fig. 4 - Batterie ................27 Fig. 5 - Battery charging preparation ..........27 Fig. 6 - Handle height ..............28 Fig. 7 - Brush adjustment ............... 28 Fig. 8 - Engine start ..............29 Fig. 9 - Fuel valve ................ 29 Fig. 10 - Cold start controller ............30 Fig. 11 - Operating temperature control .......... - Page 76 Westermann GmbH & Co. KG Schützenhof 23 D-49716 Meppen Telefon: +49 (0) 59 31 / 4 96 90-0 Internet: www.westermann-radialbesen.de E-Mail: info@westermann-radialbesen.de Your expert dealer...
Need help?
Do you have a question about the WR 840 Battery and is the answer not in the manual?
Questions and answers