Westermann WR 870 Battery User Manual
Radial sweeper
Hide thumbs
Also See for WR 870 Battery:
- Operating instructions manual (76 pages) ,
- Operating instruction (152 pages)

Related Manuals for Westermann WR 870 Battery


Summary of Contents for Westermann WR 870 Battery
- Page 1 WR 870 Battery ● WR 870 Battery WR 870 Honda ● WR 870 Honda After each use, connect the machine to the charger...
-
Page 2: Table Of Contents
Technical specifications ....................19 General technical data WR 870 ............... 19 General technical data WR 870 ............... 20 Assembly, first start-up ....................21 Safety ........................... 21 Page 2 of 59 After each use, connect the WR 870 Battery to the charger... - Page 3 Stopping the engine WR 870 Honda | Pro ............28 Charging the WR 870 Battery ................29 9.6.1 Blown fuse ..................30 Starting the WR 870 Battery | Pro ..............30 Operation ......................31 10.1 Operation description ..................31 10.2 Service interval ....................
- Page 4 R 870 battery | Pro ................... 56 19.4 Stabilizer wheel holder ..................57 Plans and other information ................. 58 20.1 Current-flow plan ..................... 58 List of figures ....................... 59 Page 4 of 59 After each use, connect the WR 870 Battery to the charger...
-
Page 5: Ec Declaration Of Conformity
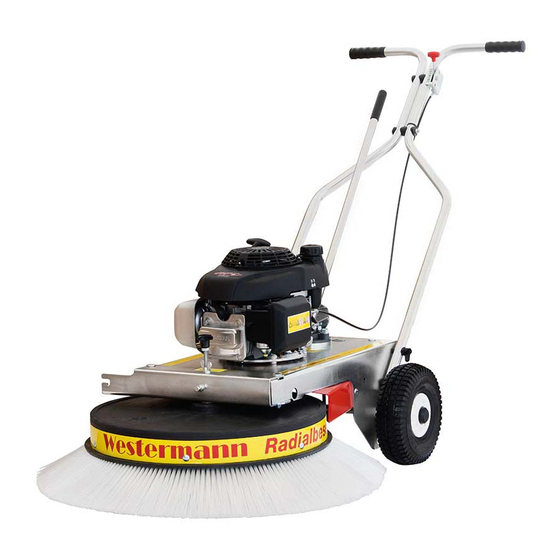
Model / type description: Description: The Westermann Radial Sweeper is built exclusively for the general sweeping of hard surfaces such as yards, roads, parking lots, silo slabs and stables. Any other use is considered improper. The manufacturer is not liable for damage resulting therefrom. - Page 6 Tel.: +49 (0) 5931 | 496 90 0 Schützenhof 23 E-mail: info@westermann-radialbesen.de 49716 Meppen URL: www.westermann-radialbesen.de Location: 49716 Meppen Date: 19.01.2017 (Signature) Alfons Westermann Managing Director Page 2 of 59 After each use, connect the WR 870 Battery to the charger...
-
Page 7: Legal Information
Right of modification: Westermann GmbH & Co. KG reserves the right to change this document and the subject matter described therein at any time without prior notice, in particular to improve and expand, provided that and as far as contractual agreements or legal requirements do not conflict with this. -
Page 8: Important Basic Information
The manufacturer assumes no liability for damage due to non-observance of the operating manual, improper use, improperly performed maintenance or repairs, unauthorised modifications, technical modifications and use of unauthorised spare parts. Page 4 of 59 After each use, connect the WR 870 Battery to the charger... -
Page 9: Conventions
Draws your attention to a dangerous situation that can result in mild to moderate injury if not avoided Alerts you to possible property damage and other important information. Page 5 of 59 After each use, connect the WR 870 Battery to the charger... -
Page 10: Pictogram Overview
Harmful or irritating substances hazard Toxic substances hazard Hand injuries hazard Hot surface hazard Crushing hazard Slip hazard Electrical voltage hazard Obstacles on the ground hazard Page 6 of 59 After each use, connect the WR 870 Battery to the charger... -
Page 11: Marking On The Machine
3.3.1 Warning pictogram on the machine Article number: AUF-00-00016 Article number: AUF-00-000028 Labels must always be kept clean. Missing or damaged labels must be replaced. Page 7 of 59 After each use, connect the WR 870 Battery to the charger... -
Page 12: Ordering Spare Parts
Original accessories and manufacturer-authorised accessories are provided for safety. Use of other accessories may void liability for consequential damages. Page 8 of 59 After each use, connect the WR 870 Battery to the charger... -
Page 13: Safety
Safety Intended use of the machine The Westermann Radial Sweeper WR 870 is to be used exclusively for the intended use described here. The Radial Sweeper WR 870 is a hand-guided machine. Areas of application of the working machine are the sweeping of hard surfaces such as yards, paths, parking lots, silo slabs and stables, clearing snow or similar work. -
Page 14: Requirements For The Operator
Avoid transporting persons with the equipment. Maintenance and repair Maintenance and repair work is part of the intended use and must be carried out in compliance with the maintenance intervals. Page 10 of 59 After each use, connect the WR 870 Battery to the charger... -
Page 15: Danger Area
Attachments and ejected debris can increase the danger area of the machine, depending on their size. Fig. 1 - Danger area Page 11 of 59 After each use, connect the WR 870 Battery to the charger... -
Page 16: Foreseeable Misuse | Reasonably Foreseeable Misuse
Fight the fire Repair damage Technical complications 4.6.3 If technical complications occur during use, they must be remedied by a specialist before further use. Page 12 of 59 After each use, connect the WR 870 Battery to the charger... -
Page 17: Application
Responsibility of the operator If the machine is used commercially, the operator is subject to the statutory provisions on occupational safety. Page 13 of 59 After each use, connect the WR 870 Battery to the charger... -
Page 18: Obligations Of The Operator
The WR 870 Battery and the WR 870 Battery MUST, after EVERY use, be connected properly to the charging station again to avoid a deep discharge of the battery Page 14 of 59 After each use, connect the WR 870 Battery to the charger... -
Page 19: Personal Responsibility
Instructed operating Is informed of the tasks entrusted and possible personnel for dangers of improper conduct after instruction given by operation the operating company. Page 15 of 59 After each use, connect the WR 870 Battery to the charger... -
Page 20: Observance Of The Operating Manual
Danger and information points, as well as important information must be marked on the machine and, if necessary. due to dirt or if unrecognisable, cleaned or renewed. Page 16 of 59 After each use, connect the WR 870 Battery to the charger... -
Page 21: Personal Protection
When working on live parts, use insulated gloves. Use hearing protection Protection of hearing from damaging sound frequencies. Safety instructions for the operator/user Page 17 of 59 After each use, connect the WR 870 Battery to the charger... - Page 22 Do not touch the exhaust when it is hot. In order to avoid serious burns or a fire hazard, please allow the engine to cool down before transport or storage in a closed room! Page 18 of 59 After each use, connect the WR 870 Battery to the charger...
-
Page 23: Technical Specifications
[m] Machine height 0.45 0.66 meters [m] Total height meters [m] Machine length Working width Machine length + swath plate: Fig. 2 - Dimensions Page 19 of 59 After each use, connect the WR 870 Battery to the charger... -
Page 24: General Technical Data Wr 870
Technical data General technical data WR 870 WR 870 WR 870 WR 870 WR 870 Technical Battery Honda Battery Honda specifications 12 V DC motor Honda GCV 160 OHC Engine Honda GXV 160 Period of operation up to 2.5 h/battery charge continuous Handlebar: height adjustable... - Page 25 Technical data After each use, connect the WR 870 Battery to the charger...
-
Page 26: Assembly, First Start-Up
The machines are subjected to a thorough test run and are supplied only after successful acceptance. First start-up Before first start-up, check the entire vehicle for possible damage. Page 21 of 59 After each use, connect the WR 870 Battery to the charger... -
Page 27: Product Description
Thanks to the rocker switch on the handrail or the Bowden cable on the base frame, the WR 870 Battery and WR 870 Honda are easy to operate and they allow maximum flexibility when setting the direction of rotation. Furthermore, it is possible by the arrangement of the three wheels to use the WR 870 in almost every corner. -
Page 28: Battery Wr 870 Rechargeable Battery
The power plug is located on top of the cover. The special charger also has an automatic shutdown as overload protection. Fig. 5 - Battery charging preparation Page 23 of 59 After each use, connect the WR 870 Battery to the charger... -
Page 29: Start-Up
Observe the directional markings for lifting and lowering on the sweeper. Fix the adjusting knob by tightening the wing nut. Fig. 7 - Brush adjustment Page 24 of 59 After each use, connect the WR 870 Battery to the charger... -
Page 30: Starting The Engine Wr 870 Honda | Pro
The fuel valve is located on the left in the direction of travel, below the fuel tank. Rotation to the left » Open (see also embossing on the top) Fig. 9 - Fuel valve Page 25 of 59 After each use, connect the WR 870 Battery to the charger... -
Page 31: Cold Start
Adjust the throttle to the desired engine speed. Optimal Fig. 13 - Start operating temperature performance at full throttle. Determining sweeping direction WR 870 Honda | Pro Page 26 of 59 After each use, connect the WR 870 Battery to the charger... -
Page 32: Fig. 14 - Determine The Direction Of Sweeping
(see above in the middle) to avoid unnecessary belt wear. Then position the lever again so that the brush element turns in the desired direction. Page 27 of 59 After each use, connect the WR 870 Battery to the charger... -
Page 33: Stopping The Engine Wr 870 Honda | Pro
"Min", then into the stop position. Fig. 15 - Engine STOP Now close the fuel valve if you do not want to operate the brush again immediately. Page 28 of 59 After each use, connect the WR 870 Battery to the charger... -
Page 34: Charging The Wr 870 Battery
Securing slot Fig. 16 - Battery charging The WR 870 Battery is equipped with overcharging protection in the form of a fuse which switches off the machine before it can be damaged. At the same time, the fuse serves as a shut-off device, since the removal of the fuse protects the sweeper from unauthorised use. -
Page 35: Blown Fuse
By releasing the lever, the rotation is slowed down and the sweeper comes to a standstill. Page 30 of 59 After each use, connect the WR 870 Battery to the charger... -
Page 36: Operation
Repeatedly inspect nuts, bolts and screws etc. and re-tighten if necessary. Proper maintenance is of crucial importance for the operational safety of the vehicle. Page 31 of 59 After each use, connect the WR 870 Battery to the charger... -
Page 37: Attachments
Operati Attachments The following attachments can be mounted on the Westermann Radial Sweeper. This ensures a variety of uses. Swath plate The attachments themselves must not be changed! The safety regulations in chapter 4 apply. The conversion or modification of the attachments by the operator or a third person, causes liability for the resulting damage to expire. -
Page 38: Attachment Of The Swath Plate
The swath plate is fixed in place using the illustrated spring pin. Fig. 19 - Locking the swath plate Page 33 of 59 After each use, connect the WR 870 Battery to the charger... -
Page 39: Transport Position Of Swath Plate
The swath plate then lies on the handle. Fig. 21 - Locking the swath plate Page 34 of 59 After each use, connect the WR 870 Battery to the charger... -
Page 40: Maintenance And Servicing
Monitor the completeness and legibility of all type and information labels as well as the operating manual. Replace missing or illegible signs and documents. Page 35 of 59 After each use, connect the WR 870 Battery to the charger... -
Page 41: Cleaning
12.4 Lubrication Regular check of wheel and brush bearings for leaks. Damaged bearing units must be replaced! 12.5 Replacement of the brush element Page 36 of 59 After each use, connect the WR 870 Battery to the charger... -
Page 42: Removal And Installation Of The Brush Element
The brushes consist of a brush ring, which is held in place by a metal clip. By loosening the metal clips, it is possible to remove the brush ring. Assembly takes place in reverse order. Page 37 of 59 After each use, connect the WR 870 Battery to the charger... -
Page 43: V-Belt Replacement | V-Belt Tightening
If you can push in the V-belt about 20mm with two fingers, the tension is sufficient to transfer the force. Page 38 of 59 After each use, connect the WR 870 Battery to the charger... -
Page 44: Replacement Of Change-Of-Direction Belt Wr 870 Honda
The toothed side should engage in the groove of the motor drive pulley. When adjusting the tension, please use the tensioning screw on the top of the housing. Page 39 of 59 After each use, connect the WR 870 Battery to the charger... -
Page 45: The V-Belt Rotating Clockwise (Only Internal Combustion Engine)
Finally, mount the belt guide plate, the anti-clockwise V-belt / toothed belt and the drive belt according to the technical specifications in this operating manual. Page 40 of 59 After each use, connect the WR 870 Battery to the charger... -
Page 46: Screw Connections
784.45 941.44 12.8 Fuse replacement The machine is protected by a fuse. The fuse slot on the WR 870 Battery is located on the handle in the switch housing. 60 Ampere fuse Fig. 26 - Fuse Page 41 of 59... -
Page 47: Procedures After Maintenance
12.11 Documentary list Incidents and interference must be recorded in a documentary list. The documentary lists must be stored electronically and/or in paper form. Page 42 of 59 After each use, connect the WR 870 Battery to the charger... -
Page 48: Residual Risks
Operation may only be carried out by trained personnel. Perform all operating steps in accordance with the instructions in this operating manual. Mark affected components with warning signs. Page 43 of 59 After each use, connect the WR 870 Battery to the charger... - Page 49 Perform all operating steps in accordance with the instructions in the operating manual. Do not operate the machine without safety devices. Install all safety devices securely before starting. Page 44 of 59 After each use, connect the WR 870 Battery to the charger...
- Page 50 Sweepings and the volume thereof must be taken into account Check brush height Avoid collisions with solid objects Page 45 of 59 After each use, connect the WR 870 Battery to the charger...
-
Page 51: Storage Conditions
Check vehicle for possible damage! Clean the WR 870 thoroughly, if necessary. Dirt attracts moisture and leads to corrosion. Repair paint damage if necessary. Fig. 29 - WR 870 Page 46 of 59 After each use, connect the WR 870 Battery to the charger... -
Page 52: Cleaning
Cleaning may only be carried out with compressed air or with other aids such as hand brushes. Dirt attracts moisture and leads to rusting. Page 47 of 59 After each use, connect the WR 870 Battery to the charger... -
Page 53: Troubleshooting
Drive belt pretension drive belt insufficient tensioning bolt Adjust Timing belt pretension toothed belt tensioning insufficient (lever can be device. pushed beyond the intended holes) Page 48 of 59 After each use, connect the WR 870 Battery to the charger... -
Page 54: Wr 870 Battery | Pro
Wrong sweeping height Adjust the sweeping height to the conditions. V-belt defective Check V-belt; replace if necessary. V-belt tension insufficient Tension the V-belt. Page 49 of 59 After each use, connect the WR 870 Battery to the charger... -
Page 55: Decommissioning
The support frame and the protective covers can be recycled as metal scrap. Page 50 of 59 After each use, connect the WR 870 Battery to the charger... -
Page 56: Warranty Policy
When using Westermann products in the consumer goods sector (private use), which were sold through Westermann dealers, the warranty period from the date of sale to the end customer is 2 years. When using Westermann products in the capital goods sector (commercial/professional), which were sold through Westermann dealers, the warranty period from the date of sale to the end customer is 1 year. - Page 57 (private | commercial | professional) to Westermann customer service. The warranty period for original Westermann spare parts is 2 years if the installation is certified by a Westermann dealer (for wear parts the restriction under point 3 applies). For warranty claims relating to replacement parts or warranty repairs, we ask you to keep the parts in question for 2 months after receipt of the warranty claim.
- Page 58 Should your warranty claim be rejected, the ordered spare parts will be charged to you at their usual purchase conditions. Invoicing also occurs if no warranty claim has been received by Westermann Customer Service within 4 weeks. If a Westermann spare part for warranty repairs is not available at short notice...
-
Page 59: Spare Parts List
AB 1007 pneumatic tyre 260x85 KT-00-00430 V-belt LA-00-00563 Jockey wheel holder DR-00-00123 Handle frame LA-00-00571 Steel profile KT-00-00192 Bowden cable PE-00-00031 Swath plate rubber flap DR-00-00124 Swath plate frame Page 54 of 59 After each use, connect the WR 870 Battery to the charger... -
Page 60: Drive Unit
DR-00-00128 V-belt pulley LA-00-00572 Adjustment plate DR-00-00126 Pulley axle DR-00-00132 Belt pulley 2 grooves SB-00-00066 Deflection lever DR-00-00129 Belt pulley 2 grooves C380-22L Cotter pin Page 55 of 59 After each use, connect the WR 870 Battery to the charger... -
Page 61: R 870 Battery | Pro
Jockey wheel holder KT-00-00304 Brush ring DR-00-00124 Swath plate frame PE-00-00031 Swath plate rubber flap KT-00-00430 V-belt LA-00-00560 Selector switch DR-00-00123 Handle frame RE-00-00007 Pneumatic tyre 260x85 Page 56 of 59 After each use, connect the WR 870 Battery to the charger... -
Page 62: Fig. 33 - Jockey Wheel Holder
Fig. 33 - Jockey wheel holder Pos. Item no. Description Amount RE-00-00010 125 mm solid rubber LA-00-00567 Wheel holder LA-00-00566 Scratcher LA-00-00564 Support DR-00-00061 Wheel axle 3691427 Cross handle Page 57 of 59 After each use, connect the WR 870 Battery to the charger... -
Page 63: Plans And Other Information
Plans and other information Plans and other information 20.1 Current-flow plan Page 58 of 59 After each use, connect the WR 870 Battery to the charger... -
Page 64: List Of Figures
Fig. 31 - Drive unit WR 870 Honda ................55 Fig. 32 - Base frame WR 870 Honda ................56 Fig. 33 - Jockey wheel holder ..................57 Page 59 of 59 After each use, connect the WR 870 Battery to the charger... - Page 65 List of figures www.westermann-radialbesen.de Page 60 of 59 After each use, connect the WR 870 Battery to the charger...
Need help?
Do you have a question about the WR 870 Battery and is the answer not in the manual?
Questions and answers