Canon DR-2050C Startup Manual
Canon scanner dr-2050c manual
Hide thumbs
Also See for DR-2050C:
- User manual (103 pages) ,
- Maintenance manual (22 pages) ,
- Brochure & specs (4 pages)

Related Manuals for Canon DR-2050C


Summary of Contents for Canon DR-2050C
- Page 1 Document Scanner Startup Manual Please read this manual before operating this unit. After you finish reading this manual, store it in a safe place for future reference.
- Page 2 • Other product and company names here in may be the trademarks of their respective owners. Copyright Copyright 2005 by CANON ELECTRONICS INC. All rights reserved. No part of this publication may be reproduced or transmitted, in any form or by any means, electronic or mechanical, including photocopying and recording, or by any information storage or retrieval system without the prior written permission of CANON ELECTRONICS INC.
-
Page 3: Canon Software License Agreement
NO AMENDMENT TO THIS AGREEMENT SHALL BE EFFECTIVE UNLESS SIGNED BY A DULY AUTHORIZED REPRESENTATIVE OF CANON. Should you have any questions concerning this Agreement, or if you desire to contact Canon for any reason, please write to Canon's local affiliate. -
Page 5: Introduction
Manuals for the Scanner The DR-2050C scanner has a Startup Manual (this manual) and online help. Please refer to the Startup Manual regarding the handling of the scanner, such as installation of software and setting up the scanner. -
Page 6: Conventions
Conventions This manual uses the following symbols and indications. Before you start reading this manual, read the following and familiarize yourself with their meanings. WARNING Indicates a warning concerning operations that may lead to death or injury to persons if not performed correctly. In order to use the machine safely, always pay attention to these warnings. -
Page 7: Table Of Contents
Power ... 5 Moving the Scanner ... 5 Normal Handling ... 6 Disposal ... 7 Features of the DR-2050C ... 8 Checking the Packing List ... 10 Removing the Protective Packing Materials ... 12 Names and Functions of Parts ... 14 Installing the Scanner ... -
Page 8: Before Using The Scanner
In order to ensure safe operation, be certain to read the cautions described below. Installation Location The performance of this scanner is affected by the environment in which it is installed. Make sure that the location where the scanner is installed meets the following environmental requirements: At least 3.9”... -
Page 9: Power
• Keep the area around the power plug clear of articles so that the power plug can be disconnected in an emergency. • Use only the AC adapter provided with the product. Do not use the scanner’s AC adapter with any other product. -
Page 10: Normal Handling
• Do not drop, kick, or otherwise strike the scanner. If the scanner does somehow become damaged, immediately turn the scanner OFF and unplug the Power Cord. Contact your local authorized Canon dealer or service representative to have the scanner serviced. -
Page 11: Disposal
Canon dealer or service representative for assistance. • Do not set up the scanner in a dusty or humid location. Doing so creates a risk of fire or electrical shock. • Do not place objects on top of the scanner. The object could injure someone if it falls or tips over. -
Page 12: Features Of The Dr-2050C
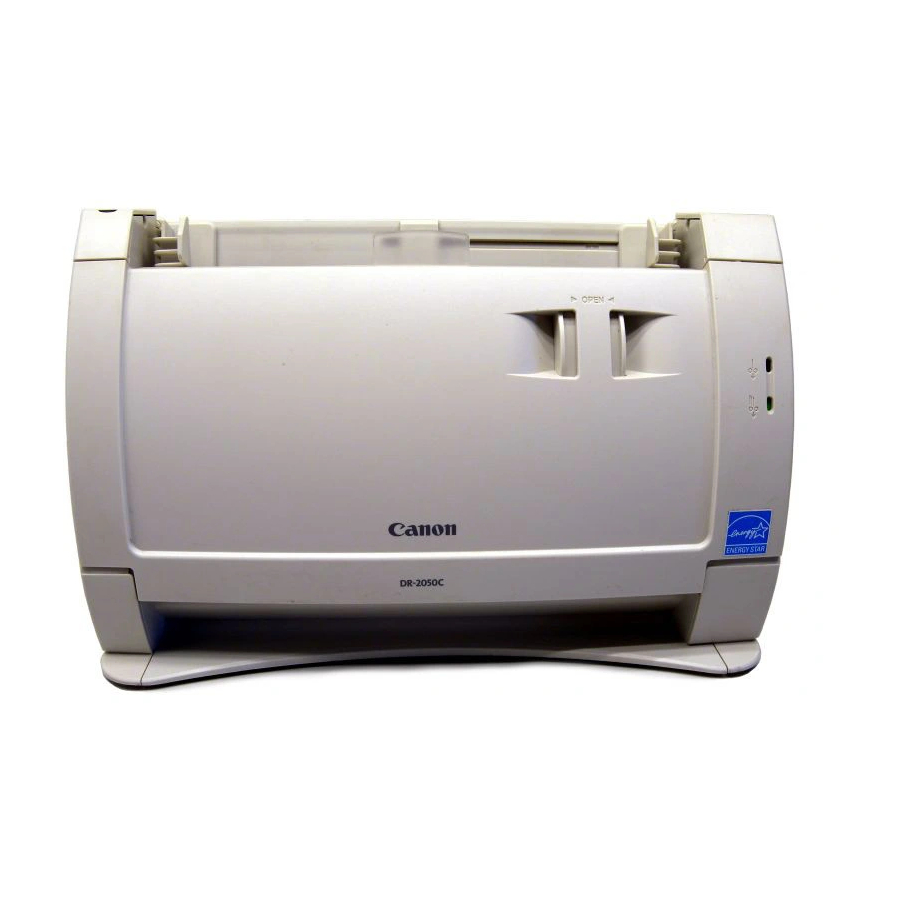
Features of the DR-2050C The main features of the DR-2050C scanner are listed below. ■ Compact Configuration The scanner has a very compact configuration, measuring only 11.7" (298 mm) (W) x 7.7" (197 mm) (H) x 3.9" (100 mm) (D). The small footprint of this standup vertical scanner saves space. -
Page 13: Prescan Function
■ Skip Blank Page Function The scanner is equipped with a Skip Blank Page function that allows it to scan a document regardless of whether every document is double-sided or single-sided. ■ Prescan Function The scanner is equipped with a Prescan function that allows you to adjust... -
Page 14: Checking The Packing List
Checking the Packing List The contents of the carton in which this scanner is shipped are described below. If anything is missing or damaged, contact your local authorized Canon dealer or service representative. DR-2050C Scanner Feed Roller Adobe Acrobat DR-2050C/2080C... - Page 15 • Remove all of the protective tape and protective sheets from the DR-2050C. (See “Removing the protective packing materials,” on p. 12.) • To use the “Feed Roller” install it on the DR-2050C. Refer to “Removing and Attaching the Feed Roller” (see p. 60) for information about installing the roller.
-
Page 16: Removing The Protective Packing Materials
Removing the Protective Packing Materials Remove all of the protective packing materials before using the scanner. Remove the protective tape (indicated by the ▼ ) from the scanner. Remove the protective sheet between the Document Feed Tray and the scanner. - Page 17 Remove the protective tape (indicated by ▼ ) and protective sheet. Close the Upper Unit slowly. Be sure that the Upper Unit is completely closed by pushing on both edges with both hands until you hear a click. Close the Document Feed Tray and Upper Cover. Before Using the Scanner...
-
Page 18: Names And Functions Of Parts
Names and Functions of Parts This section explains the name and function of each part. Familiarize yourself with the parts before connecting the scanner. ■ Front/Right Side Upper Cover Open when you need to set a document in the scanner. - Page 19 ■ Back/Left Side Ventilation Openings Power Switch Turns the scanner on and off. CAUTION Make sure that Ventilation Openings are not blocked. Blocked openings can cause internal heat build up, creating the risk of fire. ■ Conventions USB Connector Connect the USB cable provided or one that supports Hi-Speed USB 2.0.
-
Page 20: Installing The Scanner
• ISIS compatible or TWAIN compatible application software that runs on your operating system IMPORTANT • Use the most recently available USB 2.0 driver when using the DR-2050C. Contact your local authorized Canon dealer or service representative for more detailed information. - Page 21 • The ISIS/TWAIN driver provided with the scanner is not necessarily compatible with all ISIS compatible or TWAIN compatible application software. For details, contact your local authorized Canon dealer or service representative. Installing the Scanner...
-
Page 22: Installation Procedure
Installation Procedure The procedure for installing the scanner is outlined below. (For a detailed outline of this procedure, see “Connecting the Scanner to Your PC,” on p. 21.) 1. Check the interface card in your computer. (See “Interface Cards,” on p. 19.) 2. -
Page 23: Interface Cards
USB 2.0 interface card into your computer. • Use the most recent version of the USB 2.0 driver provided by Microsoft. Note If the USB 2.0 interface is not compatible with Hi-Speed USB 2.0, scanning speed is reduced. Installing the Scanner... -
Page 24: Connecting The Power Cord
Connect the bundled Power Cord q to the AC adaptor. Plug the AC adaptor Power Cord into the power connector (w) on the left side of the scanner, and plug the power plug into a power outlet (e). Installing the Scanner... -
Page 25: Connecting The Scanner To Your Pc
• When the application is running, do not turn the scanner OFF or unplug the interface cable. • Do not connect multiple DR-2050C scanners to one (1) computer. USB Interface Connection • Be sure to use the USB cable bundled with the scanner or a Hi-Speed USB 2.0 compatible cable. -
Page 26: Turning The Power On/Off
Turning the Power ON Turn ON the scanner. The power switch is on the right side of the scanner. Push the power switch to turn ON the scanner. The power lamp lights green when the power is ON. Turn ON the PC. -
Page 27: Recognizing The Scanner
Recognizing the Scanner When the computer recognizes the scanner, Windows Plug And Play displays the scanner driver's installation screen. Follow the instructions that appear on the screen to install the driver. • If you are using Windows 98SE, the [Add New Hardware Wizard] dialog box appears. - Page 28 Windows logo testing”, click the [Continue Anyway] button in the [Hardware Installation] dialog box. 5. Click the [Finish] button on the Completing the Found New Hardware Wizard screen. Note The DR-2050C is registered as “CANON DR-2050C USB” in the Imaging Device directory. Installing the Scanner...
-
Page 29: Turning The Power Off
• Make sure you exit the application before turning OFF the scanner. Turning OFF the scanner before exiting the application can cause unstable operation of the computer. • Wait at least 10 seconds before turning the scanner back ON after it has been turned OFF. WARNING... -
Page 30: Installing The Software
Installing the Software Note The DR-2050C setup disc contains the software listed below. Be sure to read the contents of the Readme.txt file before installing the software. • ISIS/TWAIN Driver This driver allows this scanner to be used with ISIS compatible application software or TWAIN compatible application software. -
Page 31: Installing The Isis/Twain Driver
Installing the ISIS/TWAIN Driver The ISIS/TWAIN driver setup program installs the ISIS/TWAIN driver. Follow the procedure below to install the ISIS/TWAIN driver. Turn ON your PC. Windows starts. IMPORTANT • If you are using Windows 2000 Professional or Windows XP, be sure to log on as a user with administrator privileges. - Page 32 In the Open box, enter “D:\Driver\Setup.exe” (assuming that “D” is the letter assigned to your CD-ROM drive), and then click the [OK] button. The installer starts. Follow the instructions that appear on the screen to install the software. 1. Read the Welcome text, and then click [Next]. 2.
- Page 33 After installation is complete, click the [Finish] button to exit the installer. Note When the ISIS/TWAIN driver is installed, Canon DR-2050C Help (see “Using the ISIS/TWAIN Driver,” on p. 36.) and the DR-2050C & 2080C Adjustment Tool (see “Adjusting the Scanner,” on p. 72.) icons are registered to the Start menu.
-
Page 34: Installing Captureperfect
Installing CapturePerfect CapturePerfect is ISIS compatible application software. You need to install the ISIS/TWAIN driver before installing CapturePerfect. Follow the procedure below to install CompturePerfect. Turn ON your PC. Windows starts. IMPORTANT If you are using Windows 2000 Professional or Windows XP, be sure to log on as a user with administrator privileges. - Page 35 Follow the instructions that appear on the screen to install the software. 1. Select the installation language. 2. Read the Welcome text, and then click [Next]. 3. Read the License Agreement text, and then click [Yes]. 4. Read the Choose Destination Location text, and then click [Next]. Installing the Software...
- Page 36 5. This starts the installer. 6. This completes the installation. After installation is complete, click the [Finish] button to exit the installer. Note Installing CapturePerfect will put a CapturePerfect icon on your Windows Start Menu. (See “Using CapturePerfect,” on p. 37.) Installing the Software...
-
Page 37: Uninstalling Software
Uninstalling Software Follow the procedure described below to uninstall the ISIS/TWAIN driver and CapturePerfect. IMPORTANT If you are using Windows 2000 Professional or Windows XP, be sure to log on as a user with administrator privileges. Click the [Start] button, point to [Settings], and then click [Control Panel]. Note If you are using Windows XP, on the Start menu, click [Control Panel]. - Page 38 The [Add/Remove Programs Properties] dialog box is displayed. Note If you are using Windows XP, the [Add or Remove Programs] dialog box is displayed. On the list in the dialog box, select the application you want to delete, and then click [Add/Remove]. Note If you are using Windows XP, click the [Change/Remove] button.
- Page 39 The [Confirm File Deletion] dialog box appears. When [Canon DR-2050C/2080C Scanner Driver] is selected. When [CapturePerfect] is selected. Click the [Yes] button to start the uninstaller. After uninstall is complete, click the [OK] button to exit the uninstaller. Installing the Software...
-
Page 40: Using The Software
Help], or click the [Help] button displayed in the dialog box. Note Before using the ISIS/TWAIN Driver, select the scanner [Canon DR-2050C] with the software. For more information, refer to [Canon DR-2050C & 2080C Help] and the manual for the software you are using. Using the Software... -
Page 41: Using Captureperfect
To view information about using CapturePerfect, click [Help] on the CapturePerfect menu bar. Starting CapturePerfect Turn ON the scanner. Turn ON your computer. Windows starts. Click the [Start] button, point to [Programs] (when using Windows XP, point to All Programs), and then click [CapturePerfect]. - Page 42 On the [Scan] menu, click [Select Scanner]. Select [Canon DR-2050C], and then click the [OK] button. Note If [Canon DR-2050C] is not displayed in the list of scanners, reinstall the ISIS/TWAIN driver. (See “Installing the ISIS/TWAIN Driver,” on p. 27.) Using the Software...
- Page 43 On the [Scan] menu, click [Scanner Setting], and then configure the scanning parameters. Note For details about how to configure scanning parameters, see ISIS/TWAIN driver help. (See p. 36.) Execute the scan operation from the [Scan] menu. Note Details about actually using CapturePerfect can be found in CapturePerfect help.
-
Page 44: Starting Captureperfect With The Event Function
- On Windows 98SE/2000 the [Scanners and Cameras Properties] dialog box appears. - On Windows Me/XP the [Scanners and Cameras] folder opens. Select [CANON DR-2050C USB], and then click the [Properties] button to display Properties. Using the Software... - Page 45 Click the [Events] tab. Make sure that [CapturePerfect] is checked. Note • When an application is started by an event, it may not work correctly depending on the application. • To disable the Event function, check the [Disable device events] check box. •...
-
Page 46: Using The Scanner
• Scanning documents before the ink is dry can cause problems with the scanner. Always make sure that the ink on a document is dry before scanning it. -
Page 47: Preparing The Trays
Pull the Document Feed Tray towards you to open it. In the case of a short document, open the Upper Cover. Documents Extremely thin, with paper translucent clips or staples paper Carbon paper Paper with square holes Coated paper Using the Scanner... -
Page 48: Using The Document Guide Adapter
Using the Feed Extension Plate Under the following conditions, install the Document Guide Adapter, set the document in the scanner, and then pull out the Feed Extension Plate. • When the document falls forward • When the document tends to bend forward because the paper is very thin, etc. -
Page 49: Placing A Document For Scanning
• Do not wear loose clothing or jewelry that may get caught in the scanner while you are operating it. If they get caught in the scanner it may cause an injury. Be extra careful of neckties and long hair. If anything gets caught in the scanner, quickly unplug the scanner to stop it. - Page 50 Fan the stack of documents to be scanned, and then angle the stack as shown in the illustration so the top edge of the first page is the lowest. (Set the document in the scanner with the top edge of the document facing downwards.) CAUTION Handle the document carefully when setting it in the scanner.
- Page 51 Set the document in the scanner with the back of the document facing forward and its top edge facing downwards. IMPORTANT The document sheet capacity is 50 sheets of non-curled sheets. Note, however, that the capacity is less when document pages are not being fed correctly.
-
Page 52: How To Feed With The Bypass Mode
Page Separation mode Adjust the Document Guide to the width of the document being scanned. In the case of an A4 or Letter size document, align the guide with the document positioning mark. Start scanning from the application. Using the Scanner... - Page 53 Set the document in the scanner with the back of the document facing forward and its top edge facing downwards. The document is scanned as it is detected. IMPORTANT • When scanning documents that are fastened together, such as invoices, set the edge that is fastened together as the leading edge.
-
Page 54: Clearing A Paper Jam
Be careful when removing jammed paper. It is possible to cut your hand on the edge of a sheet of paper. If the Document Feed Tray is closed, open it. Pressing the OPEN Knob from both sides (q), pull the Front Unit forward to open it (w). Using the Scanner... - Page 55 Close the Document Feed Tray as required. Note After removing the jammed paper, check to see if the last page was scanned, and then continue scanning. Using the Scanner...
-
Page 56: Other Functions
The scanner uses a folio scanning method to scan documents that are bigger than LTR/A4 size (maximum A3 size). To do folio scanning, fold the document in half and place it on the scanner. Both sides of the folded document are scanned and combined into a single image. -
Page 57: Regular Maintenance
They also create a risk of fire or electrical shock. Cleaning the Scanner To clean the front of the scanner, moisten a cloth with plain water, wring out excess water, wipe the surface and then dry it with a clean dry cloth. Cleaning Inside the Scanner Dust or paper particles inside the scanner can cause lines in scanned images. -
Page 58: Cleaning The Sensor Glass And The Rollers
Pressing the OPEN Knob from both sides (q), pull the Front Unit forward to open it (w). Use a blower to keep the interior of the scanner free of dust and paper particles. Use a clean dry cloth to wipe dirt off the sensor glass. - Page 59 : Rotate as you wipe. w : Rotate in the direction of the arrows as you wipe. e : (Retard Roller) Remove the roller from the scanner, wipe it clean, and then reinstall it. (See “Removing and Attaching the Retard Roller,” on p. 64.) r : (Feed Roller) Remove the roller from the scanner, wipe it clean, and then reinstall it.
-
Page 60: Cleaning The Metal Rollers
CAUTION • There are two metal rollers, one for the Front Unit and one for the scanner. Be sure to wipe both of them. Do not spray water or neutral detergent directly on the metal rollers. Doing so can damage precision mechanisms, such as the light source. -
Page 61: Removing And Attaching The Rollers
• Be sure to reset the counter after replacing the rollers. (See “Resetting the Counter,” on p. 58.) • Contact your local authrized Canon dealer or service representative for information about the exchange roller kit (feed roller and retard roller). -
Page 62: Resetting The Counter
Resetting the Counter After replacing the feed rollers, reset the counter according to the following procedure. Click the [Start] button, point to [Settings], and then click [Control Panel]. Double-click the [Scanners and Cameras] icon. Regular Maintenance... - Page 63 Click on [Properties] for the scanner you are using. Click the [Counter] tab. Press the [Reset] button, and then make sure that the counter for the roller being used is set to 0. Regular Maintenance...
-
Page 64: Removing And Attaching The Feed Roller
Removing the Feed Roller Pressing the OPEN Knob from both sides (q), pull the Front Unit forward to open it (w). Open the roller cover on the scanner side. Insert a finger into the depression in the cover and open it. Regular Maintenance... - Page 65 Shift the Feed Roller to the left to separate it from the shaft, and then remove Attaching the Feed Roller Set the Feed Roller into the hollow inside the roller cover, and align the notch in the roller with the scanner shaft. Regular Maintenance...
- Page 66 Slide the roller lock lever to the right, and then insert the shaft into the hole on the left side of the roller. Lower the lever to lock the roller shaft. Close the roller cover. Return the cover fully to its original position until you hear it click into place.
- Page 67 Gently press the left and right sides of the top of the Front Unit. Return the unit fully to its original position until you hear it click into place. Close the Document Feed Tray and Upper Cover. Regular Maintenance...
-
Page 68: Removing And Attaching The Retard Roller
Removing and Attaching the Retard Roller Follow the procedure below to remove and attach the retard roller for cleaning or replacement. CAUTION Do not use excessive force when removing or attaching the rollers. Doing so may damage them. Removing the Retard Roller Pressing the OPEN Knob from both sides (q), pull the Front Unit forward to open it (w). - Page 69 Attaching the Retard Roller Position the retard roller so the notch in the roller is facing the scanner's shaft. Slide the roller lock lever to the right, and then insert the shaft into the hole on the left side of the Retard Roller.
- Page 70 Push the roller lock lever towards the back of the scanner to lock the retard roller in place. Attach the roller cover. Be sure that the upper unit is completely closed by pushing on both edges with both hands until you hear a click.
-
Page 71: Troubleshooting
Resulting Scanned Images Are Not Correct ... p. 71. If after consulting the above section you still cannot resolve the problem, contact your local authorized Canon dealer or your service representative. The Scanner Does Not Turn ON Check the following: •... -
Page 72: The Pc Does Not Recognize The Scanner
The PC Does Not Recognize the Scanner The following are possible causes of the PC failing to recognize the scanner. Check each possible cause. Cause The scanner is not connected correctly. Remedy Check the USB cable connections between the scanner and the PC. -
Page 73: Documents Do Not Feed Properly
IMPORTANT • When system errors result in the scanner not functioning at all, turn OFF the scanner and wait at least ten seconds before turning it back ON. If an error continues to occur, restart the computer. • Make sure that the last document scanned was scanned correctly when scanning continues. -
Page 74: Paper Is Not Ejected Correctly
Paper is not ejected correctly When you are performing page-by-page scanning while a multi-page document is set in the scanner, scanning pauses with the trailing edge of the scanned sheet being engaged by the eject roller. Cause Under these conditions, the scanner enters a standby state and pauses for the next sheet. -
Page 75: Resulting Scanned Images Are Not Correct
Driver,” on p. 27. For details on how to install the application software, refer to the application software instruction manual. Cause Attempting to use a function of the DR-2050C that is not supported by the application software. Remedy Certain application software may not support auto page size detection or other functions. - Page 76 Windows Start button and then click Programs (All Programs in the case of WindowsXP), Canon Document Scanner, and then DR-2050C & 2080C Adjustment Tool, or use the scanner adjustment function of the ISIS/TWAIN driver. Follow the instructions on the dialog box that appears on the screen to adjust the scanner.
-
Page 77: Specifications
(Conditions: CPU Celeron 733 MHz; 256 MB RAM; Document Size: A4) Black and White 256-level Gray 24-bit Color Counter Top Image Scanner 2.16" to 8.50" (55 mm to 216 mm) 2.75" to 11.6" (70 mm to 297 mm) 2.75" to 13.9" (70 mm to 355 mm) 14 to 32 lb bond (0.0024"... -
Page 78: Removing And Attaching The Roller
• Refer to “Removing and Attaching the Rollers,” on p. 65 for information about replacing the rollers. • Contact your local authorized Canon dealer or service representative for detailed information about the replacement parts. • Specifications are subject to change without notice. - Page 79 External Dimensions Units: inches (units in parentheses are millimeters) 1.3" (32) 11.7" (298) 3.9" (100) Specifications...
-
Page 80: Index
Event Function ... 40 Using ... 36 Checking the Packing List ... 10 Cleaning Inside ... 53 Scanner ... 53 Glass ... 54 Document Eject Opening ... 14 Document Feed Opening ... 14 Document Feed Tray ... 14 Document Guide ... 14 Document Positioning Mark ... - Page 81 MEMO...
- Page 82 MEMO...
- Page 83 Do not make any changes or modifications to the equipment unless otherwise specified in the manual. If such changes or modifications should be made, you could be required to stop operation of the equipment. Canon U.S.A. Inc. One Canon Plaza, Lake Success NY 11042, U.S.A. Tel. No. (516)328-5600 RADIO INTERFERENCE REGULATIONS (For 120 V models) This digital apparatus does not exceed the Class B limits for radio noise emissions from digital apparatus as set out in the Interference-causing equipment standard entitled “Digital Apparatus”, ICES-003 of the...
- Page 84 CANON ELECTRONICS INC. 1248, SHIMOKAGEMORI, CHICHIBU-SHI, SAITAMA 369-1892, JAPAN CANON U.S.A. INC. ONE CANON PLAZA, LAKE SUCCESS, N.Y. 11042, U.S.A. CANON CANADA INC. 6390 DIXIE ROAD, MISSISSAUGA, ONTARIO L5T 1P7, CANADA CANON EUROPA N.V. BOVENKERKERWEG 59-61, P.O.BOX 2262, 1180 EG AMSTELVEEN, THE NETHERLANDS CANON LATIN AMERICA, INC.
Need help?
Do you have a question about the DR-2050C and is the answer not in the manual?
Questions and answers