
Related Manuals for Feider Machines FSDT75


Summary of Contents for Feider Machines FSDT75
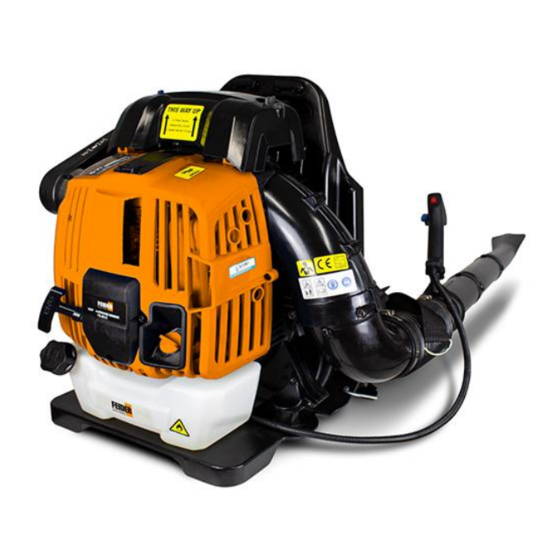
- Page 1 INSTRUCTIONS ORIGINALES PETROL BLOWER FSDT75 USER GUIDE CAUTION : Read the instructions before using the machine !
-
Page 2: Table Of Contents
CONTENTS 1. SAFETY WARNINGS 2. TECHNICAL SPECIFICATIONS 3. DESCRIPTION 4. ASSEMBLY 5. ADDING FUEL 6. OPERATION 7. MAINTENANCE 8. DECLARATION OF CONFORMITY 9. WARRANTY 10. PRODUCT FAILURE 11. WARRANTY EXCLUSIONS... -
Page 3: Safety Warnings
1. SAFETY WARNINGS WARNING: For your own safety, please read this manual before attempting to operate your new unit. Failure to follow instructions can result in serious personal injury. Spend a few moments to familiarize yourself with your blower before each use. If you give this tool to another person, also hand over this manual. - Page 4 In case of accident, immediately stop using the machine. Turn the machine off and check the problem. Do not use the machine while the machine is damaged. If the machine should start making any unusual noise or vibration, immediately shut off the power source and allow the machine to stop.
- Page 5 Doing so could cause injury associated with objects being drawn into the rotating parts. DO NOT refuel a running engine or an engine that is hot. Before using, always visually inspect to see that fasteners are secure, the housing is undamaged and that guards and screens are in place.
- Page 6 necessary, before using it again. There are harmful health consequences resulting from the emission of vibrations if the product is used for long periods of time or not properly managed and properly maintained. There is risk of injury and property damage due to attachments or broken the sudden impact of hidden objects.
-
Page 7: Technical Specifications
The use of this product in case of rain or humid environments is prohibited. Any other use might lead to damage of the appliance, property or personal injury. 2. TECHNICAL SPECIFICATIONS FSDT75 Model: Input power 2,2 kW... -
Page 8: Description
3. DESCRIPTION Stop switch 9 Starter rope 17 Oil cap 25 Hose band Control handle 10 Fuel tank 18 Oil drain bolt 26 Flat nozzle tube Throttle trigger 11 Fuel tank cap 19 Elbow Stop control lever 12 Muffler 20 Flexible pipe Primer pump 13 Shoulder strap 21 Swivel pipe... -
Page 9: Assembly
4. ASSEMBLY CAUTION: Before performing any work on the blower, always stop the engine and pull the spark plug cap off the spark plug. CAUTION: Start the blower only after having assembled it completely. CAUTION: Always wear protective gloves. Assembling blower pipes 1. -
Page 10: Adding Fuel
4. Attach long pipe 1 to the swivel pipe,Turn it clockwise to lock it in place. Then attach the second long pipe,Turn it clockwise to lock it in place. 5. ADDING FUEL AND OIL 1) Fuel tank WARNING: When filling the tank: - The tool should always be stopped and cooled. -
Page 11: Operation
6. OPERATION Starting the engine WARNING: Never attempt engine start in a place where the fuel has been supplied. It may cause ignition or fire. When starting the engine, keep a distance of at least 3 meters from fuelling place. WARNING: Exhaust gas from the engine is toxic. - Page 12 Lift the choke lever to the closed position. Pull out slowly the starter handle till feeling compression. Then pull it strongly. NOTICE: Never pull the rope to the full extension. NOTICE: Return the starter knob gently into the housing. Otherwise released starter knob may hit your body or it may not rewind appropriately.
- Page 13 When the engine is warm (warm start) Put the blower on a flat surface. Push the primer pump several times. Make sure that the choke lever is open. Stump the pedal with your right foot, and hold the top of the unit cover with left hand to prevent the engine from moving.
- Page 14 Pull the stabilizer strap until there are no space left between your back and the blower housing. To fasten the strap, pull the end of the strap downwards. ► 1. Stabilizer strap To loosen the strap, pull up the end of the fastener. ►...
- Page 15 Adjusting the control lever position For tube throttle model: Move the control handle along the swivel pipe to the most comfortable position. Then tighten the control handle with the screw ► 1. Screw Blower Operation While operating the blower, adjust the throttle trigger so that the wind force is appropriate for the work location and conditions.
-
Page 16: Maintenance
► 1. Throttle trigger 2. Stop control lever Transporting the blower CAUTION: When transporting the blower, be sure to stop the engine. NOTICE: Do not sit or stand on the blower nor put a heavy object on it. It may damage the machine. - Page 17 Recommended oil API grade SF class or higher, SAE 10W-30 oil (automobile 4-stroke engine oil) • Oil replacement procedure Change the oil as follows: 1. Drainage hole 2. Oil drain bolt 3. Gasket (Iron washer) 4. Oil cap 5. Oil cap gasket 6. Oil port 1.
- Page 18 ► 1. Knob bolts 2. Air cleaner cover 3. Filter 4. Breather Loosen the knob bolts. Remove the air cleaner cover. Remove the filter, clean off any dirt from the filter with a cloth or air blow. Replace the filter with a new one if it is dam- aged or very dirty.
- Page 19 The appropriate clearance between two electrodes of spark plug is 0.7 to 0.8 mm (0.028″ to 0.031″). Adjust to the correct clearance when it is too wide or too narrow. Clean thoroughly or replace the spark plug if it has accumulated car- bon or contaminated. Cleaning the fuel filter CAUTION: Make sure there is no damage on the fuel tank.
- Page 20 Remove the fuel tank cap, drain the fuel to empty the tank. Check the tank inside for any foreign materials. If any, wipe clean such materials. Pull out the fuel filter with wire through the fuel filling port. If the fuel filter surface is contaminated, clean it with gasoline. NOTICE: Follow the method specified by each local authority for disposing the gasoline used for cleaning the fuel filter.
-
Page 21: Declaration Of Conformity
ZI, 32 rue Aristide Bergès – 31270 Cugnaux - France Tel: +33 (0)5.34.502.502 Fax: +33 (0)5.34.502.503 Declares that the machines: PETROL BLOWER Model: FSDT75 Serial No.: 20210759856-20210760005 / 20210760006-20210760155 The people name holding the technical file:M. Olivier Patriarca Have been designed in compliance with the following standards:... -
Page 22: Warranty
9. WARRANTY WARRANTY The manufacturer guarantees the product against defects in material and workmanship for a period of 2 years from the date of the original purchase. The warranty only applies if the product is for household use. The warranty does not cover breakdowns due to normal wear and tear. The manufacturer agrees to replace parts identifed as defective by the designated distributor. -
Page 23: Product Failure
10. PRODUCT FAILURE WHAT TO DO IF MY MACHINE BREAKS DOWN? If you bought your product in a store: a) Empty the fuel tank if your product has one. b) Make sure that your machine is complete with all accessories supplied, and clean! If this is not the case, the repairer will refuse the machine. -
Page 24: Warranty Exclusions
11. WARRANTY EXCLUSIONS THE WARRANTY DOES NOT COVER: • Start-up and setting up of the product. • Damage resulting from normal wear and tear of the product. • Damage resulting from improper use of the product. • Damage resulting from assembly or start-up not in accordance with the user manual. •... - Page 25 NOTES...
- Page 26 NOTES...
- Page 27 NOTES...
- Page 28 BUILDER SAS 32, rue Aristide Bergès - ZI 31270 Cugnaux – France Made in PRC 2021...
Need help?
Do you have a question about the FSDT75 and is the answer not in the manual?
Questions and answers