
Related Manuals for Qomo Journey 13 Series


Summary of Contents for Qomo Journey 13 Series
- Page 1 All manuals and user guides at all-guides.com Interactive Touch Screen User Manual www.qomo.com...
-
Page 2: Table Of Contents
All manuals and user guides at all-guides.com Content Safety Instruction ............................1 Installation ..............................3 Bearing ....................................Wall-mounting ................................... OPS Installation ................................. Basic Operation ............................5 Power on ....................................Power off ..................................... Control Panel ..............................6 Terminal Interface ............................7 Terminal Interface Type 1 ............................... -
Page 3: Safety Instruction
All manuals and user guides at all-guides.com Safety Instruction For your safety, please read the following instruction before you use the product. Serious injury or property loss may be caused by improper operations. Do not try to repair the product without guidance. Placement ... - Page 4 All manuals and user guides at all-guides.com Humidity Do not expose machine in rain, damp or place near water. Ensure the indoor drying, cool. Ventilation Keep the ventilation openings clear. Ensure that the unit has enough space for ventilation around: left, right and back >10cm, top> 20cm. Earphone ...
-
Page 5: Installation
All manuals and user guides at all-guides.com Installation Bearing If the product is installed in a wall-mounted way, the bearing capacity of the surface for installation must be at least four times of the weight of the product. If the surface for installation is a wall or the ceiling of a building, the surface must be made of solid bricks, concrete or other materials with equal intensity. -
Page 6: Ops Installation
All manuals and user guides at all-guides.com Insert wall plugs into the mounting holes. Attach the mounting arms to the Push the self-tapping screws through the back of screen with the screws. bracket into the wall plugs and tighten the screws. -
Page 7: Basic Operation
All manuals and user guides at all-guides.com Handle facing outward Basic Operation Power on Power the interactive touch screen with the 100V-240V 50Hz/60Hz AC power supply. Connect the panel to the power supply. Press the rocker switch (on the bottom left in the rear of the panel) to enter standby mode. -
Page 8: Control Panel
All manuals and user guides at all-guides.com Control Panel 2 3 4 5 6 7 8 9 10 11 12 Item Icon Function Description Power indicator: Press power button on the control panel. The power indicator turns green. Press power button on the control panel to enter the standby mode. -
Page 9: Terminal Interface
All manuals and user guides at all-guides.com Terminal Interface Terminal Interface Type 1 RJ45 IN USB-Touch HDMI IN VGA IN Audio IN USB 3.0 AV IN YPbPr IN AV OUT Earphone OUT SD CARD HDMI OUT RS232 SPDIF WIFI: antenna port Terminal Interface Type 2 RJ45 IN RJ45 OUT... -
Page 10: Remote Control
All manuals and user guides at all-guides.com Remote Control Item Function Description Power on or standby mode Mute on/off Change channels or enter numbers Return to previous interface SLEEP: Set the sleep time NICAM: Nicam button ASPECT: Adjust picture aspect ratio Signal source selection Show the current signal source Up/down/right/left direction buttons... -
Page 11: Remote Control Area
All manuals and user guides at all-guides.com Remote Control Area The effective receiving area is about 3 meters with 30° angle from vertical point to the left and right. And the effective receiving area is about 5 meters from the front of device. Note that the remote control signal receiver locates at the position of power indicator. -
Page 12: Connecting And Setting
All manuals and user guides at all-guides.com Connecting and Setting For safety, please do not connect any power supply before the external devices setup. 1. External Computer and Touch Connecting Audio IN VGA IN USB-Touch 1) Connect a VGA cable (15 pin) between the VGA and external PC. Connect an earphone cable between the PC and audio at the same time. -
Page 13: Av Connecting
All manuals and user guides at all-guides.com 2. AV Connecting AV IN 1) Connect an AV cable with the device with AV-OUT (Yellow is Video, Red is Audio-R, White is Audio-L). 2) Plug the POWER cord and switch it on from the rear panel. 3) Press to turn on the panel. -
Page 14: Video-Out
All manuals and user guides at all-guides.com Front HDMI/ HDMI 1/ HDMI 2 1) Connect a HDMI cable with the device with HDMI. 2) Plug the POWER cord and switch it on from the rear panel. 3) Press to turn on the panel. 4) Select Signal source to HDMI source according to the one you connected. -
Page 15: Rs232
All manuals and user guides at all-guides.com AV-OUT 1) Connect an AV cable with the device. 2) Plug the POWER cord and switch it on from the rear panel. 3) Press to turn on the panel. AV-OUT outputs the picture and sound of AV source. 4. - Page 16 All manuals and user guides at all-guides.com RS232 code list There are two RS232 code lists. Please check your Android firmware version first and refer to corresponding list according to your Android firmware version. RS232 Code for Android Firmware QOMO_xxx_xxx_xxxxx_Vxx 6 bytes command Baud rate: 115200 Data bits: 8...
- Page 17 All manuals and user guides at all-guides.com Channel - |99 XX 1A 01 E5 AA Screenshot |99 XX 1B 01 E4 AA Screen Display |99 XX 1C 01 E3 AA Display ratio |99 XX 1E 01 E1 AA Sleep Mode |99 XX 1D 01 E2 AA Auto Adjustment |99 XX 1F 01 E0 AA...
- Page 18 All manuals and user guides at all-guides.com (Bidirectional) Set Signal Source 0x55 0x54 0x53 0x50 0x73 0x21 0x21 0x21 (DTV) Set Signal Source 0x55 0x54 0x53 0x50 0x73 0x21 0x21 0x21 (ATV) Set Signal Source 0x55 0x54 0x53 0x50 0x73 0x30 0x30 0x21...
- Page 19 All manuals and user guides at all-guides.com (Bidirectional) Set Sound Mode 0x55 0x54 0x53 0x50 0x61 0x33 0x21 0x21 (Standard) Set Sound Mode 0x55 0x54 0x53 0x50 0x61 0x21 0x21 0x21 (Music) Set Sound Mode 0x55 0x54 0x53 0x50 0x61 0x30 0x21 0x21...
-
Page 20: Android Home Page
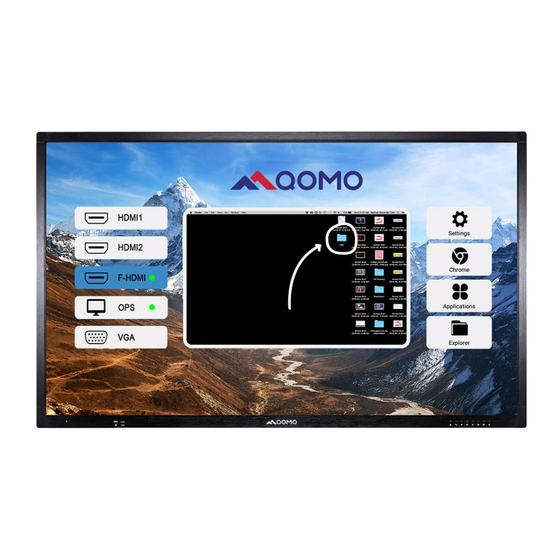
All manuals and user guides at all-guides.com Android Home Page Education Version Android home page consists of three parts as shown in above picture. Click on the toolbar or Press HOME button to enter the home page. 1. Click a signal source in part ① and its preview will be shown in part ②. Then click part ② to enter its corresponding signal source. -
Page 21: Business Version
All manuals and user guides at all-guides.com Business Version Android home page mainly contains three parts: Quick-access Apks, Time and Network Connection Status. Click on the toolbar or Press HOME button to enter the home page. 1. Click to open corresponding APK; Click to display all the APKs installed. -
Page 22: Bottom-Up Toolbar
All manuals and user guides at all-guides.com Bottom-up Toolbar The toolbar can be invoked in any signal source interface. Swipe up from the bottom of screen and it will appear. Buttons Functions Click to enter PC source Back Return to previous interface Return to Android home page Home Task... -
Page 23: Signal Source Selection
All manuals and user guides at all-guides.com Signal Source Selection There are three ways to select a signal source to display. Swipe your finger up from the bottom edge to bring up a toolbar then click Input. Press SOURCE button on the remote control. ... -
Page 24: Android Settings
All manuals and user guides at all-guides.com Android Settings Click setting icon on home page to enter Android setting interface. 1. Common function: Click Common function to set Starting Channel, Sound, Wallpaper, ECO, Lock Screen and Factory Data Reset. Starting Channel: Start the Panel and enter the channel you set directly. ... - Page 25 All manuals and user guides at all-guides.com 2. Network and equipment: Click Network and equipment to set WLAN, Ethernet, Tethering& portable hotspot and Mcast. WLAN: Select an available wireless network AP and enter the password to be connected. Click and a menu pops up.
- Page 26 All manuals and user guides at all-guides.com 4. Language & input: Where you can change the system or keyboard language.
- Page 27 All manuals and user guides at all-guides.com 5. Date & time: Where you can change time format, time zone and etc. 6. About: Click About to check network status, model, Android version, Kernel version and etc. Click Status and enter its page to get the Mac address.
-
Page 28: Built-In Pc Operation
All manuals and user guides at all-guides.com Built-in PC Operation 1. Select PC signal source to enter PC interface. The following are three ways to select a signal source channel. Swipe your finger up from the bottom edge to bring up a toolbar then click input. ... -
Page 29: Menu
All manuals and user guides at all-guides.com Menu When you switch to other signal sources like OPS, HDMI, VGA and etc, settings interface will be displayed as follows: Picture, Sound and Setting. Note that TV setting is disabled. Click an icon to set the option or press button on remote control to switch the options. -
Page 30: Annotation Software - Magicboard
All manuals and user guides at all-guides.com Annotation software - MagicBoard MagicBoard provides various functions like annotation, capture, quick-access Apps & Docs and etc. Click icon to enter whiteboard interface. And click icon to fold/unfold the toolbar. MagicBoard Interface Icons Functions Click to exit the program or Select to keep it running in the background... - Page 31 All manuals and user guides at all-guides.com 1. Save file: Click icon to save the file. Check “Save to editable file” box so that you can reedit this file next time. You can open this editable file through DOC of File Management ...
- Page 32 All manuals and user guides at all-guides.com 3. Whiteboard running in the background: Click icon then click “Background” and the whiteboard will run in the background. Icon will appear on both sides. Click either of them to unfold the tools. Note that floating icons will float in every singal source for annotation.
- Page 33 All manuals and user guides at all-guides.com Annotation mode Save annotation as an image or scan QR code to share the annotation Enter the whiteboard Rectangular screenshot Window Shade Adjust volume...
-
Page 34: Included Accessories
All manuals and user guides at all-guides.com Included Accessories Picture Name Quantity Remote control Battery (AAA) Pointer 1.8m power cable 3m HDMI cable 3m USB cable (A-B) Bracket Antenna sticks for PC and Android Warranty card... -
Page 35: Troubleshooting
No image is displayed or the Modify the color settings. image is black and white. Check the color system. This is the general user manual for all QOMO interactive touch screens. Some details may be different from the actual product.
Need help?
Do you have a question about the Journey 13 Series and is the answer not in the manual?
Questions and answers