
Related Manuals for Trane CSRA025FAF0


Summary of Contents for Trane CSRA025FAF0
- Page 1 Installation Operation Maintenance 25, 40 and 60 Ton Air-Cooled Cold Generators® Models: CSRA025FAF0, CSRA040FAF0, and CSRA060FAF0 CSRA-SVX02A-EN © 2002 American Standard Inc. All Rights Reserved...
-
Page 2: Table Of Contents
Table of Contents General Information Earnings and Cautions ....... . 4 Literature Change History. - Page 3 Table of Contents System Start-Up Chilled Water Circulating Pump ......59 Verifying Proper Fan Rotation ......63 Compressor Start-Up .
-
Page 4: General Information
General Information NOTICE: Warnings and Cautions appear at appropriate sections throughout this manual. Read these carefully. WARNING -Indicates a potentially hazardous situation which, if not avoided, could result in death or serious injury. CAUTION -Indicates a potentially hazardous situation which, if not avoided, may result in minor or moderate injury. -
Page 5: Model Number Description
Model Number Description All Trane products are identified by a multiple-character model number that precisely identifies a particular type of unit. An explanation of the alphanumeric identification code is provided in Figure 1a. Its use will enable the owner/operator, installing contractors, and service engineers to define the operation, specific components, and other options for any specific unit. - Page 6 General Information Figure 1a — Model Number Description CSRA-SVX02A-EN...
-
Page 7: Unit Description
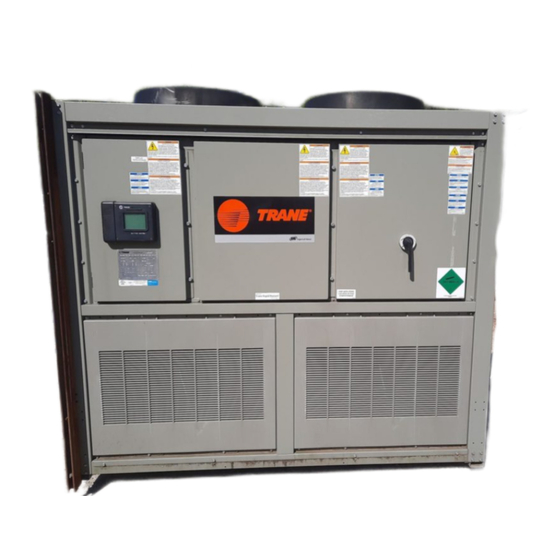
General Information Figure 1b — Unit Nameplate Unit Description Before shipment, each unit is leak tested, dehydrated, charged with refrigerant and compressor oil, and run tested for proper control operation. Each unit is equipped with manifolded scroll compressors. Each manifolded set of compressors is piped in parallel and utilizes a passive oil management system to maintain proper compressor oil level. - Page 8 UCM network via a Trane ICS™ system or a Tracer Summit™ system. DIP Switch settings on the TCI module for these applications should be; Switches 1, 2, and 3 are “Off”.
-
Page 9: Input Devices & System Functions
(Used with Non-Trane Building Control System) The Generic Building Automation System (GBAS) module allows a non- Trane building control system to communicate with the unit and accepts external setpoints in form of analog inputs 0 - 5 DCV and a binary Input for demand limit. - Page 10 General Information With Lead/Lag enabled, HGBP operation (if applicable) will be bypassed and the system will go directly into pump down when the last subtract command is initiated. When the UCM is powered up (after a power loss), or any time the compressor's start time and run time are equal, the lead compressor for single circuit units (20 through 30 Tons), will be the first “On”...
- Page 11 General Information four times within a 10 minute period, the control switches from controlling to the “lower limit” to a temperature equal to the “lower limit” minus the “temporary low limit suppression” setting. It will utilize this new “low limit” temperature for one hour to reduce condenser fan short cycling.
- Page 12 General Information Compressor Motor Winding Thermostats (Standard) A thermostat is embedded in the motor windings of each Scroll compressor. Each thermostat is designed to open if the motor windings exceeds approximately 221°F. The thermostat will reset automatically when the winding temperature decreases to approximately 181°F. Rapid cycling, loss of charge, abnormally high suction temperatures, or the compressor running backwards could cause the thermostat to open.
- Page 13 General Information 3. Turn “Off” and lockout all of the compressors and initiate a manual reset diagnostic. Loss-of-Flow (Solution) Protection (Standard) The factory installed solution flow switch is wired to the CGM. If it opens for more than 6 continuous seconds when the pump is requested to be “On”, an auto reset diagnostic will be initiated.
- Page 14 General Information turning off except during an Emergency Stop condition. If an Emergency Stop is initiated, the Solution Pump is immediately turned “Off” (relay de- energized). Low Ambient Pump Control (Standard) A Low Ambient Pump “On” Control function (LAPC) allows the pump to run continuously if the outside ambient temperature falls below a programmable Low Ambient Pump “On”...
-
Page 15: Unit Component "Layout" And "Ship With" Locations
General Information Figure 2 — Unit Component “Layout” and “Ship with” Locations (60 Ton Unit Illustrated) Control Panel Condenser Fans Typical Lifting Holes (4) Pump Circuit Breaker/Control Panel Enclosure Tow Bar Forklift Tube Slots Water Inlet Water Outlet Unit Inspection As soon as the unit arrives at the job site [ ] Verify that the nameplate data matches the data on the sales order and bill of lading (including electrical data). -
Page 16: Installation
Do not remove damaged material from the receiving location. Take photos of the damage, if possible. The owner must provide reasonable evidence that the damage did not occur after delivery. [ ] Notify the appropriate Trane office before installing or repairing a damaged unit. Unit Clearances Figure 3 illustrates the minimum operating and service clearances for either a single, multiple, or pit application. - Page 17 Installation Anchor the unit to the roof with hold-down bolts or isolators. Follow the instructions under “Unit Isolation” for proper isolator placement and installation. Check with a roofing contractor for proper waterproofing procedures. Figure 3 — Typical Installation Clearances for Single, Multiple or Pit Applications CSRA-SVX02A-EN...
- Page 18 Installation Figure 4a — C25 Ton Unit Dimensional Data & Recommended Clearances CSRA-SVX02A-EN...
- Page 19 Installation Figure 4b — C40 Ton Unit Dimensional Data & Recommended Clearances CSRA-SVX02A-EN...
- Page 20 Installation Figure 4c — C60 Ton Unit Dimensional Data & Recommended Clearances CSRA-SVX02A-EN...
- Page 21 Table 1 — Typical Unit Weights and Point Loading Data Unit Weights Model No. Tons Shipping Operational Dimensioned from Pump End Weight (lbs) Weight (lbs) CSRA010FAF0 3800 3820 CSRA015FAF0 4030 4050 CSRA025FAF0 6050 6150 83.0 CSRA040FAF0 8250 8370 79.0 CSRA060FAF0 9300 9615 96.0 Notes: 1.
-
Page 22: Rigging
Installation WARNING Heavy Objects! Do not use cables (chains or slings) except as shown. Each of the cables (chains or slings) used to lift the unit must be capable of supporting the entire weight of the unit. Lifting cables (chains or slings) may not be of the same length. -
Page 23: General Unit Requirements
[ ] Verify that the power supply complies with the unit nameplate specifications. [ ] Check the unit for shipping damage and material shortage; file a freight claim and notify Trane office. [ ] Verify that the installation location of the unit will provide the required clearance for proper operation. -
Page 24: Main Electrical Power Requirements
Installation Main Electrical Power Requirements [ ] Verify the power supply meets the required power requirements of the system. [ ] Install power wiring in accordance with all applicable codes. [ ] Install and connect properly sized power supply wiring, with over current protection, to the main circuit breaker (ICB1). - Page 25 Installation Water Shutoff Valves Shutoff valves are provided in the “Supply” and “Return” pipe near the chiller so the gauge(s), thermostats, sensors, strainer, etc., can be isolated during service. Pipe Unions and Connectors Pipe unions and Victaulic connectors are used to simplify disassembly for system service.
-
Page 26: Final Water Piping Connections
Trane assumes no responsibility for equipment failures which result from untreated or improperly treated water, or saline or brackish water. -
Page 27: Flexible Hose Guidelines
Installation Flexible Hose and Hard Pipe Installation General Use the procedure described below to ensure the proper installation of flexible hose provided as part of a ChillerSource rental. It is critical that this procedure is followed to minimize premature or catastrophic failure of this hose. -
Page 28: Dixon Coupling
Installation Dixon Coupling • The Dixon coupling (See Figure 7), bolts are to be torqued prior to charging the hose with water to 40 ft-lbs. DO NOT EXCEED 40 ft-lbs. (The torque must be applied evenly between the bolts to ensure a consistent gap on each side of the coupling. - Page 29 Installation Figure 9 — (Incorrect Horizontal Hose Installation) Incorrect horizontal hose installation shows an incorrect hose installation. Elbows are not installed. This causes the top of the hose to be in tension, which stretches the hose out of the coupling; and the bottom of the hose to be in compression, which causes it to crimp.
- Page 30 Installation Figure 11 — Incorrect Vertical Hose Installation Incorrect vertical hose installation shows an incorrect hose installation. In this configuration the hose is installed without an elbow and with an elevation greater than 7 feet off the ground. This creates excessive stress at the hose coupling connection, causing the hose to stretch and separate from the coupling.
- Page 31 Installation Figure 13 — Incorrect Horizontal/Vertical Installation Incorrect horizontal/vertical installation shows an incorrect horizontal/vertical hose installation. In this configuration, a number of improper installation techniques can be noted: • elbows are not installed • the hose is completely supported by the couplings •...
-
Page 32: Hard Pipe Guidelines
Also, the low pressure control may need to be changed. Contact the local Trane ChillerSource representative. For all 60 Hz units, heat tape is factory-installed on the unit evaporator and all internal water piping. - Page 33 Installation Install an appropriately sized fused disconnect switch for field installed heat tape when applying it to all exposed piping. A shore power 115V plug is provided for factory installed heat tape. Be sure to use heat tape that is recommended for low-temperature applications, it should be thermostatic controlled and dissipate 7 watts per linear foot.
- Page 34 Installation Figure 15 — Typical Insulated, Spiralled Heat Tape Installation Table 2A — Non-Insulated, Non-Thermostatically Controlled Heat Tape with Outer Wrap Application Pipe Size Technique “Straight” 2” 2-1/2” 3” 4” 5” Heat Tape Req. per Linear 12” 12” 12” 12” 12”...
-
Page 35: Electrical Cable
Installation Table 2B — Insulated, Non-Thermostatically Controlled Heat Tape with Outer Wrap Application Pipe Size Technique “Straight” 2” 2-1/2” 3” 4” 5” Heat Tape Req. per Linear 12” 12” 12” 12” 12” Ft. of Pipe Protection Down to (°F) -6° 0°... -
Page 36: Electrical Cable Box
Installation *Temperature Correction Factors Ambient Temp °F Factor 70 - 77 1.04 78 - 86 1.00 87 - 95 0.96 96 - 104 0.91 105 - 113 0.87 114 - 122 0.82 Electrical Cable Box The electrical cable is contained in a lightweight plastic box, approximately four feet long and four feet wide. -
Page 37: Pig-Tail Connectors
Installation Figure 17 — Cam-lok Connectors Pig-Tail Connectors Each cable box has four male pig-tails and four female pig-tails for non cam- lok connections. Each male pig-tail has a male cam-lok on one end and a barrel lug on the other. Each female pig-tail has a female cam-lok on one and a barrel lug. -
Page 38: Field Installed Power Wiring
Installation Figure 18 — Pig-tail Connectors Field Installed Power Wiring An overall dimensional layout for the field installed wiring entrance into the unit is illustrated in Figure 4. To insure that the unit's supply power wiring is properly sized and installed, follow the guidelines outlined below. Note: All field installed wiring must conform to NEC guidelines as well as State and Local codes. -
Page 39: Main Unit Power Wiring
Installation WARNING Hazardous Voltage! Disconnect all electric power, including remote disconnects before servicing. Follow proper lockout/tagout procedures to ensure the power can not be inadvertently energized. Failure to disconnect power before servicing could result in death or serious injury. Once the door has been opened, it can be closed with the handle in any one of the three positions outlined above, provided it matches the circuit breaker position. - Page 40 Installation Figure 19 — Typical Field Installed Power Wiring for Field Installed Pump Refer to the Wiring Diagram Notes at the end of this Section CSRA-SVX02A-EN...
-
Page 41: Power Wire Sizing And Protection Device Equations
Installation Table 3 — Customer Connection Wire Range Power Wire Sizing and Protection Device Equations To correctly size the main power wiring for the unit, use the appropriate calculation(s) listed below. Read the load definitions that follow and use Calculation #1 for determining the MCA (Minimum Circuit Ampacity), MOP (Maximum Over current Protection), and RDE (Recommended Dual Element fuse size) for each unit. -
Page 42: Field Installed Control Wiring
Installation RDE = (1.5 x LOAD 1) + LOAD 2 + LOAD 4 Select a fuse rating equal to the RDE value. If the RDE value does not equal a standard fuse size as listed in NEC 240 - 6 select the next higher standard fuse rating. -
Page 43: Controls Using 24 Vac
Installation Since the unit-mounted 115V control power transformer (1T1) and the 24V control power transformers (1T2, 1T3, 1T4) are provided on all units, it is not necessary to run a separate 115 volt control circuit power source to the unit. A separate field provided 15 Amp maximum 115V 60 Hz power source is required when the unit is equipped with field supplied heat tape. -
Page 44: Controls Using Dc Analog Input/Outputs
Installation Remote Running/Alarm Indicator (Optional) If the remote run indication and alarm contacts are used, a 24 VAC control circuit must be provided between the Remote Running/Alarm Indicator panel and the appropriate terminals located at the UCM. Maximum contact rating @ 24 VAC is 10 Amp in-rush and 3.2 Amp sealed. -
Page 45: Controls Using Dc Communication Links
Installation Table 6 — DC Conductors Distance from Recommended Unit to Control Wire Size 000 - 499 feet 16 gauge 500 - 1000 feet 14 gauge Controls using DC Communication Links Before installing any connecting wiring between the unit and components utilizing a DC communication link, refer to the connection diagram that shipped with the unit for the electrical access and connection locations provided on the unit. -
Page 46: Ice Building Control Option
Installation ICS™ Communication Link This option allows the unit control module (UCM) in the unit to exchange information (i.e., operating setpoints and AUTO/STOP commands) with a higher level control device, such as a Tracer. Twisted-pair conductors establish the bi-directional communications link between the unit's control module and Tracer. - Page 47 Installation Figure 20A — Typical Field Control Connections Diagram CSRA-SVX02A-EN...
- Page 48 Installation Figure 20B — Typical GBAS 0 - 5 Volt Connections Diagram CSRA-SVX02A-EN...
- Page 49 Installation Field Connection Diagram Notes for all System Control Options CSRA-SVX02A-EN...
- Page 50 Installation Use the checklist provided below in conjunction with the “General Unit Requirement Checklist“ to ensure that the unit is properly installed and ready for operation. Be sure to complete all of the procedures described in this section before starting the unit for the first time. [ ] Turn the field supplied disconnect switch, located upstream of the unit, to the “Off”...
-
Page 51: System Pre-Start Procedures
Typically, current imbalance is associated with loss in motor efficiency, higher operating motor temperature, loss of performance and reliability. With the designs of specialized motors such as those used in the Trane scroll compressor, operating temperature, efficiency, performance, and reliability has been taken into account in the total performance of the compressor. -
Page 52: Electrical Phasing
System Pre-Start Procedures At low operating voltage and high operating load, the imbalance may be around 4 percent. At high operating voltage and low operating load, the imbalance may be as high as 15 percent. If an imbalance situation is suspected within the compressor (current draw unequal between phases) and the line voltage imbalance does not exceed 2 percent;... - Page 53 System Pre-Start Procedures [ ] Open switch (1S70), 24V Transformer SW and close switch (1S1), 115V control circuit SW inside chiller control panel. [ ] Close the disconnect switch or circuit protector switch that provides the supply power to the unit's chiller circuit breaker. [ ] Turn chiller circuit breaker handle on main control panel door to the “ON”...
-
Page 54: System Start-Up
System Start-Up Sequence of Operation Chiller Control for Comfort Applications The CGM controls the leaving solution temperature (LST) to within an adjustable setpoint using deadband control. The CGM monitors the LST sensor and determines how far away the temperature is from the leaving solution setpoint (LSS). - Page 55 System Start-Up Evaporator Freeze Protection Diagnostic The evaporator freeze protection integrator (EFZ) will start integrating when the leaving solution temperature is less than the low leaving solution temperature cutout setpoint. Once EFZ integrates up to 30 Sec., the following diagnostics will occur: 1.
- Page 56 System Start-Up Duty Cycle Calculations calculate the duty cycle based on the calculated Load Value Fraction: On Time Seconds = 3600 / 4 X Max Cycle Rate X (1-Load Value Fraction) Off Time Seconds = 3600 / 4 X Max Cycle Rate X Load Value Fraction Where Load Value Fraction = Fractional part of the calculated Load Value.
- Page 57 System Start-Up Table 8a — Chilled Solution Reset Schedule based on Zone Temperature Active Leaving Solution Setpoint Zone Reset Cooling Reset Amount = Maximum LSS = ALSS + Maximum Adjustable Factory Reset Preset = 5 3 - 16 F Reset Amount = Zero (0) LSS = ALSS Zone...
- Page 58 System Start-Up Table 8c — Chilled Solution Reset Schedule based on Entering Solution Temperature Active Leaving Solution Setpoint Entering Solution Reset Reset Amount = Maximum LSS = ALSS + Maximum Adjustable Factory Reset Preset = 5 3 - 16 F Reset Amount = Zero (0) LSS = ALSS...
-
Page 59: Chilled Water Circulating Pump
System Start-Up With Lead/Lag enabled, HGBP operation (if applicable) will be bypassed and the system will go directly into pumpdown when the last subtract command is initiated. When the UCM is powered up (after a power loss), or any time the compressor's start time and run time are equal, the number one (Lead) designated compressor will be the first “On”... - Page 60 System Start-Up 4. Turn the 24 volt control circuit switch 1S70 located in the unit control panel to the “On” position. Note: To prevent the compressors from starting, leave the 115 volt control circuit switch “Off”. 5. Open the Human Interface access door, located in the unit control panel, and press the SERVICE MODE key to display the first service screen.
- Page 61 System Start-Up Table 9 — Evaporator Data for C25 through C60 Units Unit Size Water Volume Minimum Flow Rate Maximum Flow Rate liter liter/s liter/s 37.8 13.6 Figure 21 — Evaporator Water Pressure Drop for CGAF-C20 through C60 Units (English) 45.00 C60 Ton 40.00...
- Page 62 System Start-Up Table 10 — Service Test Guide for Component Operation COMPONENT COMPONENT CONFIGURATION BEING TESTED Condenser Compressor Stage Low Ambient Liquid Line Solution Fans Damper Output Solenoid Valve Pump * COMPRESSOR 20 thru 30 Ton A-Off/B-On K10-Off K11-On A-On/B-Off K10-On K11-Off 40 thru 60 Ton 1A-Off/1B-On K11-Off K3-Off K12-On K4-Off Ckt #1 On...
-
Page 63: Verifying Proper Fan Rotation
System Start-Up Verifying Proper Fan Rotation 1. Close the main power disconnect switch or circuit protector switch that provides the supply power to the unit's circuit breaker (1CB1). 2. Open the Human Interface access door, located in the unit control panel, and press the SERVICE MODE key to display the first service screen. - Page 64 System Start-Up WARNING Hazardous Voltage! Disconnect all electric power, including remote disconnects before servicing. Follow proper lockout/tagout procedures to ensure the power can not be inadvertently energized. Failure to disconnect power before servicing could result in death or serious injury. C.
- Page 65 System Start-Up Figure 22 — Condenser Fan Locations CSRA-SVX02A-EN...
-
Page 66: Compressor Start-Up
System Start-Up Compressor Start-Up 1. Ensure that the main power disconnect switch and the control power cir- cuit breaker for the “System Solution Pump” is “On”. 2. Before closing the main power disconnect switch for the unit, ensure that the compressor discharge service valve and the liquid line service valve for each circuit is back seated. - Page 67 System Start-Up 10.Attach a set of service gauges onto the suction and discharge gauge ports for each circuit. Refer to Figure 23 for the various compressor loca- tions. 11.Once the configuration for the components is complete, press the NEXT key until the LCD displays the “Start test in __Sec.” screen. Press the + key to designate the delay before the test is to start.
-
Page 68: Proper Refrigerant Charge
System Start-Up Verifying Proper Refrigerant Charge 1. Attach a set of service gauges onto the suction line and liquid line gauge ports for each circuit. Refer to Figure 23 for the various compressor loca- tions. 2. Open the Human Interface access door, located in the unit control panel, and press the SERVICE MODE key to display the first service screen. - Page 69 Environmental scientists have found evidence that refrigerant emissions contribute to depletion of ozone in the upper atmosphere and can increase global warming. Trane encourages every effort to eliminate, if possible, or vigorously reduce the emission of CFC, HCFC and HFC refrigerant to the atmosphere that can result from installation, operation, routine maintenance, or major service on this equipment.
- Page 70 System Start-Up Systems operating with superheat in excess of 16 degrees: A. Could cause excessive compressor cycling on internal winding thermostat which leads to compressor motor failure. B. Lowers the efficiency of the evaporator by reducing the heat transfer ca- pability.
- Page 71 System Start-Up Compressor Oil The scroll compressor uses Trane OIL-42 without substitution. The appropriate oil charge for a 9 and 10 Ton scroll compressor is 8.5 pints. For a 14 and 15 Ton scroll compressor, use 13.8 pints. Table 11 — Recommended Refrigerant Capacities...
-
Page 72: Compressor Crankcase Heaters
System Start-Up Figure 24 — Typical Compressor Terminal Block Compressor Crankcase Heaters Each compressor is equipped with a crankcase heater and is controlled by a 600 volt auxiliary switch on the compressor contactor. The proper operation of the crankcase heater is important to maintain an elevated compressor oil temperature during the “Off”... -
Page 73: Final System Setup
System Start-Up 2. Loosen the damper shaft “Locking” set screws on the actuator. 3. Firmly hold the damper blades in the closed position. 4. Tighten the “Locking” set screws. To check damper operation, program the actuator for 100% on circuit #1 and/or circuit #2. - Page 74 System Start-Up Table 12 — Sample Operator’s Maintenance Log Refrigerant Circuit #1 Refrigerant Circuit #2 Current Ambient Compr. Suct. Disch. Liquid Super- Sub- Compr. Suct. Disch. Liquid Super- Sub- Temp. Press. Press. Press. heat cool. Press. Press. Press. heat cool. Date Level (Psig) (Psig) (Psig)
-
Page 75: Service & Maintenance
Anytime a compressor is replaced, the oil for each compressor within the manifolded set must be replaced. The scroll compressor uses Trane OIL-42 without substitution. The appropriate oil charge for a 9 and 10 Ton scroll compressor is 8.5 pints. For a 14 and 15 Ton scroll compressor, use 13.8 pints. - Page 76 Important: Environmental scientists have found evidence that refrigerant emissions contribute to depletion of ozone in the upper atmosphere and can increase global warming. Trane encourages every effort to eliminate, if possible, or vigorously reduce the emission of CFC, HCFC and HFC refrigerant to the atmosphere that can result from installation, operation, routine maintenance, or major service on this equipment.
-
Page 77: Fuse Replacement Data
Service & Maintenance Table 13 — Compressor Circuit Breaker Data Unit Size Number of Compressor Rated Compressor Compressor Must Hold Must Trip Compressors Capacities Voltage (Amps) (Amps) 1, 1 10, 15 17.1, 25.4 117, 178 20.8, 29.5 23.9, 33.9 17.2 18.9 21.7 25.4... -
Page 78: Monthly Maintenance
Service & Maintenance Monthly Maintenance Before completing the following checks, turn all system control circuit switches to the “Off” position. “Open” the main power disconnect switches for the Condensing Unit and all system support equipment. “lock” the disconnect switches in the “Off” position before removing any access panels. - Page 79 Service & Maintenance 2. Protect all electrical devices such as motors and controllers from any over spray. 3. Straighten any bent coil fins with a fin comb. 4. Mix the detergent with water according to the manufacturer's instructions. If desired, heat the solution to 150°F maximum to improve its cleansing capability.
-
Page 80: Annual Maintenance
Environmental scientists have found evidence that refrigerant emissions contribute to depletion of ozone in the upper atmosphere and can increase global warming. Trane encourages every effort to eliminate, if possible, or vigorously reduce the emission of CFC, HCFC and HFC refrigerant to the atmosphere that can result from installation, operation, routine maintenance, or major service on this equipment. - Page 81 Service & Maintenance WARNING Hazardous Voltage! Disconnect all electric power, including remote disconnects before servicing. Follow proper lockout/tagout procedures to ensure the power can not be inadvertently energized. Failure to disconnect power before servicing could result in death or serious injury. [ ] Inspect the expansion valve sensing bulbs for cleanliness.
-
Page 82: Final Process
Service & Maintenance Final Process For future reference, you may find it helpful to record the unit data requested below in the blanks provided. (1) Complete Unit Model Number: (2) Unit Serial Number: (3) Unit “DL” Number (“design special” units only): (4) Wiring Diagram Numbers (from unit control panel): —... - Page 83 La Crosse Aftermarket Business Unit Trane has a policy of continuous product data and product improvement and reserves the right to change 3600 Pammel Creek Road design and specifications without notice. Only qualified technicians should perform the installation and servicing La Crosse, WI 54601 of equipment referred to in this bulletin.
Need help?
Do you have a question about the CSRA025FAF0 and is the answer not in the manual?
Questions and answers