Table of Contents
Advertisement
Quick Links
J9555
Figures not included, sold separately and subject to availability.
Please keep this instruction sheet for future reference,
as it contains important information.
Adult assembly is required.
Requires three "AA" (LR6) alkaline batteries (not included).
Tool required for battery installation: Phillips Screwdriver (not included).
www.rescueheroes.com
for action, excitement and adventure!
Advertisement
Table of Contents

Related Manuals for Fisher-Price RESCUE HEROES J9555


Summary of Contents for Fisher-Price RESCUE HEROES J9555
- Page 1 J9555 Figures not included, sold separately and subject to availability. Please keep this instruction sheet for future reference, as it contains important information. Adult assembly is required. Requires three “AA” (LR6) alkaline batteries (not included). Tool required for battery installation: Phillips Screwdriver (not included). www.rescueheroes.com for action, excitement and adventure!
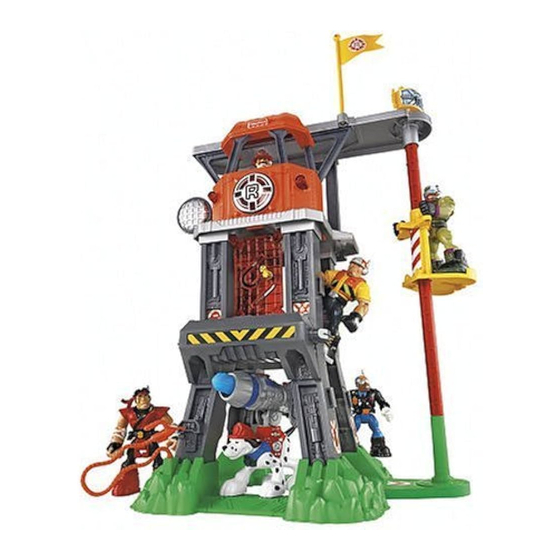
- Page 2 Base Pump Hose Elevator Part not shown: Label Sheet. Fisher-Price, Inc., a subsidiary of Mattel, Inc., East Aurora, NY 14052 U.S.A. PRintED in CHinA ©2006 Mattel, Inc. All Rights Reserved. ® and ™ designate U.S. trademarks of Mattel, Inc. J9555pr-0920...
-
Page 3: Label Decoration
LABEL DECORATION Leg C (Back Side of Map) Leg D Leg B Leg A (Both Sides) Proper label application will help to keep the labels looking their best. • Wash your hands before applying the labels. • Make sure the areas where the labels will be applied are clean and dry. Wipe this product with a clean, soft, dry cloth to remove any dust or oils. -
Page 4: Battery Installation
BUILDING BATTERY THE COMMAND CENTER INSTALLATION ™ Lookout Leg C Leg D Leg B Battery Compartment Door • Locate the battery compartment door on the inside of the lookout. Leg A • Loosen the screw in the battery compartment door with a Phillips screwdriver. - Page 5 BUILDING THE COMMAND CENTER ™ 2nd Floor 3rd Floor Sockets Floor Grooves Front of Base Assembly Long Grooves Tabs • Position the 2nd floor between the legs, so that the long • Position the map so that the long tabs are up right. ledge is toward the front of the base assembly.
- Page 6 Pole Base 3rd Floor Cylinder Slots • Position the lookout with the Fisher-Price logo outward. ® • Insert and “snap” the tabs on the lookout into the slots in the 3rd floor. • Make sure the elevator footpad is upright, as shown.
- Page 7 BUILDING TO THE RESCUE! THE COMMAND CENTER ™ Satellite Dish Satellite Dish Flag Control Panel Microphone Buttons Small Roof Hole Large Hole ® ® • Insert and “snap” the flag into the small hole in the roof. • Fit the satellite dish into the large hole in the roof and onto the square tab on the pole.
-
Page 8: Consumer Information
CARE CONSUMER INfORMATION • To clean, wipe the surface of this toy with a damp cloth. Visit us on-line at www.service.fisher-price.com. Do not immerse this toy. Call our Consumer Relations Department, toll-free at 1-800-432-5437, 9 AM - 7 PM EST Monday through Friday •...
Need help?
Do you have a question about the RESCUE HEROES J9555 and is the answer not in the manual?
Questions and answers