Advertisement
Quick Links
INSTALLATION INSTRUCTIONS
1188577-2-F
©2014 KALLISTA
P21650, P21660, P24452, P24453,
P24454, P24456, P24743, P24745,
P24746, P24761, P24843
1 of 5
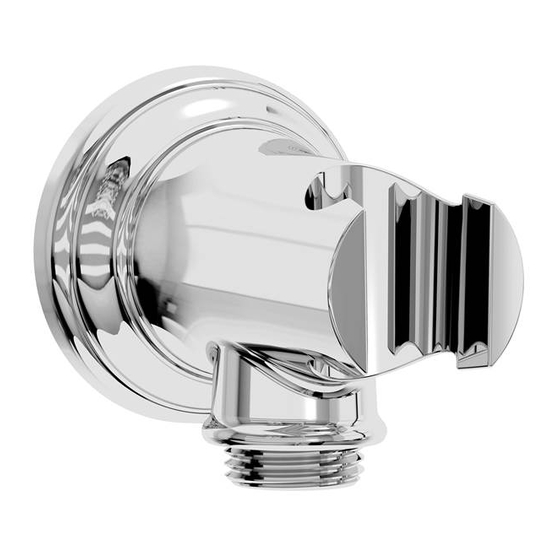
Handshower, Hose
& Handshower Accessories
Questions? Problems? For additional assistance, please contact KALLISTA's Customer
Service Department at 1-888-4-KALLISTA (1-888-452-5547) or kallista.com
Advertisement

Related Manuals for Kallista P21650


Summary of Contents for Kallista P21650
- Page 1 Handshower, Hose & Handshower Accessories INSTALLATION INSTRUCTIONS P21650, P21660, P24452, P24453, P24454, P24456, P24743, P24745, P24746, P24761, P24843 1188577-2-F Questions? Problems? For additional assistance, please contact KALLISTA’s Customer 1 of 5 Service Department at 1-888-4-KALLISTA (1-888-452-5547) or kallista.com ©2014 KALLISTA...
-
Page 2: Before You Begin
Observe all local plumbing and building codes. Shut off the water supply. Inspect the supply piping for damage. Replace as necessary. KALLISTA reserves the right to make revisions in the design of products without notice, as specifi ed in the Price Book. 1188577-2-E Questions? Problems? For additional assistance, please contact KALLISTA’s Customer... -
Page 3: Tools And Materials
Turn on the water and allow water to fl ow through the supply elbow. Check connection for leaks. Repair as needed. 1188577-2-E Questions? Problems? For additional assistance, please contact KALLISTA’s Customer 3 of 5 Service Department at 1-888-4-KALLISTA (1-888-452-5547) or kallista.com... - Page 4 Turn on the water. Check for leaks and smooth operation. Place the handshower in the fi xed wall bracket. 1188577-2-E Questions? Problems? For additional assistance, please contact KALLISTA’s Customer 4 of 5 Service Department at 1-888-4-KALLISTA (1-888-452-5547) or kallista.com...
- Page 5 Tighten the setscrews so they engage with the groove in the hubs. Screw the caps onto the exposed ends of the setscrews. 1188577-2-E Questions? Problems? For additional assistance, please contact KALLISTA’s Customer 5 of 5 Service Department at 1-888-4-KALLISTA (1-888-452-5547) or kallista.com...
- Page 6 Wall Bracket with Integrated Supply Elbow INSTALLATION INSTRUCTIONS P21651 P21652 1230883-2-B Questions? Problems? For additional assistance, please contact KALLISTA’s Customer ©2015 KALLISTA 1 of 3 Service Department at 1-888-4-KALLISTA (1-888-452-5547) or kallista.com.
- Page 7 Shut off the water supply. Inspect the supply piping for damage. Replace as necessary. KALLISTA reserves the right to make revisions in the design of products without notice, as specifi ed in the Price Book. TOOLS AND MATERIALS...
- Page 8 Turn on the water and allow water to fl ow through the bracket to fl ush out debris. Check connection for leaks. Repair as needed. 1230883-2-B Questions? Problems? For additional assistance, please contact KALLISTA’s Customer 3 of 3 Service Department at 1-888-4-KALLISTA (1-888-452-5547) or kallista.com.
- Page 9 Shower Arms INSTALLATION INSTRUCTIONS P21520 P21521 P21522 P21523 1193441-2-A Questions? Problems? For additional assistance, please contact KALLISTA’s Customer 1 of 3 Service Department at 1-888-4-KALLISTA (1-888-452-5547) or FAX 1-888-272-3094.
- Page 10 The appearance of your product may differ from what is shown in these instructions, however, the installation procedure is the same. KALLISTA reserves the right to make revisions in the design of products without notice, as specifi ed in the Price Book.
- Page 11 Check connections for leaks. Repair as needed. Turn off the water. Install the showerhead according to the showerhead manufacturer’s instructions. 1193441-2-A Questions? Problems? For additional assistance, please contact KALLISTA’s Customer 3 of 3 Service Department at 1-888-4-KALLISTA (1-888-452-5547) or FAX 1-888-272-3094.
- Page 12 Shower Arms INSTALLATION INSTRUCTIONS P21520 P21521 P21522 P21523 1193441-2-A Questions? Problems? For additional assistance, please contact KALLISTA’s Customer 1 of 3 Service Department at 1-888-4-KALLISTA (1-888-452-5547) or FAX 1-888-272-3094.
- Page 13 The appearance of your product may differ from what is shown in these instructions, however, the installation procedure is the same. KALLISTA reserves the right to make revisions in the design of products without notice, as specifi ed in the Price Book.
- Page 14 Check connections for leaks. Repair as needed. Turn off the water. Install the showerhead according to the showerhead manufacturer’s instructions. 1193441-2-A Questions? Problems? For additional assistance, please contact KALLISTA’s Customer 3 of 3 Service Department at 1-888-4-KALLISTA (1-888-452-5547) or FAX 1-888-272-3094.
- Page 15 Record your model number below Determine the valve stem adapter Thin Wall: Use the #3 adapter and Standard Wall: Use the #1 adapter Important Information for future reference: length. Refer to the plaster guard. the 13/16” (21 mm) screw. and the 13/16” (21 mm) screw. Observe all local plumbing and building codes.
- Page 16 All Kallista products carry Kallista's five-year limited warranty unless otherwise noted.* Kallista products are warranted to be free of defects in material and workmanship for five years from the date of installation. Kallista will, at its election, repair, replace, or make appropriate adjustment where Kallista inspection discloses any such defects occurring in normal usage within five (5) years after installation.
- Page 17 Installation Guide Three-Way Transfer Valve P29513, P29514 1091987-2-B...
- Page 18 Thank You For Choosing Kallista We appreciate your commitment to KALLISTA quality products. Please take a moment to review this manual before you install your KALLISTA product. If you encounter any installation or performance problems, please do not hesitate to contact us from within the USA or Canada at 1-888-4-KALLISTA (1-888-452-5547).
- Page 19 Before You Begin (cont.) Inspect the waste and supply tubing; replace if necessary. KALLISTA reserves the right to make revisions in the design of products without notice, as specified in the Price Book. Kallista 1091987-2-B...
- Page 20 2. Route and Connect the Water Supply Route the 3/4″ mixed water supply line to the transfer valve location. Apply thread sealant to the inlet port threads and connect the water supply to the transfer valve inlet. 1091987-2-B Kallista...
- Page 21 Install caps on the temporary bath and shower nipples. Turn on the water and check for leaks. Once no leakage is verified, turn off the water. Complete the finished wall. Remove and discard the plaster guard. Install the trim according to the installation instructions packed with the trim. Kallista 1091987-2-B...
- Page 22 Install caps on the temporary bath and shower nipples. Turn on the water and check for leaks. Once no leakage is verified, turn off the water. Complete the finished wall. Remove and discard the plaster guard. Install the trim according to the installation instructions packed with the trim. 1091987-2-B Kallista...
- Page 23 1091987-2-...
- Page 24 USA/Canada: 1-888-4-KALLISTA Fax: 1-888-272-3094 kallista.com ©2012 KALLISTA 1091987-2-B...
- Page 25 3/32" WARNING: Risk of scalding. Record your model number below Using the guard as a handle, turn Remove the plaster guard. Measure dimension “Y” from the High water temperature can for future reference: the water off. finished wall. cause severe burns. Set the water Observe all local plumbing and temperature at or below 120°F building codes.
- Page 26 Questions? Problems? For additional assistance, please contact KALLISTA's Customer Service Department at 1-888-4-KALLISTA (1-888-452-5547) or kallista.com. 1286745-2-A © 2016 KALLISTA...
- Page 27 Thermometer WARNING: Risk of scalding. WARNING: Risk of scalding. CAUTION: Risk of product Observe all local plumbing and This valve meets or exceeds ANSI High water temperature can This valve will not protect damage: Use only silicone building codes. A112.18.1/CSA B125.1/ASSE 1016. cause severe burns.
- Page 28 All Kallista products carry Kallista's five-year limited warranty unless otherwise noted.* Kallista products are warranted to be free of defects in material and workmanship for five years from the date of installation. Kallista will, at its election, repair, replace or make appropriate adjustment where Kallista inspection discloses any such defects occurring in normal usage within five (5) years after installation.
Need help?
Do you have a question about the P21650 and is the answer not in the manual?
Questions and answers