Table of Contents
Advertisement
Available languages
Available languages
Quick Links
Record your model number.
CAUTION: Risk of product
damage.
To avoid plugging the showerhead
spray outlets, use thread sealant tape
on the shower arm threads. Do not use
thread sealant compound (pipe dope).
Slide the wall plate onto the shower
Install the arm. Tighten with a clean
1
2
arm. Apply sealant tape.
strap wrench.
1333673-2-C
CAUTION: Risk of scalding.
IMPORTANT INSTRUCTIONS
KALLISTA low-flow showerheads
Before using your shower, verify your
are designed for use with compatible
new showerhead is compatible with
KALLISTA valves. When installing a
your shower valve (located behind the
low-flow product to an existing
wall) by performing the following steps:
showering system, verify compatibility
• While standing outside the shower,
before showering. Do not use this
turn on the shower valve. Do not step
KALLISTA low-flow product with a
into the shower.
shower valve that allows the water
• Adjust the water to your typical
temperature to become too hot when
showering temperature.
other plumbing products are used.
• Have someone flush the nearest toilet.
• With your hand, carefully check the
water temperature, from the
showerhead while the toilet is refilling.
• If the water becomes significantly
hotter, you will need to either replace
the shower valve with a compatible
KALLISTA valve or return your
showerhead.
Slide the plate against the wall. Run
Apply 100% silicone sealant around
3
4
water to flush debris.
the wall plate. Apply sealant tape to
the arm.
100% Silicone Sealant
Sealant Tape
NOTICE: Choose an automatic
Important Information
compensating valve with the appropriate
Follow all local plumbing and building
minimum flow rating, to assure your
codes.
valve will provide safety at the lowest
Shut off the water supply.
flow rates. For a showerhead with a
maximum flow rate of 1.75 gal/min (6.6
l/min), use with an automatic
compensating valve rated 1.5 gal/min
(5.7 l/min) or less.
Use a clean strap wrench to secure
5
the showerhead to the arm.
Strap Wrench
Advertisement
Table of Contents

Related Manuals for Kallista P21650


Summary of Contents for Kallista P21650
- Page 1 KALLISTA valves. When installing a valve will provide safety at the lowest your shower valve (located behind the Shut off the water supply.
- Page 2 Questions? Problems? For additional assistance, please contact KALLISTA's Customer Service Department at 1-888-4-KALLISTA (1-888-452-5547) or kallista.com. 1333673-2-C © 2019 KALLISTA...
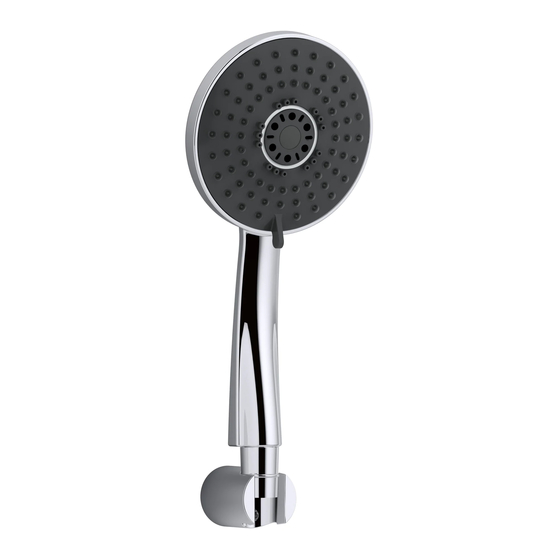
- Page 3 Handshower, Hose & Handshower Accessories INSTALLATION INSTRUCTIONS P21650, P21660, P24452, P24453, P24454, P24456, P24743, P24745, P24746, P24761, P24843 1188577-2-F Questions? Problems? For additional assistance, please contact KALLISTA’s Customer 1 of 5 Service Department at 1-888-4-KALLISTA (1-888-452-5547) or kallista.com ©2014 KALLISTA...
-
Page 4: Before You Begin
Observe all local plumbing and building codes. Shut off the water supply. Inspect the supply piping for damage. Replace as necessary. KALLISTA reserves the right to make revisions in the design of products without notice, as specifi ed in the Price Book. 1188577-2-E Questions? Problems? For additional assistance, please contact KALLISTA’s Customer... -
Page 5: Tools And Materials
Turn on the water and allow water to fl ow through the supply elbow. Check connection for leaks. Repair as needed. 1188577-2-E Questions? Problems? For additional assistance, please contact KALLISTA’s Customer 3 of 5 Service Department at 1-888-4-KALLISTA (1-888-452-5547) or kallista.com... - Page 6 Turn on the water. Check for leaks and smooth operation. Place the handshower in the fi xed wall bracket. 1188577-2-E Questions? Problems? For additional assistance, please contact KALLISTA’s Customer 4 of 5 Service Department at 1-888-4-KALLISTA (1-888-452-5547) or kallista.com...
- Page 7 Tighten the setscrews so they engage with the groove in the hubs. Screw the caps onto the exposed ends of the setscrews. 1188577-2-E Questions? Problems? For additional assistance, please contact KALLISTA’s Customer 5 of 5 Service Department at 1-888-4-KALLISTA (1-888-452-5547) or kallista.com...
- Page 8 Wall Bracket with Integrated Supply Elbow INSTALLATION INSTRUCTIONS P21651 P21652 1230883-2-B Questions? Problems? For additional assistance, please contact KALLISTA’s Customer ©2015 KALLISTA 1 of 3 Service Department at 1-888-4-KALLISTA (1-888-452-5547) or kallista.com.
- Page 9 Shut off the water supply. Inspect the supply piping for damage. Replace as necessary. KALLISTA reserves the right to make revisions in the design of products without notice, as specifi ed in the Price Book. TOOLS AND MATERIALS...
- Page 10 Turn on the water and allow water to fl ow through the bracket to fl ush out debris. Check connection for leaks. Repair as needed. 1230883-2-B Questions? Problems? For additional assistance, please contact KALLISTA’s Customer 3 of 3 Service Department at 1-888-4-KALLISTA (1-888-452-5547) or kallista.com.
- Page 11 P23222-RK, P23222-LV, P24022-CL, P24022-CR, P24022-KL, P24022-RB, P24022-RL, P24122-CR, P24122-LV, P24129-CR, P24129-LV, P24421-CR, P24421-LV, P24422-CR, P24422-LV, P24522-LV, P24522-TT, P24622-CR, P24622-LV, P24722-LV 1048650-2-K Questions? Problems? For additional assistance, please contact KALLISTA’s Customer ©2014 KALLISTA 1 of 6 Service Department at 1-888-4-KALLISTA (1-888-452-5547) or kallista.com.
- Page 12 The appearance of your product may differ from what is shown in these instructions, however, the installation procedure is the same. KALLISTA reserves the right to make revisions in the design of products without notice, as specifi ed in the Price Book.
- Page 13 Set the valve stem adapter over the spline adapter. Do not completely press or screw the valve stem adapter into place until instructed to do so. 1048650-2-K Questions? Problems? For additional assistance, please contact KALLISTA’s Customer 3 of 6 Service Department at 1-888-4-KALLISTA (1-888-452-5547) or kallista.com.
- Page 14 Reinstall the handle assembly and the valve stem adapter. Check the alignment. Repeat until the handle alignment is satisfactory. 1048650-2-K Questions? Problems? For additional assistance, please contact KALLISTA’s Customer 4 of 6 Service Department at 1-888-4-KALLISTA (1-888-452-5547) or kallista.com.
-
Page 15: Install The Front Plate
Visually inspect the front plate assembly to ensure the foam seal is completely covering the wall opening. If not, stop the installation and repair the wall opening. 1048650-2-K Questions? Problems? For additional assistance, please contact KALLISTA’s Customer 5 of 6 Service Department at 1-888-4-KALLISTA (1-888-452-5547) or kallista.com. - Page 16 Tighten the setscrew with a hex wrench. Make sure the handle assembly is tight against the escutcheon. 1048650-2-K Questions? Problems? For additional assistance, please contact KALLISTA’s Customer 6 of 6 Service Department at 1-888-4-KALLISTA (1-888-452-5547) or kallista.com.
- Page 17 Installation Guide Thermostatic Mixing Valves P29511, P29512 Français, page “Français-1” Español, página “Español-1” 1170591-2-A...
- Page 18 If you do not understand any of the temperature adjustment instructions in this document, in the United States please contact our Customer Care Center at 1-888-4-KALLISTA. Outside the U.S., please contact your distributor. IMPORTANT NOTICE: Please fill in the blanks on the valve label.
- Page 19 Do not sweat or braze directly to the valve body. Do not apply excessive heat to the valve body when you make solder connections. Do not apply flux or acids directly to the valve, as damage to the seals, plastic components, and trim finish may result. Kallista 1170591-2-A...
- Page 20 (170 liters) of hot water in 8 minutes. Choose a water heater large enough for your installation. The valve is calibrated to 104°F (40°C) at the first stop position. The maximum temperature limit stop is positioned so the outlet water temperature does not exceed 120°F (49°C). 1170591-2-A Kallista...
- Page 21 This valve complies with ASME A112.18.1, ASSE 1016, and CSA B125. The valve is listed with ASSE, CSA, and IAPMO/UPC. If possible, flush all piping thoroughly before installing the valves to prevent early clogging of filter screens. Kallista 1170591-2-A...
- Page 22 (37 mm) (113 mm) 1-3/4" (44 mm) Stop 3/4" NPT Bath Outlet 3-3/4" (95 mm) 1/2" 2-7/16" (13 mm) (62 mm) Finished Wall Finished Wall 3-1/2" (89 mm) 1-3/16" (30 mm) 4-5/8" (117 mm) P29512 - 3/4″ Valve Roughing-In 1170591-2-A Kallista...
- Page 23 3-7/8" (52 mm) (37 mm) (98 mm) 1-3/4" (44 mm) Stop 3-3/4" (95 mm) Finished 1/2" Wall 2-7/16" (13 mm) (62 mm) Finished Wall 3-1/2" (89 mm) 1-3/16" (30 mm) 4-5/8" (117 mm) P29511 - 1/2″ Valve Roughing-In Kallista 1170591-2-A...
- Page 24 This will also provide support for the valve. NOTE: When installing the P29511 valve, use 1/2″ nominal copper tubing and fittings throughout this installation. Smaller diameter piping upstream or downstream of the valve will reduce performance of the valve. 1170591-2-A Kallista...
- Page 25 finished wall is too thick. Refer to the diagram above. Install water hammer arrestors in the hot and cold water supply lines. Determine the desired location for the valve according to the roughing-in information, and construct suitable stud and support framing. Kallista 1170591-2-A...
-
Page 26: Install The Valve
Flush the hot and cold water supply lines to remove any debris. Use thread sealant and connect the hot and cold water supply lines to the valve inlet ports. Ensure that the corresponding water supply lines are connected to the correct inlet ports. 1170591-2-A Kallista... - Page 27 1, 2, and 3 of the plaster guard. Turn on the water supply lines to the valves. Run the water through the mixing valve, all showers, and the spout. Remove the plaster guard to access and inspect the valve. Kallista 1170591-2-A...
- Page 28 Turn the volume control valve stem (not shown) fully clockwise to release the pressure. Slowly loosen the head nut, turning it counterclockwise. This will begin to draw the cartridge out of the valve body. 1170591-2-A Kallista...
- Page 29 Hand tighten the head nut onto the valve body. Do not overtighten. Return the integral supply stops back to their original position. Make note of reversed inlet supplies on valve for future servicing. Kallista 1170591-2-A...
- Page 30 Turn the trim handle or plaster guard clockwise until you hear a click. Do not turn any further. This is the shower temperature position. Remove the trim handle or plaster guard from the valve spline adapter. Position a thermometer in the water stream to check the shower temperature. 1170591-2-A Kallista...
- Page 31 If the water temperature is less than 104°F (40°C) to 105°F (41°C) or is more than desired, proceed to the ″Adjust the Shower Temperature″ section. If both settings are correct, fill out the ″Notice to Homeowners″ section of this Homeowners Guide. Kallista 1170591-2-A...
- Page 32 NOTE: Keep the detent collar off while making adjustments. Turn the valve stem fully counterclockwise. Using the volume control valve (not shown), turn on the water. Allow the water to flow for several minutes until the water temperature stabilizes. 1170591-2-A Kallista...
- Page 33 Turn the valve stem clockwise until the water temperature reaches 120°F (49°C). Reinstall the spline adapter with the adapter tab positioned flush with the hot temperature limit stop on the cartridge. Using the volume control valve (not shown), turn off the water. Kallista 1170591-2-A...
- Page 34 Hold a thermometer in the water stream to check the water temperature. Once the water the temperature reaches the set hot temperature limit (section ″Adjust the Hot Temperature Limit″) begin slowly rotating the the detent collar and spline adapter clockwise. 1170591-2-A Kallista...
-
Page 35: Troubleshooting
F. Service stops are not fully opened. Rotate both service stops clockwise until fully open. G. Check thermostatic performance; replace the thermostatic cartridge, if necessary. No flow from shower control A. Filter screens are blocked. Clear water outlet. filter screens. Kallista 1170591-2-A... - Page 36 B. If leaking from around the temperature spindle, replace the thermostatic cartridge. Flow knob or temperature A. Impaired free movement of knob is stiff to operate. internal components. Replace the appropriate cartridge. B. Supply pressures are too high. Fit pressure reducing valve. 1170591-2-A Kallista...
-
Page 37: Guide D'installation
S’il ne vous est pas possible de comprendre les instructions de réglage de température dans ce document, veuillez contacter notre département du service clientèle aux États-Unis 1-888-4-KALLISTA. Hors des États-Unis, veuillez contacter votre distributeur. AVIS IMPORTANT: Prière de remplir les espaces vides sur l’étiquette de la valve. -
Page 38: Avant De Commencer
La température de l’eau ne devrait jamais être supérieure à 120°F (49°C). ATTENTION: Risque de brûlures. Ce dispositif a été calibré en usine pour assurer une température maximale sécurisée. Toute variation des réglages ou conditions d’alimentation 1170591-2-A Français-2 Kallista... - Page 39 Les mitigeurs thermostatiques P29511 et P29512 ne contiennent pas de contrôle de volume/de robinet de sectionnement intégrés. Un contrôle de volume séparé/un robinet de sectionnement distincts (P29527 ou P29528) devront être installés en aval de toute sortie de valve utilisée. Kallista Français-3 1170591-2-A...
- Page 40 Cette valve est conforme aux exigences des normes ASME A112.18.1, ASSE 1016 et CSA B125. Ce robinet est enregistré selon ASSE, CSA et IAPMO/UPC. Si possible, bien purger toute la tuyauterie avant d’installer les valves afin d’éviter tout blocage des crépines. 1170591-2-A Français-4 Kallista...
- Page 41 Sortie de la Arrêt baignoire 3/4" NPT 3-3/4" (95 mm) 1/2" 2-7/16" (13 mm) (62 mm) Mur fini min. Mur fini max. 3-1/2" (89 mm) 1-3/16" (30 mm) 4-5/8" (117 mm) P29512 - Raccordement de valve 3/4″ Kallista Français-5 1170591-2-A...
- Page 42 (37 mm) (98 mm) 1-3/4" (44 mm) Arrêt 3-3/4" (95 mm) Mur fini 1/2" max. 2-7/16" (13 mm) (62 mm) Mur fini min. 3-1/2" (89 mm) 1-3/16" (30 mm) 4-5/8" (117 mm) P29511 - Raccordement de valve 1/2″ 1170591-2-A Français-6 Kallista...
- Page 43 REMARQUE: Lors de l’installation de la valve P29511, utiliser des raccords et tuyaux en cuivre de 1/2″ nominaux dans cette installation. Une tuyauterie de petit diamètre en amont et en aval de la valve réduira le rendement du robinet. Kallista Français-7 1170591-2-A...
- Page 44 fini est trop épais. Se référer au diagramme ci-dessus. Installer un antibélier dans les conduites d’alimentation d’eau chaude et froide. Déterminer l’emplacement souhaité pour la valve selon le plan de raccordement, et construire un cadre de support et de montants adéquat. 1170591-2-A Français-8 Kallista...
- Page 45 PTFE ou du liquide. Les matériaux de scellage à base d’huile ne devraient pas être utilisés. REMARQUE: Un renfort en plâtre est fixé à la surface du mitigeur. Ne pas le retirer avant d’en être instruit. Kallista Français-9 1170591-2-A...
- Page 46 MIN-MAX sur les adaptateurs de garniture 1, 2 et 3 du renfort en plâtre. Ouvrir les lignes d’alimentation d’eau aux valves. Faire couler l’eau à travers le mitigeur, toutes les douches, et le bec. Retirer le renfort de plâtre pour accéder et inspecter la valve. 1170591-2-A Français-10 Kallista...
- Page 47 Si la valve est déjà installée et pressurisée: Tourner les deux arrêts d’alimentation intégrale de 90° dans le sens contraire des aiguilles d’une montre, jusqu’à ce qu’ils entrent en contact avec le support d’arrêt. Kallista Français-11 1170591-2-A...
- Page 48 Serrer à la main l’écrou de tête sur le corps de valve. Ne pas trop serrer. Remettre les arrêts d’alimentation intégrale en position originale. Noter les alimentations d’entrée inversées pour les entretiens futurs. 1170591-2-A Français-12 Kallista...
- Page 49 Tourner la poignée de garniture ou le renfort de plâtre vers la droite jusqu’à entendre un clic. Ne pas tourner plus. Ceci est la position de température de douche. Retirer la poignée de garniture ou le renfort de plâtre de l’adaptateur à cannelures de la valve. Kallista Français-13 1170591-2-A...
- Page 50 104°F (40°C) à 105°F (41°C) ou si elle est supérieure à la température souhaitée, aller à la section ″Réglage de la température de douche″. Si les deux réglages sont corrects, remplir la section ″Avis aux propriétaires″ de ce guide du propriétaire. 1170591-2-A Français-14 Kallista...
- Page 51 Tourner la tige de la valve complètement vers la gauche. Utiliser le robinet de contrôle de volume (non illustré) pour ouvrir l’alimentation d’eau. Laisser couler l’eau pendant plusieurs minutes jusqu’à ce que la température de l’eau se stabilise. Kallista Français-15 1170591-2-A...
- Page 52 Réinstaller l’adaptateur à cannelures avec la patte de l’adaptateur placée à ras de la butée de fin de course de température chaude sur la cartouche. Utiliser le robinet de contrôle de volume (non illustré) pour couper l’alimentation d’eau. 1170591-2-A Français-16 Kallista...
- Page 53 Utiliser le robinet de contrôle de volume (non illustré) pour ouvrir l’alimentation d’eau. Laisser couler l’eau pendant plusieurs minutes jusqu’à ce que la température de l’eau se stabilise. Placer un thermomètre dans le courant d’eau pour vérifier la température de l’eau. Kallista Français-17 1170591-2-A...
-
Page 54: Dépannage
B. Inspecter les grilles du filtre de toute obstruction. Dégager si nécessaire. C. S’assurer que le débit minimum soit suffisant pour des conditions d’alimentation. D. S’assurer que les pressions dynamiques d’entrée soient normalement balancées et suffisantes. 1170591-2-A Français-18 Kallista... - Page 55 Remplacer la valve clapet. alimentation chaude. La température maximale de A. Indique un réglage de mélange est trop chaude ou température maximum incorrect; se référer à la section ″Régler la trop froide. limite de température chaude″. Kallista Français-19 1170591-2-A...
- Page 56 Le bouton de débit ou de A. Mouvement libre altéré des température est rigide pour composants internes. Remplacer la opérer. cartouche appropriée. B. Les pressions d’alimentation sont trop élevées. Ajuster la valve de réduction de pression. 1170591-2-A Français-20 Kallista...
-
Page 57: Guía De Instalación
Si no comprende las instrucciones de ajuste de temperatura contenidas en este documento, llame a nuestro Departamento de Atención al Cliente, al 1-888-4-KALLISTA. Fuera de los Estados Unidos, comuníquese con su distribuidor. AVISO IMPORTANTE: Por favor, llene la información en la etiqueta de la válvula. -
Page 58: Antes De Comenzar
La temperatura del agua nunca debe ajustarse a más de 120°F (49°C). PRECAUCIÓN: Riesgo de quemaduras. Este aparato se ha calibrado en la fábrica para asegurar una temperatura máxima del agua que no presente riesgos. Cualquier 1170591-2-A Español-2 Kallista... - Page 59 Las válvulas mezcladoras termostáticas P29511 y P29512 no tienen una válvula integral de control de caudal o llave de paso. Usted debe instalar una llave de paso/control de caudal separada (P29527 ó P29528), aguas abajo de toda salida de válvula que se utilice. Kallista Español-3 1170591-2-A...
- Page 60 CSA B125. La válvula se encuentra en las listas de la ASSE, CSA, y IAPMO/UPC. De ser posible, haga circular agua por todas las tuberías antes de instalar las válvulas para evitar que las rejillas de filtro se obstruyan. 1170591-2-A Español-4 Kallista...
- Page 61 3/4" NPT 3-3/4" (95 mm) 1/2" 2-7/16" (13 mm) (62 mm) Pared acabada mín Pared acabada máx 3-1/2" (89 mm) 1-3/16" (30 mm) 4-5/8" (117 mm) Diagrama de instalación de la válvula de 3/4″ - P29512 Kallista Español-5 1170591-2-A...
- Page 62 Llave de paso Pared 3-3/4" (95 mm) acabada 1/2" máx 2-7/16" (13 mm) (62 mm) Pared acabada mín 3-1/2" (89 mm) 1-3/16" (30 mm) 4-5/8" (117 mm) Diagrama de instalación de la válvula de 1/2″ - P29511 1170591-2-A Español-6 Kallista...
- Page 63 NOTA: Al instalar la válvula P29511, utilice tuberías de cobre y conexiones de 1/2″ nominal en toda la instalación. Las tuberías de menor diámetro tanto aguas arriba como aguas abajo de la válvula reducirán el rendimiento de la válvula. Kallista Español-7 1170591-2-A...
- Page 64 Instale amortiguadores de golpe de ariete en las líneas de suministro del agua fría y caliente. Determine la ubicación deseada de la válvula conforme al diagrama de instalación, y construya una estructura adecuada de postes y soportes. 1170591-2-A Español-8 Kallista...
- Page 65 NOTA: El protector de yeso está instalado en el frente de la válvula mezcladora. No lo retire hasta que se le indique. Haga circular agua por las líneas del agua fría y caliente para eliminar las partículas que pueda haber. Kallista Español-9 1170591-2-A...
- Page 66 Abra el suministro de agua a las válvulas. Deje correr agua a través de la válvula mezcladora, todas las duchas y el surtidor. Quite el protector de yeso para tener acceso y revisar la válvula. 1170591-2-A Español-10 Kallista...
- Page 67 Con la válvula ya instalada y presurizada: Gire ambas llaves de paso integrales de 90° hacia la izquierda hasta que hagan contacto con el soporte de la llave de paso. Kallista Español-11 1170591-2-A...
- Page 68 Apriete con la mano la tuerca de sujeción sobre el cuerpo de la válvula. No apriete demasiado. Vuelva a colocar las llaves de paso integrales en su posición original. Indique en la válvula los suministros de entrada invertidos para el servicio futuro. 1170591-2-A Español-12 Kallista...
- Page 69 Gire la manija decorativa o el protector de yeso hacia la derecha hasta que escuche un clic. No gire más. Esta es la posición de temperatura de la ducha. Quite la manija decorativa o el protector de yeso del adaptador de ranuras de la válvula. Kallista Español-13 1170591-2-A...
- Page 70 Si la temperatura del agua es menor de 104°F (40°C) a 105°F (41°C), o es mayor que la temperatura deseada, continúe en la sección ″Ajuste la temperatura de la ducha″. Si las temperaturas son correctas, llene la sección ″Aviso al usuario″ de esta Guía del usuario. 1170591-2-A Español-14 Kallista...
- Page 71 NOTA: Mientras realiza los ajustes, no tenga instalado el collarín de retención. Gire la espiga de válvula completamente a la izquierda. Abra el agua utilizando la válvula de control de caudal (no se ilustra). Deje correr el agua durante varios minutos hasta estabilizar la temperatura del agua. Kallista Español-15 1170591-2-A...
- Page 72 Vuelva a instalar el adaptador de ranuras con la lengüeta del adaptador al ras con el tope del límite de temperatura caliente en el cartucho. Cierre el agua utilizando la válvula de control de caudal (no se ilustra). 1170591-2-A Español-16 Kallista...
- Page 73 Abra el agua utilizando la válvula de control de caudal (no se ilustra). Deje correr el agua durante varios minutos hasta estabilizar la temperatura del agua. Sostenga un termómetro en el chorro de agua para verificar la temperatura del agua. Kallista Español-17 1170591-2-A...
-
Page 74: Resolución De Problemas
filtro de rejilla. Limpie de ser necesario. C. Asegúrese de que el caudal mínimo sea suficiente para las condiciones del suministro. D. Asegúrese de que las presiones dinámicas de entrada estén reguladas nominalmente y sean suficientes. 1170591-2-A Español-18 Kallista... - Page 75 La temperatura máxima de la A. Indica un ajuste incorrecto para mezcla es muy alta o muy la temperatura máxima; consulte la sección ″Ajuste el límite de la baja. temperatura caliente″. B. Consulte el síntoma 4. Kallista Español-19 1170591-2-A...
- Page 76 La perilla de flujo o la perilla A. Los componentes internos no se de temperatura no se mueven mueven libremente. Reemplace el fácilmente. cartucho correspondiente. B. Las presiones de suministro están muy altas. Instale una válvula de reducción de presión. 1170591-2-A Español-20 Kallista...
- Page 77 1170591-2-...
- Page 78 1170591-2-...
- Page 79 1170591-2-...
- Page 80 USA/Canada: 1-888-4-KALLISTA Fax: 1-888-272-3094 kallista.com ©2011 KALLISTA 1170591-2-A...
- Page 81 Volume Control Valve Trim INSTALLATION INSTRUCTIONS P23013-CR, P23013-LV, P23123-LV, P23223-RK, P23223-LV, P24113-CR, P24113-LV, P24118-CR, P24118-LV, P24423-CR, P24423-LV, P24523-TT, P24623-CR, P24623-LV, P24723-LV 1072177-2-G Questions? Problems? For additional assistance, please contact KALLISTA’s Customer ©2014 KALLISTA 1 of 6 Service Department at 1-888-4-KALLISTA (1-888-452-5547) or kallista.com.
-
Page 82: Before You Begin
The appearance of your product may differ from what is shown in these instructions, however, the installation procedure is the same. KALLISTA reserves the right to make revisions in the design of products without notice, as specifi ed in the Price Book. - Page 83 Set the valve stem adapter over the spline adapter. Do not completely press or screw the valve stem adapter into place until instructed to do so. 1072177-2-G Questions? Problems? For additional assistance, please contact KALLISTA’s Customer 3 of 6 Service Department at 1-888-4-KALLISTA (1-888-452-5547) or kallista.com.
- Page 84 Reinstall the handle assembly and the valve stem adapter. Check the alignment. Repeat until the handle alignment is satisfactory. 1072177-2-G Questions? Problems? For additional assistance, please contact KALLISTA’s Customer 4 of 6 Service Department at 1-888-4-KALLISTA (1-888-452-5547) or kallista.com.
-
Page 85: Install The Front Plate
Visually inspect the front plate assembly to ensure the foam seal is completely covering the wall opening. If not, stop the installation and repair the wall opening. 1072177-2-G Questions? Problems? For additional assistance, please contact KALLISTA’s Customer 5 of 6 Service Department at 1-888-4-KALLISTA (1-888-452-5547) or kallista.com. - Page 86 Tighten the setscrew with a hex wrench. Make sure the handle assembly is tight against the escutcheon. 1072177-2-G Questions? Problems? For additional assistance, please contact KALLISTA’s Customer 6 of 6 Service Department at 1-888-4-KALLISTA (1-888-452-5547) or kallista.com.
- Page 87 Homeowners Guide Volume Control Valve P29524, P29526 Français, page “Français-1” Español, página “Español-1” 1072185-5-A...
-
Page 88: Five-Year Limited Warranty
Thank you for choosing Kallista. Your Kallista product combines exceptional performance with timeless classic elegance that will satisfy you for years to come. The dependability and beauty of your Kallista product will surpass your highest expectations. Please take a few minutes to study this Homeowners Guide. Pay special attention to the care and cleaning and warranty information. - Page 89 (1/2") 77006** 1045321 (3/4") Valve **Finish/color code must be speci ed when ordering. Service Parts Kallista 1072185-5-A...
-
Page 90: Guide Du Propriétaire
à partir de la date de l’installation. Kallista jugera à sa discrétion, de la réparation, du remplacement ou du réglage approprié et ceci après toute inspection faite par Kallista de tous défauts dûs à une utilisation normale et ceci pendant cinq (5) ans à... - Page 91 Cette garantie vous donne des droits légaux spéci ques. Vous pouvez également avoir d’autres droits qui varient d’un état/province. Ceci constitue la garantie écrite exclusive de Kallista. Kallista a ç 1072185-5-A...
- Page 92 (1/2") 77006** 1045321 (3/4") Valve **Vous devez spéci er les codes de la nition et/ou de la couleur quand vous passez votre commande. Pièces de rechange 1072185-5-A Français-3 Kallista...
- Page 93 Garantía limitada de cinco años Todos los productos Kallista tienen una garantía de cinco años de Kallista, a menos que se indique lo contrario.* Se garantiza que los productos Kallista están libres de defectos de material y mano de obra por cinco años a partir de la fecha de...
- Page 94 La presente garantía le otorga ciertos derechos legales especí cos. Además, es posible que usted cuente con otros derechos que pueden variar de un estado/provincia a otro. Ésta es la garantía exclusiva por escrito de Kallista. 1072185-5-A ñ Kallista...
- Page 95 (1/2") 77006** 1045321 (3/4") Válvula **Se debe especi car el código del acabado/color con el pedido. Piezas de repuesto Kallista Español-4 1072185-5-A...
- Page 96 1072185-5-A Kallista...
- Page 97 Kallista 1072185-5-A...
- Page 98 USA/Canada: 1-888-4-KALLISTA Fax: 1-888-272-3094 kallista.com ©2007 KALLISTA 1072185-5-A...
-
Page 99: Installation Instructions
TurnSpray™ Bodyspray INSTALLATION INSTRUCTIONS P22076 P22078 1118174_2_B Questions? Problems? For additional assistance, please contact Kallista’s Customer 1 of 4 Service Department at 1-888-4KALLISTA (1-888-452-5547) or FAX 1-888-272-3094. -
Page 100: Before You Begin
The appearance of your product may differ from what is shown in these instructions, however, the ‰ installation procedure is the same. Kallista reserves the right to make revisions in the design of products without notice, as specified in the ‰ Price Book. - Page 101 Run water through the system to flush out dirt and debris. ‰ Apply sealant tape around the exposed threads of the pipe nipple. ‰ 1118174_2_B Questions? Problems? For additional assistance, please contact Kallista’s Customer 3 of 4 Service Department at 1-888-4KALLISTA (1-888-452-5547) or FAX 1-888-272-3094.
- Page 102 Turn the escutcheon until it is snug against the finished wall. A strap wrench can be used, if desired. ‰ 1118174_2_B Questions? Problems? For additional assistance, please contact Kallista’s Customer 4 of 4 Service Department at 1-888-4KALLISTA (1-888-452-5547) or FAX 1-888-272-3094.
- Page 103 3-way Transfer Valve Trim INSTALLATION INSTRUCTIONS P23083-CR, P23083-LV, P23183-LV, P23283-RK, P23283-LV, P24183-CR, P24183-LV, P24184-CR, P24184-LV, P24483-CR, P24483-LV, P24583-TT, P24683-CR, P24683-LV, P24724-LV 1091608-2-G Questions? Problems? For additional assistance, please contact KALLISTA’s Customer ©2014 KALLISTA 1 of 6 Service Department at 1-888-4-KALLISTA (1-888-452-5547) or kallista.com.
- Page 104 The appearance of your product may differ from what is shown in these instructions, however, the installation procedure is the same. KALLISTA reserves the right to make revisions in the design of products without notice, as specifi ed in the Price Book.
- Page 105 Set the valve stem adapter over the spline adapter. Do not completely press or screw the valve stem adapter into place until instructed to do so. 1091608-2-G Questions? Problems? For additional assistance, please contact KALLISTA’s Customer 3 of 6 Service Department at 1-888-4-KALLISTA (1-888-452-5547) or kallista.com.
- Page 106 Reinstall the handle assembly and the valve stem adapter. Check the alignment. Repeat until the handle alignment is satisfactory. 1091608-2-G Questions? Problems? For additional assistance, please contact KALLISTA’s Customer 4 of 6 Service Department at 1-888-4-KALLISTA (1-888-452-5547) or kallista.com.
- Page 107 Visually inspect the front plate assembly to ensure the foam seal is completely covering the wall opening. If not, stop the installation and repair the wall opening. 1091608-2-G Questions? Problems? For additional assistance, please contact KALLISTA’s Customer 5 of 6 Service Department at 1-888-4-KALLISTA (1-888-452-5547) or kallista.com.
- Page 108 Tighten the setscrew with a hex wrench. Make sure the handle assembly is tight against the escutcheon. 1091608-2-G Questions? Problems? For additional assistance, please contact KALLISTA’s Customer 6 of 6 Service Department at 1-888-4-KALLISTA (1-888-452-5547) or kallista.com.
- Page 109 Installation Guide Three-Way Transfer Valve P29513, P29514 1091987-2-B...
- Page 110 Thank You For Choosing Kallista We appreciate your commitment to KALLISTA quality products. Please take a moment to review this manual before you install your KALLISTA product. If you encounter any installation or performance problems, please do not hesitate to contact us from within the USA or Canada at 1-888-4-KALLISTA (1-888-452-5547).
- Page 111 Before You Begin (cont.) Inspect the waste and supply tubing; replace if necessary. KALLISTA reserves the right to make revisions in the design of products without notice, as specified in the Price Book. Kallista 1091987-2-B...
-
Page 112: Prepare The Site
2. Route and Connect the Water Supply Route the 3/4″ mixed water supply line to the transfer valve location. Apply thread sealant to the inlet port threads and connect the water supply to the transfer valve inlet. 1091987-2-B Kallista... - Page 113 Install caps on the temporary bath and shower nipples. Turn on the water and check for leaks. Once no leakage is verified, turn off the water. Complete the finished wall. Remove and discard the plaster guard. Install the trim according to the installation instructions packed with the trim. Kallista 1091987-2-B...
- Page 114 Install caps on the temporary bath and shower nipples. Turn on the water and check for leaks. Once no leakage is verified, turn off the water. Complete the finished wall. Remove and discard the plaster guard. Install the trim according to the installation instructions packed with the trim. 1091987-2-B Kallista...
- Page 115 1091987-2-...
- Page 116 USA/Canada: 1-888-4-KALLISTA Fax: 1-888-272-3094 kallista.com ©2012 KALLISTA 1091987-2-B...
Need help?
Do you have a question about the P21650 and is the answer not in the manual?
Questions and answers