Advertisement
Quick Links
User Manual
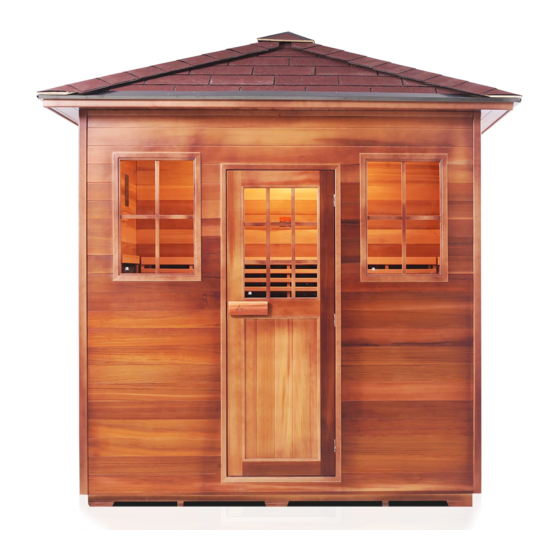
MoonLight - 5
SunRise - 5
Thank you for choosing our SaunaTerra Series!
The Dry Traditional Sauna
Congratulations on the purchase of your brand new dry traditional sauna. Please
carefully review and read through this material. Keep this manual and your
proof of purchase for future reference and service calls.
Advertisement

Related Manuals for Enlighten Sauna SaunaTerra Series


Summary of Contents for Enlighten Sauna SaunaTerra Series
- Page 1 User Manual MoonLight - 5 SunRise - 5 Thank you for choosing our SaunaTerra Series! The Dry Traditional Sauna Congratulations on the purchase of your brand new dry traditional sauna. Please carefully review and read through this material. Keep this manual and your...
- Page 2 We are so delighted that you have decided to take control of your life and invest in the most important thing – your health. Happy Detox! Enlighten Sauna Team What You Need to Prepare Before Installing the Sauna 1. Choose the right Outdoor space and clear it out for the sauna.
-
Page 3: Power Plugs
Electrical Components/Requirements Please Read Carefully! Each sauna will require a dedicated circuit when plugged into an outlet according to the chart below. A “dedicated circuit” requires that no other appliance should share the outlet/circuit with the sauna. Failure to comply with this requirement may cause an electrical interruption and/or a diminished performance. - Page 4 Installation requirements for your sauna are as follows: 1. Your Enlighten sauna is a self-contained and freestanding unit. It should not be built into any structure without prior authorization. 2. Any modifications made to the sauna can waive the warranty, please get authorization before proceeding.
- Page 5 1. Prepare before the installation and use similar sealant to prevent any leaks from happening: 2. Apply sealant on the sides (as shown on the images) as well as on the bottom and top of walls.
-
Page 6: Cleaning And Maintenance
Cleaning and Maintenance 1. Before using your sauna for the first time, clean the inside of the sauna with a clean damp cloth. 2. Make sure to always keep the sauna dry and clean. 3. Use a clean damp towel. DO NOT use a towel that is too wet and can drip water inside the sauna and DO NOT use cleaning agents inside the sauna. - Page 7 Sauna Installation Instructions Please read the following directions carefully The sauna installation requires a minimum of 2 people, 5 person model sizes require at least 3 people to install. You should not try to install the sauna on your own as damage may easily occur. Please read the instructions thoroughly before and during assembly to ensure proper installation of the unit.
- Page 8 Packaging CONTENTS OF BOXES 1. Floor Panel. 2. Ceiling Panel 3. Accessories 4. Left Side Wall 5. Right Side Wall 6. Front Wall 7. Back Wall 8. Bench and Bench Support 9. Harvia Electric Heater, BC-45E 10. Outdoor Roof ( SLOPE OR PEAK) Location of Sauna &...
- Page 9 Sauna Assembly: Connecting the Panels. Panel Locking Systems Each sauna offers two types of panel-locking systems to connect the different sides of the sauna. Please use the instructions below as a reference guide on how to connect the sauna panels. Inner-Locking System: The inner-locking system is designed to be completely invisible when the sauna is installed.
- Page 10 Latch System: The Latch Locking System is two brackets that lock together bypassing the main loop over the opposite side and locking latch (Figure G-3). Figure G-3: Latch Locking System Where to Start: Lay the boxes flat on the ground and open them carefully. The accessories and smaller parts are located in the box that includes the top and bottom panels (Figure G-4).
- Page 11 Sauna Assembly: Connecting the Panels Steps. Step 1. Begin with the FLOOR PANEL Placement Place the floor panel flat on the desired location. Make sure to leave a space around the sidewalls for one person to stand and install the side panels (Figure C-1). You can slide the sauna once it’s complete next to a wall.
- Page 12 Step 2. REAR PANEL Placement Place the rear panel on the back end of the floor panel. At this point, someone should hold the rear panel until the next connection is made. Step 3. LEFT PANEL Placement Install the left panel (the left panel has 2-4 sockets on the lower end) as the image below. Make sure the top of both panels is flat and leveled.
- Page 13 Sauna Assembly: Install HARVIA Heater BEFORE Installing the Bench and Other Panels. Step 6. Heater Installation. These instructions for installation and use are intended for the owner or the person in charge of the sauna, as well as for the electrician in charge of the electrical installation of the heater. After completing the installation, the person in charge of the installation should give these instructions to the owner of the sauna or to the person in charge of its operation.
- Page 14 For the installation of Harvia heater, please refer to these steps: Step 1. When you step into the unit, you place the heater on the left side wall towards the front wall. Step 2. There are three wires coming out of the floor on the left-hand side. Step 3.
- Page 15 Instructions For Harvia Heater Use Piling of the Sauna Stones The piling of the sauna stones has a great effect on the functioning of the heater (figure 1). Important information on sauna stones: The stones are provided with the sauna, but if you choose to buy additional stones, please see below: ●...
- Page 16 Maintenance of the Stones Due to large variation in temperature, the sauna stones disintegrate in use. Rearrange the stones at least once a year or even more often if the sauna is in frequent use. At the same time, remove any pieces of stones from the bottom of the heater and replace any disintegrated stones with new ones.
- Page 17 Step 7. BENCH Placement Some saunas will include square bench support. Place it in front of the windows (Figure C-3). Figure C-3: Bench Support...
- Page 18 Step 1. Place the bench stand panels by lining up its side with the vertical guides on the rear panel. After placing the bench stand panel, connect the heaters’ plugs. Step 2. Slide the benchtop panel over the horizontal guide on the side panels. Make sure the smooth and finished side is facing up and forward (Figure C-4) Step 3.
- Page 19 Step 8. FRONT PANEL Placement: (Note: Install the door handle before installing the front panel.) Connect the front panel to both side panels as in the image below (Figure C-5). Refer to “Connecting the Panels” section on how to lock the panels together. Tips: Make sure to align the corners of the two side panels and the edges of the front panel.
- Page 20 Step 9. TOP PANEL Placement: Step 1. Raise the top panel over the sauna body. Insert the wires for the control panel, temperature sensor, and heaters through the openings in the ceiling. Step 2. Connect the control panel wire (white ribbon) and the heat sensor (2-pin wire) on top of the sauna.
- Page 21 If you bought an Indoor Version, the Top Panel is your Indoor Roof. Skip OUTDOOR ROOF ASSEMBLY INSTRUCTIONS. If you bought an Outdoor Version, please proceed with the OUTDOOR ROOF ASSEMBLY INSTRUCTIONS. OUTDOOR ROOF ASSEMBLY INSTRUCTIONS Step 10. Roof Placement. PEAK ROOF Main Support Place the roof bottom section on top of the sauna and screw the center support beam (Figure D-1).
- Page 22 Roofing Shingles Support Install the roofing shingles support beams around the top. Each beam is labeled alphabetically to a matching corner or side (Figure D-2). For example, the beam marked with “A” should be screwed into the “A” corner. Repeat for all the corners and sides (based on the model, you might have eight or six supporting beams).
- Page 23 Screw the corner roof shingles around all corners. Each corner will have two shingles curved upward to easily identify the position of the screw (Figure D-4). Figure D-4: Corner Roof Shingles After screwing in the corners, flatten the curved shingles and place the pyramid roof shingles on top (Figure D-5).
- Page 24 SLOPE ROOF CAUTION! BEFORE PLACING THE SLOPE ROOF, MAKE SURE THAT EVERYTHING IS WORKING AND CONNECTED PROPERLY ON THE CEILING. If you had something damaged or had any issues, please call our technical department and wait till you get everything resolved and working properly before placing the roof. The roof is heavy and it will be hard to remove it in order to install parts.
- Page 25 Digital Controller for BC45E Heater models BC45E, BC60E, BC80E and BC90E are controlled from a separate control unit. See the instructions for use of the BC45E control unit model. Function Function Power Button Temperature Control (reduce) (On/Off) Power on/off Fahrenheit Light On/OFF indicator indicator...
- Page 26 Timer Control Celsius Light On/OFF indicator (reduce time) Timer Control Lights Button/Pause Button (increase) Temperature Control Bluetooth connected light (increase) USB connect Settings control interface Setting the Temperaturer The purpose of the thermostat is to keep the temperature in the sauna room on a desired level. By experimenting, you can find the setting that suits you best.
- Page 27 ACCESSORIES Oxygen Ionizer (Recommended) Locate the ionizer plug which is extended out of the sauna ceiling (1-pin plug). Connect the oxygen ionizer and screw it into the back panel. Cup Holder (Optional) The cup holder is a small wooden table that can be screwed in one of the front corners (either right or left, based on the user preference).
- Page 28 Color Therapy Lights (Recommended) Some models will include color therapy lights (or chromo lights aka chromotherapy). Color therapy lights function as light therapy for physical and mental health. Scientists have determined that each color emits a frequency. Our body consists of Seven Layers of the Auric Field and the Seven Chakras (energy centers of the body).
- Page 29 Location: The throat Function/Qualities: Language; Ability to communicate effectively; Authenticity; Inspiring, teaching. Function when disturbed/unhealthy: Lethargy, weakness in expressive abilities; Shyness, voice problems, insecurity, fear of others’ judgments/opinions. Physical Health: Throat, neck, thyroid problems. 6th Chakra – Third Eye (INDIGO BLUE) Location: Between the eyebrows.
- Page 30 OTHER ACCESSORIES: Bucket with ladle Analog Thermostat Rocks Sand Timer/Hourglass Clock Wall for Sauna...
-
Page 31: Usage Guide
Usage Guide Precautions and Warnings! If the temperature becomes unbearable, decrease the temperature or shut off the sauna immediately. ● Do not use it if pregnant or have serious inflammation, fever, a communicable disease, acute bleeding, ● or are intoxicated. Do not splash water on any electrical component inside the sauna other than the harvia heater rocks ●... - Page 32 Instructions for Bathing • Begin by washing yourself. • Stay in the sauna for as long as you feel com- fortable. • Forget all your troubles and relax. • According to established sauna conventions, you must not disturb other bathers by speaking in a loud voice.
- Page 33 Sauna and Contraindications Sauna and Medications Individuals who are using prescription drugs should seek the advice of their personal physician or pharmacist for possible changes in the drug’s effect when the body is exposed to elevated body temperature. Diuretics, barbiturates, and beta-blockers may impair the body's natural heat loss mechanisms.
- Page 34 Sauna and Hemophiliacs / Individuals Prone To Bleeding The use of saunas should be avoided by anyone who is predisposed to bleeding. Sauna and Fever An individual that has a fever should not use any type of sauna. Sauna and Insensitivity to Heat An individual that has an insensitivity to heat should not use any type of sauna.
-
Page 35: Troubleshooting
Troubleshooting The sauna doesn’t power on: ● Make sure the power cord is securely connected to the power socket and the control box (located under the bench ). ● Make sure the breaker did not turn off. ● Make sure the control panel white ribbon wire is securely connected. ●... - Page 36 ● Check that all heating elements glow when the heater is on. ● Turn the thermostat to a higher setting. ● Check that the heater output is sufficient. ● Check the sauna stones. Too tightly piled stones, the settling of stones with time or wrong stone type can hinder the air flow through the heater, which results in reduced heating efficiency.
-
Page 37: Warranty Information
Warranty Information Enlighten Saunas warrants its products to be free of defects in material and workmanship. This warranty extends only to: a retail purchaser of a sauna or parts directly from the supplier; the authorized wholesale purchaser of a sauna or parts directly from the supplier; or a retail purchaser of a sauna or parts from an authorized wholesaler. - Page 38 Extended Warranty 5 years optional You can extend for an additional 5% of the MSRP price of the sauna. This amount must be paid within 90 days of the date of delivery ● Factory-Installed Heater Components - 5 years ● Factory-Installed Sauna Controls and Wiring - 5 years ●...
- Page 39 Indoor-Residential Use: The sauna or parts must be placed in an indoor environment unless the sauna or parts are specifically bought for outdoor/indoor use. If an indoor sauna or parts are placed in an outdoor environment, the warranty shall be null and void and of no further force and effect. A warranty shall not apply to any product or a component used for any industrial, rental, professional or neglect, accident, abuse, improper installation and/or reckless operation by the purchaser, including but not limited to: exposure to a fire or excessive heat, and other hazardous elements/activities.
-
Page 40: Commercial Use
Commercial Use: Standard Warranty The standard 3-year warranty covers the following: Factory-Installed Heater Components - 3 years • Factory-Installed Sauna Controls and Wiring- 3 years • Factory-Installed Audio Components - 3 years • Enlighten Saunas® Brand Cabin (Wood / Construction) - 3 Years •... - Page 41 Enlighten Saunas® shall not be liable for the loss of use of the sauna or other incidental or consequential damages. Under no circumstances shall the supplier or any of its representatives be held liable for injury to any persons or damages to any properties. Specifications are subject to change without notice.
Need help?
Do you have a question about the SaunaTerra Series and is the answer not in the manual?
Questions and answers