Advertisement
Quick Links
Advertisement

Related Manuals for Enlighten Sauna Rustic-4


Summary of Contents for Enlighten Sauna Rustic-4
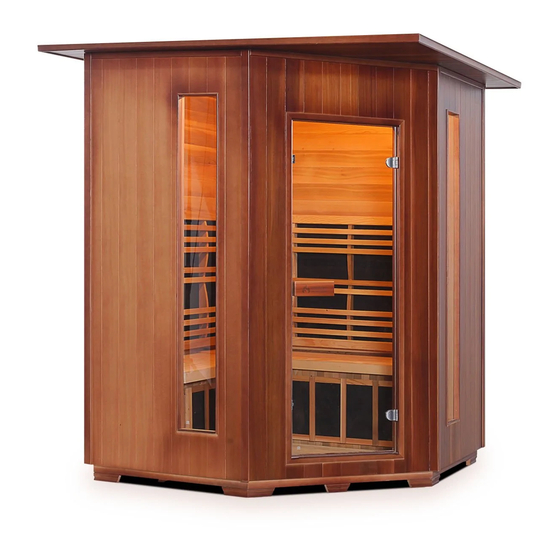
- Page 1 User Manual Rustic - 4 Thank you for choosing our infrared sauna! Congratulations on the purchase of your brand new infrared sauna. Please carefully review and read through this material. Keep this manual and your proof of purchase for future reference and service calls. ...
- Page 2 effective sources for personal detoxification and more. Please let us know if there is anything you need. We are here to help. Happy Detox! Enlighten Sauna Team 2 ...
-
Page 3: Power Plugs
Electrical Components/Requirements Please Read Carefully! Each sauna will require a dedicated circuit when plugged into an outlet according to the chart below. ... - Page 4 Sauna Installation Instructions Please read the following directions carefully The sauna installation requires a minimum of 2 people. You should not try to install the sauna on your own as damage may easily occur. Caution No plumbing or plumbing fixtures should be placed in the sauna. ...
- Page 5 Lift the panel with the male locks a few inches. Push it against the opposite panel; make sure to apply pressure around the top and bottom corners. Slide the panel down to lock it in place. Make sure all the locks are connected (top and bottom). ...
- Page 6 Where to Start: Lay the boxes flat on the ground and open them carefully. The accessories, user manual, and smaller parts are located in the box that includes the top and bottom panels (Figure G-4). ...
- Page 7 ASSEMBLY INSTRUCTIONS – General Guide for: FLOOR PANEL Placement: Place the floor panel flat on the desired location. Make sure to leave a space around the sidewalls for one person to stand and install the side panels (Figure C-1). You can slide the sauna once it’s complete next to a wall. ...
- Page 8 REAR PANEL Placement: Place the rear panel on the back end of the floor panel. At this point, someone should hold the rear panel until the next connection is made. SIDE PANELS Placement: Connect the side panels to the back panel as in the image below (Figure C-2, Page 8). Refer to “Connecting the Panels”...
- Page 9 BENCH Placement Some saunas will include square bench support. Place it in front of the windows (Figure C-3). Figure C-3: Bench Support 9 ...
- Page 10 Step 1. Place the bench stand panels by lining up its side with the vertical guides on the rear panel. After placing the bench stand panel, connect the heaters’ plugs. Step 2. Slide the benchtop panel over the horizontal guide on the side panels. Make sure the smooth and finished side is facing up and forward (Figure C-4, Page 21)...
- Page 11 FRONT PANEL Placement: (Note: Install the door handle before installing the front panel.) Connect the front panel to both side panels as in the image below (Figure C-5, Page 22). Refer to “Connecting the Panels” section (page 6) on how to lock the panels toget h er.
- Page 12 TOP PANEL Placement: Step 1. Raise the top panel over the sauna body. Insert the wires for the control panel, temperature ...
- Page 13 OUTDOOR SAUNAS ASSEMBLY INSTRUCTIONS: Installation steps start at the section “ Assembly Instructions – General Guide” . Then continue after placing the top panel. Main Support Place the roof bottom section on top of the sauna and screw the center support beam (Figure D-1). The illustration below will not include the sauna’s body, but the roof should be installed on top of the ...
- Page 14 Roofing Shingles Support Install the roofing shingles support beams around the top. Each beam is labeled alphabetically to a matching corner or side (Figure D-2, Page 25). For example, the beam marked with “A” should be screwed into the “A” corner. Repeat for all the corners and sides (based on the model, you might have eight or six supporting beams). ...
- Page 15 Roof Sealing Screw the corner roof shingles around all corners. Each corner will have two shingles curved upward to easily identify the position of the screws (Figure D-4). Figure D-4: Corner Roof Shingles After screwing in the corners, flatten the curved shingles and place the pyramid roof shingles on top (Figure D-5).
- Page 16 Slope Roof CAUTION! BEFORE PLACING THE SLOPE ROOF, MAKE SURE THAT EVERYTHING IS WORKING AND CONNECTED PROPERLY ON THE CEILING. If you had something damaged or had any issues, please call our technical department and wait till you get everything resolved and working properly before placing the roof.
- Page 17 ACCESSORIES Oxygen Ionizer (Recommended) Locate the ionizer plug which is extended out of the sauna ceiling (1-pin plug). Connect the oxygen ionizer and screw it into the back panel. ...
- Page 18 Color Therapy Lights (Recommended) Some models will include color therapy lights (or chromo lights aka chromotherapy). Color therapy lights function as light therapy for ...
- Page 19 Function when disturbed/unhealthy: Grief, Attachment, Easily Hurt. Emotional dependence on others. Heartlessness. Physical Health: Heart problems, lung problems, blood pressure problems. 5th Chakra – Throat Chakra (LIGHT BLUE) Location: The throat ...
- Page 20 Control Panel Operating Instructions V.1 # Function # Function 1 Power Button 6 Temperature Control (reduce) (On/Off) 2 Heat Light 7 Fahrenheit Light 3 Timer Control 8 Celsius Light (reduce time) 4 Timer Control 9 Lights Button/Pause (increase) 5 Temperature Control ...
- Page 21 # Function # Function 1 Power Button 6 Temperature Control (reduce) (On/Off) 2 Heat Light 7 Fahrenheit Light 3 Timer Control 8 Celsius Light (reduce time) 4 Timer Control 9 Lights Button/Pause (increase) 5 Temperature Control 10 Bluetooth connected light (increase) ...
- Page 22 # Function # Function 1 Power Button 6 Temperature Control (reduce) (On/Off) 2 Heat Light 7 Fahrenheit Light 3 Timer Control 8 Celsius Light (reduce time) 4 Timer Control 9 Lights Button/Pause (increase) 5 Temperature Control 10 Bluetooth connected light (increase) ...
- Page 23 # Function # Function 1 Power Button (On/Off) 5 Turn on Bluetooth button 2 Turn on radio button 6 Set time buttons 3 Turn on the AUX function 7 Set temperature buttons button 4 Turn on USB function button 8 ...
- Page 24 # Function # Function 1 Power Button (On/Off) 6 Turn on the AUX function button 2 Set 45 ⁰C on 60 minutes 7 Set time buttons 3 Turn on USB function button 8 Set temperature buttons 4 Turn on Bluetooth button 9 ...
- Page 25 1.Turn on the light wave. Click the "On/Off"(1) button to turn the light wave on or off. In the power-on state, The first ...
- Page 26 3. Press the “USB”(3) button to open the USB function, the temperature zone displays USB, the temperature +/- adjusts the previous one, the next one, the clock area displays “XX”, the time +/- ...
-
Page 27: Usage Guide
Usage Guide Allow your sauna to warm up for 15-20 minutes or until it reaches 110 F° (43 ° C). You may close the ... - Page 28 Wood Care If the sauna exterior body has become scratched or scuffed, it could be concealed by using a small amount of furniture polish, oil or other furniture treatment.
- Page 29 cardiac output, blood flow, in an effort to transfer internal body heat to the outside environment via the skin (perspiration) and respiratory system. This takes place primarily due to major changes in the ...
-
Page 30: Troubleshooting
Saunas and Implants Metal pins, rods, artificial joints or any other surgical implants generally reflect far infrared waves and thus are not heated by this system; nevertheless, you should consult your surgeon prior to using ... -
Page 31: Warranty Information
Control panel display is unusual: If the control panel temperature display is over 150 or 230, make sure to connect the heat sensor ... -
Page 32: Standard Warranty
Outdoor-Residential Use: A warranty shall not apply to any product or a component used for any industrial, rental, professional or neglect, accident, abuse, improper installation and/or reckless operation by the purchaser, including but not limited to: exposure to a fire or excessive heat, and other hazardous elements/activities. - Page 33 For the coverage period specified (“warranty period”), Company agrees to replace, at its sole option, the products listed above, subject to and solely in accordance with the terms, conditions, exclusions, and limitations set forth herein. The warranty covers parts only, labor is not included. Indoor-Residential Use: ...
-
Page 34: Commercial Use
Commercial Use: Standard Warranty The standard 3-year warranty covers the following: F actory-Installed Heater Components - 3 years • F actory-Installed Sauna Controls and Wiring- 3 years • F actory-Installed Audio Components - 3 years • E nlighten Saunas®... - Page 35 instruction book; consumable items including light bulbs. Enlighten Saunas® shall not be liable for the loss of use of the sauna or other incidental or consequential damages. Under no circumstances shall the supplier or any of its representatives be held liable for injury to any persons or damages to any properties.
- Page 36 Sauna’s Health Benefits Detoxification and Body Cleansing Detoxification is a bodily process that removes health-threatening toxic waste that is accumulated by our body from our environment, day-to-day stress, diet, and chemicals. Sweating is the body's ...
- Page 37 Lower Blood Pressure and Improved Circulation Blood vessel dilation brings blood closer to the surface of the skin and, as blood vessels expand to ...
Need help?
Do you have a question about the Rustic-4 and is the answer not in the manual?
Questions and answers