
Subscribe to Our Youtube Channel
Related Manuals for FENDT BALER Series


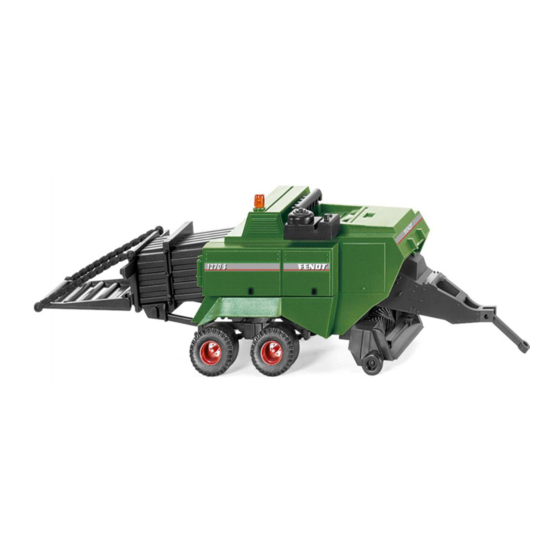
Summary of Contents for FENDT BALER Series
- Page 1 SERIES BALER OPERATOR MANUAL FENDT ™ 870N / 870S / 990N / 990S / 1270N / 1270S / 1290N / 1290S / 12130N / 12130S Large Square Baler...
- Page 2 Congratulations on your selection of a FENDT ™ Product. We believe you have exercised excellent judgment in the purchase of your FENDT ™ machine. We are most appreciative of your patronage. Your Dealer has performed the pre-delivery service on your new machine.
- Page 3 CONTENTS FENDT ™ 870N / 870S / 990N / 990S / 1270N / 1270S / 1290N / 1290S / 12130N / 12130S 700735021 E Rev. CONTENTS SAFETY ................................A-1 GENERAL INFORMATION ..........................B-1 PREPARATION ..............................C-1 ELECTRONICS ..............................D-1 OPERATION ..............................E-1 ADJUSTMENTS ..............................
- Page 4 CONTENTS NOTES A-ii 700735021 E Rev. Find manuals at https://best-manuals.com Find manuals at https://best-manuals.com...
-
Page 5: Table Of Contents
SAFETY SAFETY Contents Safety Alert Symbol ............................A-3 Safety Messages ............................A-3 Informational Messages ..........................A-3 Safety Signs ..............................A-4 A Word To The Operator ..........................A-4 Operator Manual ............................. A-5 Prepare For Operation ............................ A-5 Operation ................................ A-6 General Information ..........................A-6 Personal Protection Equipment ........................ - Page 6 SAFETY NOTES 700735021 E Rev. Find manuals at https://best-manuals.com Find manuals at https://best-manuals.com...
-
Page 7: Safety Alert Symbol
SAFETY SAFETY ALERT SYMBOL FIG. 1: The safety alert symbol means ATTENTION! BECOME ALERT! YOUR SAFETY IS INVOLVED! Look for the safety alert symbol both in this manual and on the safety signs on this baler. The safety alert symbol will direct you to information that involves your safety and the safety of others. -
Page 8: Safety Signs
SAFETY SAFETY SIGNS WARNING: DO NOT remove or obscure Danger, Warning or Caution signs. Replace any Danger, Warning or Caution signs that readable missing. Replacement signs are available from your dealer in the event of loss or damage. The actual location of the safety signs is illustrated at the end of this section. -
Page 9: Operator Manual
SAFETY Make sure your machine has the correct equipment needed by the local regulations. WARNING: An operator should not use alcohol or drugs which can affect their alertness or coordination. An operator on prescription or ‘over the counter’ drugs needs medical advice on whether or not they can properly operate machines. -
Page 10: Operation
SAFETY Make sure you know and understand the positions and operations of all controls. Make certain all controls are in neutral and the parking brake is applied before starting the machine. Make certain all people are well away from your area of work before starting and operating the machine. -
Page 11: Personal Protection Equipment
SAFETY Make sure all persons are clear of the rear of the bale chute when raising and lowering the chute, ejecting or dumping a bale. Do not stand between the tractor and the implement to install the hitch pin when the tractor engine is running. FIG. -
Page 12: Shields And Guards
SAFETY Shields and Guards FIG. 9: All shields and guards must be in the correct operating position and in good condition. 71389544C FIG. 9 FIG. 10: Do not operate the machine with the drive shaft shields open or removed. Entanglement in rotating drive shafts can cause serious injury or death. -
Page 13: Flying Debris
SAFETY Flying Debris FIG. 12: Never stand near the machine during operation. Debris can be thrown from the machine during operation possibly resulting in injury. D-8278 FIG. 12 Handrails FIG. 13: Face the ladder and use the handrails when getting on or off the machine. WC1940 FIG. -
Page 14: Travel On Public Roads
SAFETY TRAVEL ON PUBLIC ROADS FIG. 14: Make sure you understand the speed, brakes, steering, stability, and load characteristics of this machine and the tractor before you travel on public roads. Use good judgement when traveling on public roads. Maintain complete control of the machine at all times. Never coast down hills. -
Page 15: Maintenance
SAFETY FIG. 15: Watch overhead wires other obstructions. Avoid contact with electrical power lines. Contact with electrical power lines can cause electrical shock, resulting in very serious injury or death. D-15022 FIG. 15 MAINTENANCE General Information FIG. 16: Before doing any unplugging, lubricating, servicing, cleaning, or adjusting: •... - Page 16 SAFETY Be aware of the size of parts when doing service work. Never stand under or near a part being moved with lifting equipment. FIG. 17: Never service, check or adjust the drive chains or belts while the tractor engine is running. wc1943 FIG.
-
Page 17: Fire Prevention And First Aid
SAFETY Fire Prevention and First Aid FIG. 20: Be prepared for emergencies. Keep a first aid kit handy for treatment of minor cuts and scratches. Always carry one or more fire extinguishers of the correct type. Check fire extinguishers regularly as instructed by the manufacturer. -
Page 18: Checking For High Pressure Leaks
SAFETY Checking for High Pressure Leaks FIG. 22: Fluid leaking from the hydraulic system or the fuel injection system under high pressure can be very hard to see. The fluid can go into the skin causing serious injury. Fluid injected into the skin must be surgically removed within a few hours. -
Page 19: Text Safety Signs And Information Signs
SAFETY TEXT SAFETY SIGNS AND INFORMATION SIGNS Left-hand Side of the Baler p1015627 FIG. 25 FIG. 25: Safety and informational signs on the left-hand side of the baler. Some signs can be in different locations than is shown in this figure. Some signs can be No Text. FIG. - Page 20 SAFETY FIG. 27: Safety sign (2) (A) Entanglement hazard. Rotating shaft/PTO driveline (B) Do not reach into areas of moving parts (C) General safety alert (D) Read the Operator Manual for safety information and operating instructions before operating the machine This decal is on the driveline cover.
- Page 21 SAFETY FIG. 31: Warning - safety sign (6) READ & UNDERSTAND INSTRUCTIONS BEFORE OPERATING JACK Read and understand instructions before operating jack. WARN ING NEVER ATTEMPT TO MOVE PULL PIN WHEN THERE IS ANY LOAD ON THE JACK. Never attempt to move pull pin when there is any load on DOING SO COULD CAUSE THE TRAILER TO MOVE SUDDENLY.
- Page 22 SAFETY FIG. 34: Warning - safety sign (9) Disengage all drives, shut off Tractor engine and apply the flywheel brake before attempting any maintenance, lubrication or replacement of shear bolt. Release Flywheel brake before engaging PTO. 700726205 FIG. 34 FIG. 35: Warning - safety sign (10) To prevent serious injury or death: 1.
- Page 23 SAFETY FIG. 38: Danger - safety sign (13) Stuffer arm can move without putting hay in the baler. Shut off PTO and tractor engine. 700720130A FIG. 38 FIG. 39: Tie down location (14) Single axle and tandem axle balers will have different tie down locations.
- Page 24 SAFETY FIG. 42: Tire pressure and lug nut torque values (17A) This decal shows the correct tire pressures and lug nut torques for 870 and 990 balers. NOTE: All of the torque values are for oiled lugs. Size Pressure Torque Nm 21.5L X 16.1 2.8 bar (40 psi) 350 Nm (260 lb-ft)
- Page 25 SAFETY FIG. 45: Lift location (19) 516931D1 FIG. 45 FIG. 46: Twine routing and tension into knotter area (20) Adjust twine tension to 50 N to 70 N (12 lbf to 15 lbf). 700728732 FIG. 46 FIG. 47: Twine routing through upper tensioners, upper slacker arms and tucker arms (21) 700721970 FIG.
- Page 26 SAFETY FIG. 48: Equal Angle Drive 1000 RPM (22) 700737788 FIG. 48 FIG. 49: Safety sign (23) Hazard (A) - General safety alert. Avoidance (B) - Read the Operator Manual for safety information and operating instructions before operating the machine. 700714074a FIG.
-
Page 27: Under The Left-Hand Shield
SAFETY Under the Left-hand Shield FIG. 50: Informational signs on the left-hand side of the baler under the left-hand shield. N522756 FIG. 50 FIG. 51: Main drive sprocket shearbolt (1) The cap screw must go through with the nut on the inside. Tighten the nut to 145 Nm (105 lbf ft). -
Page 28: Rear Of The Baler
SAFETY FIG. 53: Knife Spacing (3) (A) Use two spacers for 192 mm (7.6 in) between knives. (B) Use one spacer for 96 mm (3.8 in) between knives. (C) Use no spacers for 48 mm (1.9 in) between knives. 700729044 FIG. - Page 29 SAFETY FIG. 55: Safety and informational signs on the rear of the baler. Some signs can be in different locations than is shown in this figure. FIG. 56: Danger - safety sign (1) Needle frame can move without putting hay in the baler. Shut off PTO and tractor engine and engage needle lockout before threading needles or adjusting twine tensioners.
- Page 30 SAFETY FIG. 60: SMV (Slow Moving Vehicle) emblem (5) smv2 FIG. 60 FIG. 61: Parking brake (6) (if equipped) (A) Turn the handle counterclockwise to release the parking brakes. (B) Turn the handle clockwise to apply the parking brakes. Do not use more than 40 daN (90 lbf) on the handle. 700725581b FIG.
-
Page 31: Right-Hand Side Of The Baler
SAFETY FIG. 64: Jack point sign (9) Shows the location to apply a jack. Single axle and tandem axle balers have different jack points. 619718 FIG. 64 FIG. 65: Needle twine routing and tension (10) This sign is on the rear of the beam under the lower tensioners on a tandem axle baler. - Page 32 SAFETY FIG. 67: Danger - safety sign (1) Needle frame can move without putting hay in the baler. Shut off PTO and tractor engine and engage needle lockout before threading needles or adjusting twine tensioners. 700720126A FIG. 67 FIG. 68: Danger - safety sign (2) Stuffer arm can move without putting hay in the baler.
- Page 33 SAFETY FIG. 70: Warning - safety sign (4) Stop engine. Remove key before entering this area. 700722061B FIG. 70 FIG. 71: Twine box routing for four and six twine balers See the Preparation section for a larger view with instructions on how to route the twine. The top view is for four twine balers.
- Page 34 SAFETY FIG. 72: Balers after serial number **********CHB0X001 and Up have a bale density valve assembly with a density bleed valve (6) The decal shows how to operate the density bleed valve. Pull down and twist until the valve locks to release pressure (A).
- Page 35 SAFETY FIG. 75: Right-hand pickup chains routing (9) 700731306 FIG. 75 700735021 E Rev. A-31...
-
Page 36: Text Safety Signs And Information Signs
SAFETY NO-TEXT SAFETY SIGNS AND INFORMATION SIGNS Safety Signs, Hazard and Avoidance FIG. 76: Most of the safety signs on this machine consist of two panels. The hazard panel (A) depicts the consequence of encountering the hazard. The avoidance panel (B) depicts the action required to avoid the hazard. 700730354 FIG. -
Page 37: Left-Hand Side Of The Baler
SAFETY Left-hand Side of the Baler N524008 FIG. 77 FIG. 77: Safety and informational signs on the left-hand side of the baler. Some signs can be in different locations than is shown in this figure. Some signs can have text. FIG. - Page 38 SAFETY FIG. 79: Amber reflector (2) D-15079 FIG. 79 FIG. 80: Safety sign (3) Hazard (A) - Crushing hazard - risk of personal injury to feet. Avoidance (B) - Keep a safe distance. 700730354 FIG. 80 FIG. 81: Safety sign (4) Hazard (A) - Explosion hazard - accumulator contains gas and oil under pressure that can penetrate skin and cause serious injury.
- Page 39 SAFETY FIG. 82: Safety sign (5) Hazard (A) - General safety alert. Avoidance (B) - Read the Operator Manual for safety information and operating instructions before operating the machine. 700714074a FIG. 82 FIG. 83: Safety sign (6) Hazard (A) - General safety alert. Avoidance (B) - Stop the engine and remove the key before doing maintenance or repair work.
- Page 40 SAFETY FIG. 86: Safety sign (9) Hazard (A) - Crushing hazard - risk of personal injury. The stuffer can trip without putting hay into the baler. Avoidance (B) - Never reach into the stuffer area with the tractor running and the PTO connected. The stuffer can trip without putting hay into the baler.
- Page 41 This as a preview PDF file from best-manuals.com Download full PDF manual at best-manuals.com...
Need help?
Do you have a question about the BALER Series and is the answer not in the manual?
Questions and answers