Sign In
Upload
Download
Table of Contents
Contents
Add to my manuals
Delete from my manuals
Share
URL of this page:
HTML Link:
Bookmark this page
Add
Manual will be automatically added to "My Manuals"
Print this page
×
Bookmark added
×
Added to my manuals
Manuals
Brands
Roland Manuals
Musical Instrument
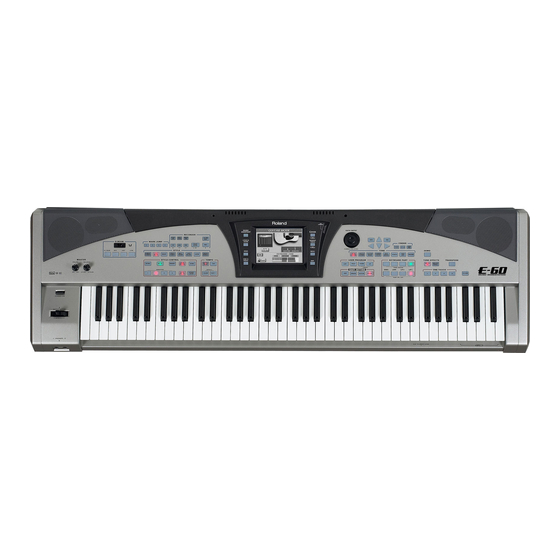
E-60
Owner's manual
Roland E-60 Owner's Manual
Hide thumbs
Also See for E-60
:
Owner's manual
(221 pages)
1
2
3
4
5
6
7
Table Of Contents
8
9
10
11
12
13
14
15
16
17
18
19
20
21
22
23
24
25
26
27
28
29
30
31
32
33
34
35
36
37
38
39
40
41
42
43
44
45
46
47
48
49
50
51
52
53
54
55
56
57
58
59
60
61
62
63
64
65
66
67
68
69
70
71
72
73
74
75
76
77
78
79
80
81
82
83
84
85
86
87
88
89
90
91
92
93
94
95
96
97
98
99
100
101
102
103
104
105
106
107
108
109
110
111
112
113
114
115
116
117
118
119
120
121
122
123
124
125
126
127
128
129
130
131
132
133
134
135
136
137
138
139
140
141
142
143
144
145
146
147
148
149
150
151
152
153
154
155
156
157
158
159
160
161
162
163
164
165
166
167
168
169
170
171
172
173
174
175
176
177
178
179
180
181
182
183
184
185
186
187
188
189
190
191
192
193
194
195
196
197
198
199
200
201
202
203
204
205
206
207
208
209
210
211
212
213
214
215
216
217
218
219
220
page
of
220
Go
/
220
Contents
Table of Contents
Bookmarks
Table of Contents
Features
Table of Contents
Important Notes
Panel Descriptions
Front Panel
Rear Panel
Setting up and Demo Songs
Connections
Switching the E-60/E-50 On/Off
Internal Memory Protect
Setting the Display Contrast
Switching off the E-60/E-50
Interactive Demo of the E-60/E-50
The Main Page
General Note about the E-50'S Menu
Quick Start
The General Idea
Playing to an Automatic Accompaniment
Professional Transitions: Fill in
Intro & Ending
Selecting Music Styles
Changing the Tempo
Using the Keyboard Parts
Playing with an Upper And/Or the Lower Part
Alternating between Sounds
Selecting Sounds for the Keyboard Parts
Drumming on the Keyboard
Playing Realistic Guitar Parts (Guitar Mode)
First Steps
Additional ARPEGGIO Functions
Leaving the E-60/E-50'S Guitar Mode
Selecting Guitar Sounds
About the Chord Indications
Using the Available STRUMM Techniques
Playing Question and Answer Phrases
Guitar Mode Options
Working with the Music Assistant
If the Desired Registration Is Not Displayed
To Save Time
Using the Finder
Playing Back Songs (Standard MIDI Files)
Quick Location of the Song You Need
Starting Playback
Other Practical Playback Functions
Using the Song Cover Function
Minus One
Displaying Lyrics and Chord Information
Displaying Scores
Recording Your Music
Recording with Style Backing
Listening to Your Song
Recording Without Accompaniment
Adding more Parts
Saving Your Song
About the Keyboard Modes
Arranger, Piano, Organ and Guitar Modes
Split and Whole Modes
Using the SPLIT Keyboard Mode
Using WHOLE Mode
Switching Parts on and off
Using the Performance Functions
Pitch Bend and Modulation
Transposition
Global Transpose
Octave
Key Touch (Velocity Sensitivity)
Master Tune
Using the D Beam Controller (E-60)
Using Optional Footswitches
Sustain Footswitch (HOLD)
Foot Switch
Expression (Foot Pedal)
Scale Tuning
Metronome
Additional Arranger/Style Functions
Playback Functions (Style Control)
Starting a Music Style
Stopping Style Playback
About Sync Start & Stop
Selecting Other Style Divisions
Other Ways of Selecting Arranger Patterns
Bass Inversion
Melody Intelligence
Linking MELODY INTELL Type Selection to the Styles (Style Melody Intell Link)
Using the Style Cover Function
Freeze Data
Saving a Style with a COVER Alteration
One Touch
Ignoring Certain One Touch Settings (Hold)
Programming Your Own One Touch Settings (WRITE)
More Refined Arranger Settings
Chord Recognition Area (ZONE)
Arranger Type (Chord Mode)
Arranger Hold
Intro & Ending Alteration
Dynamic Arranger
Tempo-Related Settings (Arranger Options)
Style Tempo
TEMPO CHANGE (RITARD and ACCELER)
Working with 'External' Styles
Using the CUSTOM Memories
Programming CUSTOM Assignments
Disk User
Style Finder: Quickly Locating Styles
Quick Location of the Style You Need
Editing the Style Finder Information
Advanced Keyboard Part Functions
Tuning Upper2: Coarse Tune and Fine Tune
Portamento for UP1 and UP2
Portamento Time
Portamento Mode: Mono/Poly
Lower Hold
Tone Edit: Editing Keyboard Parts
Using the Mixer Functions & Effects
Mixing Keyboard Parts
Volume and Status of the Style Parts
Editing the Keyboard Effects Processors
Reverb for Keyboard Parts
Chorus for Keyboard Parts
Using the Multi-Effects Processor (Multi-FX)
Selecting Another MFX Type and Editing It
Linking Multi-FX Type Selection to the Upper1 Part (Upper 1 M-FX Link)
Effects for Songs and Styles
Reverb for Style/Song Parts
Chorus for Style/Song Parts
Digital Bass Enhancer Function
Working with User Programs
Saving Your Settings to a User Program
Selecting User Programs
Cancel
Choosing User Programs Manually
Selecting User Programs with [DOWN][UP]
Working with the User Program Finder
Quick Location of the User Program You Need
Selectively Loading User Program Settings (User Program Hold)
Bypassing the AUTO FILL Function (Fill in on User Program Change)
Automatic Functions for User Programs
Song Link
Linking a MIDI Set to a User Program
User Program Recall
Editing User Program Finder Information
Editing the User Program Finder Information
Editing an Index
Music Assistant Functions
Creating New Music Assistant Registrations
Editing Music Assistant Registrations
Saving a Music Assistant Entry
Song and Style Makeup Tools
Mixing Song or Style Parts
Using the Makeup Tools
General Procedure
Palette
SOUND EDIT for Sounds
SOUND EDIT for Drum Sets
Drum Instr Edit
Common
Before Saving Your Settings
Saving Your Modified Song or Style
More Refined Song Functions
Programming MARK & JUMP Locations
Working with the Song Finder
Locating Files with the Song Finder
Editing the Song Finder Information
Editing an Index
Play List Function
Programming Play Lists
Editing Play Lists
Using Play Lists
Managing Play Lists
Editing Lyrics
Adding Lyrics to a Song
Exporting Lyrics Data as Text File
Using the 16-Track Sequencer
About the Sequencer's Main Page
General Considerations
Example 1: Recording a Song from Scratch
Preparations
Example 2: Adding Tracks
Saving Your Song
Editing 16-Track Songs
Easy Editing and Useful Functions
Editing One or Several Tracks (TRACK EDIT)
Editing Song Data Using Microscope Edit
General Notes about MICRO EDIT
Editing Events
Other Edit Operations
Style Converter
General Considerations
Using the Style Converter
Auditioning the Tracks
Programming Styles (Style Composer)
Concept
Recording Styles from Scratch
Starting the Style Composer
Clearing the RAM Memory (Initialize Style)
Getting Ready for the First Track
Recording
Auditioning Your Style and Adding more Tracks
Saving Your Style
Recording Other Tracks and Divisions
Muting Tracks While Recording Others
Remarks
Using Existing Styles
Starting with All Tracks of an Existing Style
Copying Individual Style Tracks
Editing Styles on the Fly Via Additional Recordings
Adding Notes in Realtime
Adding Controller Data in Realtime
Adding or Changing Settings of Existing Parts
Expression, Panpot, Reverb, Chorus
Changing the Preset Tempo
Style Track Edit Functions
Editing Individual Style Events (Style Micro Edit)
General Notes about STYLE MICRO EDIT
Editing Events
Other Edit Operations
Disk/Media Functions
The How-To's
Loading Data
Saving Data
Rename Functions
Delete
Copy
Format
Import User Program Function
Archiving Data Using a Computer (USB)
Backing up All of the E-60/E-50'S Data
Just in Case
MIDI
The How-To's
Accessing the MIDI Functions
Working with Presets
Editing Procedure
Editing MIDI Parameters
Keyboard, Style, Song Parts
MIDI System Parameters
MIDI Sets
Writing a MIDI Set
Using MIDI Sets
MIDI Set Selection at Power-On
Miscellaneous
Using V-LINK
General Settings
Song/Arranger Start Priority
Flashing Exit
Flashing Metronome
Info
Initializing the E-60/E-50 (Factory Reset)
Specifications
MFX Types and Parameters
MIDI Implementation Chart
Chord Intelligence
Index
Advertisement
Quick Links
Download this manual
All manuals and user guides at all-guides.com
r®
Owner's Manual
Table of
Contents
Previous
Page
Next
Page
1
2
3
4
5
Advertisement
Table of Contents
Need help?
Do you have a question about the E-60 and is the answer not in the manual?
Ask a question
Questions and answers
Related Manuals for Roland E-60
Musical Instrument Roland E-50, E-60 Owner's Manual
Roland e-60, e-50 music workstation owner's manual (221 pages)
Musical Instrument Roland E-68 Owner's Manual
(224 pages)
Musical Instrument Roland E-600 Owner's Manual
Intelligent keyboard 64-voice polyphony (92 pages)
Musical Instrument Roland EP-880 Owner's Manual
Digital piano owner's manual ep-880 (216 pages)
Musical Instrument Roland E-28 Owner's Manual
Intelligent keyboard (102 pages)
Musical Instrument Roland ep-3 Owner's Manual
(19 pages)
Musical Instrument Roland ep-7IIe Owner's Manual
Midi digital piano (18 pages)
Musical Instrument Roland ep-7 Owner's Manual
(21 pages)
Musical Instrument Roland EP-7 Service Notes
(24 pages)
Musical Instrument Roland ep-7 Owner's Manual
(20 pages)
Musical Instrument Roland EP-50 Owner's Manual
(14 pages)
Musical Instrument Roland E-X50 Owner's Manual
Arranger keyboard (55 pages)
Musical Instrument Roland E-X20 Service Notes
Arranger keyboard (13 pages)
Musical Instrument Roland ep-95 Owner's Manual
(48 pages)
Musical Instrument Roland EP-30 Service Note
(25 pages)
Musical Instrument Roland ep-9 Owner's Manual
(21 pages)
This manual is also suitable for:
E-50
Table of Contents
Print
Rename the bookmark
Delete bookmark?
Delete from my manuals?
Login
Sign In
OR
Sign in with Facebook
Sign in with Google
Upload manual
Upload from disk
Upload from URL


Need help?
Do you have a question about the E-60 and is the answer not in the manual?
Questions and answers