Table of Contents
Advertisement
Available languages
Available languages
Quick Links
Advertisement
Table of Contents

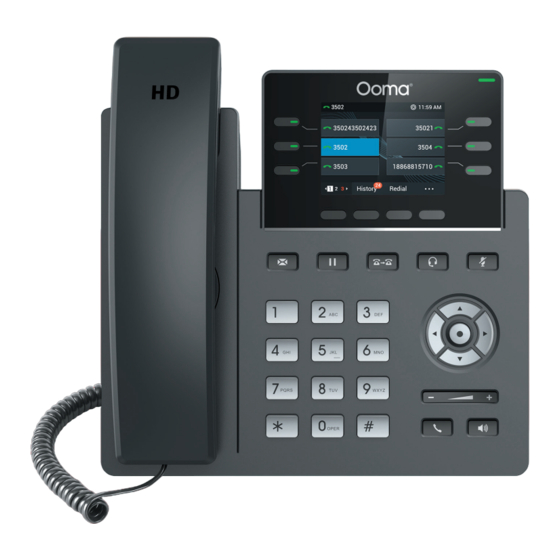
Summary of Contents for ooma IP Phone
- Page 1 Quick Start Guide...
-
Page 2: Getting Started
Getting Started Setting up your Ooma IP phone with Ooma Office is quick and easy. Follow the instructions below to install your phone. You should be up and calling in a few minutes! Power Adapter Ethernet Cable Ooma IP Phone... - Page 3 If your phone is labeled Ready to Call, you may skip this step and continue to Step 2. Otherwise, you will need to add your new phone to your Ooma Office account. Visit http://office.ooma.com/add_device and simply follow the on-screen instructions.
-
Page 4: Assemble Your Phone
Assemble Your Phone STEP 2 Attach the phone stand to the body. Align the stand with the slots , and slide right until you hear a click. Connect the phone handset to the handset jack using the coiled phone cord. DC5V... -
Page 5: Connect Your Phone
Connect Your Phone STEP 3 Use the Ethernet cable that came with the phone to connect the INTERNET ( ) port on the back of the phone to any available Ethernet port on your router or switch. Connect the power supply as shown below. Skip this step if using Power Over Ethernet (PoE). Once powered and connected to the Internet, the startup process will commence automatically. -
Page 6: Troubleshooting
Confirm that the IP phone is assigned to a user. • Log into Ooma Office Manager, navigate to the Devices section, select the user to whom the device should be assigned, and assign the phone to the desired user. •... - Page 8 © 2021 Ooma, Inc. All rights reserved. Patent Pending. Ooma, Ooma Telo, Ooma Connect 4G Adapter, Ooma Premier, Ooma HD3 Handset, Ooma Linx, Ooma Home Security, and the Ooma logo are trademarks or service marks of Ooma, Inc. Other company and product names mentioned herein are trademarks of their respective companies.
- Page 9 Guide de démarrage rapide...
-
Page 10: Comment Démarrer
Comment démarrer La configuration de votre téléphone IP Ooma avec Ooma Office est rapide et facile. Suivez les instructions ci-dessous pour configurer votre téléphone. Vous devriez être prêt à passer des appels en quelques minutes! Adaptateur d’alimentation Câble Ethernet Téléphone IP Ooma... - Page 11 Si votre téléphone est étiqueté Ready to Call (Prêt pour les appels), vous pouvez passer cette étape et aller à l’étape 2. Sinon, vous devrez ajouter votre nouveau téléphone à votre compte Ooma Office. Rendez- vous sur http://office.ooma.com/add_device et suivez simplement...
- Page 12 Assembler votre téléphone ÉTAPE 2 Fixez le support au boîtier du téléphone. Alignez le support avec les fentes et faites-le glisser vers la droite jusqu’à ce que vous entendiez un clic. Connectez le combiné à la prise du combiné à l’aide du cordon enroulé.
- Page 13 Connectez votre téléphone ÉTAPE 3 Utilisez le câble Ethernet fourni avec le téléphone pour connecter le port INTERNET ( ) situé à l’arrière du téléphone à n’importe quel port Ethernet disponible sur votre routeur ou commutateur. Branchez l’alimentation comme indiqué ci-dessous. Passez cette étape si vous utilisez l’alimentation électrique par Ethernet (PoE).
-
Page 14: Dépannage
Si l’appareil est déjà attribué à un utilisateur, redémarrez le téléphone en le débranchant de l’alimentation, patientez 30 secondes, puis rebranchez-le. BESOIN D’AIDE? le téléphone ne fonctionne toujours pas, veuillez contacter le service d’aide d’Ooma au 1-877-948-6662 (Canada) ou 1-866-939-6662 (États-Unis). - Page 15 © 2021 Ooma, Inc. Tous droits réservés. Brevet en instance. Ooma, Ooma Telo, l’adaptateur Ooma Connect 4G, Ooma Premier, le combiné Ooma HD3, Ooma Linx, Sécurité à domicile Ooma et le logo Ooma sont des marques de commerce ou des marques de service d’Ooma, Inc. Les noms d’autres entreprises et d’autres produits mentionnés dans le présent document sont des marques de commerce de leurs entreprises respectives.


Need help?
Do you have a question about the IP Phone and is the answer not in the manual?
Questions and answers