Table of Contents
Advertisement
Quick Links
Advertisement
Table of Contents

Related Manuals for Telos Alliance Axia QUASAR


Summary of Contents for Telos Alliance Axia QUASAR
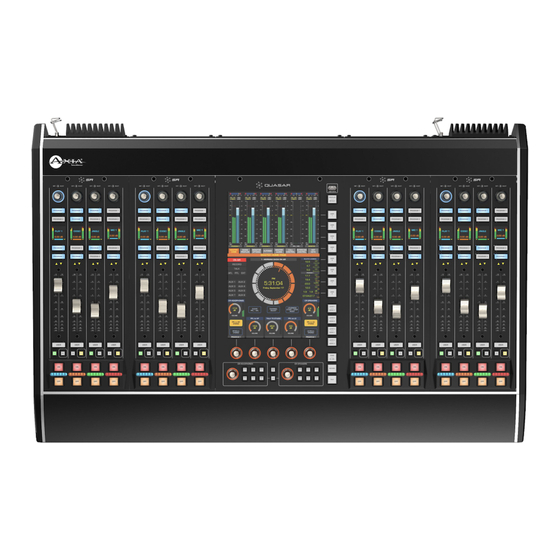
- Page 1 User Manual...
-
Page 3: Notices And Cautions
Notices and Cautions Notices Caution: Double Pole/Neutral Fusing Warning... - Page 4 USA Class A Computing Device Information to User. Warning Canada Warning CE Conformity Information • • •...
- Page 5 Quasar User Manual Disclaimer Trademarks Warranty After-Sales Information Updates Feedback...
- Page 6 Serial Numbers Service After Sales Modifications Credits…...
-
Page 7: We Support You
We Support You By Phone / Fax • • • By Email • • Via World Wide Web: Register Your Product AXIA AUDIO... - Page 9 Contents...
- Page 10 fi fi...
- Page 14 Creating the Most Exciting and Engaging Audio Experiences Imaginable...
- Page 16 Introduction About This User Manual ...
- Page 17 Startup Quick Start Guide Welcome To Quasar This Quickstart Guide Assumes a Few Things: • • •...
- Page 18 Quasar System Anatomy Required Equipment, Cables, & Accessories: Required items that are NOT included: ...
-
Page 19: Network Switch Configuration
Network Switch Configuration... - Page 20 Quasar Surface Connections Network Connections Mains Power Connections...
- Page 21 Quasar Surface Network Configuration • • • • • • Save & Reboot...
- Page 22 Quasar Console Discovery & Configuration Do It!
- Page 23 Quasar Engine Installation & Network Configuration Physical Installation Mains Power Connections Network Connections • • • • •...
- Page 24 Checking the Connection...
- Page 25 Quasar Engine Audio Outputs Configuration Program Outputs • • • • • • • Apply...
- Page 26 Monitor Outputs...
- Page 27 Quasar Surface Layer Configuration Understanding Layers Configuring Layers • •...
- Page 28 Disabling Layers...
- Page 29 Creating and Configuring Input Sources • • Create New Source Profile • • •...
- Page 30 Assigning Sources to Input Channels • • Creating a Show Profile From The Console • • • Load Source Capture Show...
- Page 31 Creating a Show Profile From The Web UI • • Create new show profile •...
- Page 32 Program Assignment & Monitoring • • •...
-
Page 34: Operation
Operation - 1 Control Surface Overview... - Page 35 Terminology Used In This Manual Button The MTS-MON Master Module...
- Page 37 The Touchscreen User Interface – Expert Mode ...
- Page 38 The Touchscreen User Interface – Simple Mode...
- Page 39 The XR-4FAD Fader Module ...
- Page 40 Operation - 2 The Touchescreen UI GUI Elements : Widgets & Windows General GUI Widgets’ Rules Menu Tabs...
- Page 41 GUI Buttons ...
- Page 42 Labels COMPRESSOR RATIO Frames...
- Page 43 Gauges Faders...
- Page 44 Quasar Master Menu (orange tabs) MASTER HOME ...
- Page 45 SHOW PROFILES LOAD SHOW • • • • • • • DELETE SHOW Managing Show Profiles From The Console ...
-
Page 46: Monitor Options
UPDATE SHOW MONITOR OPTIONS • • •... - Page 47 ...
- Page 48 AUTOMIX CALL CONTROL...
-
Page 49: Aux Returns
MASTER AUXES AUX RETURNS... - Page 50 HOT KEYS...
- Page 51 Quasar Channel Menu (blue tabs) HOME SOURCE...
- Page 52 INPUT & FILTERS ...
- Page 53 DYNAMICS COPY PASTE CLEAR PRESETS...
- Page 54 EQUALIZER COPY PASTE CLEAR PRESETS...
-
Page 55: Aux Sends
DE-ESSER AUX SENDS ... - Page 56 CONTROL & B/FEED ...
- Page 57 Operation – 3 Working With The Dynamics Dynamics UI...
- Page 58 Compressor/Limiter...
- Page 59 Expander/Gate Some Configuration Examples...
- Page 61 Working With The De-Esser De-Esser Sidechain Setting The De-Esser PFL to LS PFL to HP DE-ESSER ACTIVE ESS SIGNAL PROCESSED ESS ...
- Page 62 Working With The Automixer ...
- Page 63 Working With The Call Controller LINE LINE LINE LINE LINE...
- Page 64 LINE LINE LINE ...
- Page 65 LINE 1 ON HOLD READY LINE 1 ON HANDSET LINE 1 SEIZED EW LINE 1 USED EW ...
- Page 66 TRANSFER • • Fader Modules’ Hardware Keys ...
- Page 69 Configuration - 1 Web UI Reference: MTS-MON Module...
-
Page 70: System Menu
System Menu Status Network Setup... - Page 71 Software Choose File Upload Software Switch to Selected Bank Reboot…...
- Page 72 Time Setup Set Time from PC Apply Remote GUI...
-
Page 74: Configuration Menu
Configuration Menu Console Discovery Do It! - Page 75 Engine Save Customize...
- Page 76 Apply...
- Page 77 UI Options CHANNEL SELECT ...
- Page 78 CHANNEL SELECT Hot Keys...
- Page 79 Apply...
- Page 80 Brightness Control Apply Apply...
- Page 81 Backup / Restore Backup Settings Choose File Restore settings ...
-
Page 83: Profiles Menu
Profiles Menu Presets... - Page 84 Create new preset Apply PRESET STORE...
-
Page 85: Diagnostics Menu
CLOSE COPY PASTE Diagnostics Menu Clear Log Log History Delete Selected Files... - Page 86 Log Setup Switch Statistics Active Connections Module Information Screenshot • • • • •...
- Page 87 Web UI Reference: XR-4FAD Module...
-
Page 88: System Menu
System Menu Status Network Setup Software Choose File Upload Software Switch to Selected Bank Time Setup Set Time from PC Apply... -
Page 89: Configuration Menu
Configuration Menu Connection Layers Setup Hardware Key Map Fader Offset... - Page 90 Brightness Control Apply...
- Page 91 Apply Backup / Restore Backup Settings Choose File Restore settings Diagnostics Menu...
- Page 92 Fader Calibration Screenshot...
- Page 93 Configuration - 2 Profiles Source Profiles...
- Page 94 Create new source profile Delete Selected Sources...
- Page 95 Basic Source Settings Create new source profile ...
- Page 96 ...
- Page 97 ...
- Page 98 • • • • • • • • • • • • • • • •...
- Page 99 • • • • • •...
-
Page 100: Source Availability
• • • • • Source Availability Bus Assignment On Manual Source Load... - Page 101 • • Apply Apply...
- Page 102 Filters, Dynamics, & Equalizer Save as Copy Apply Cancel Source Configuration Examples...
-
Page 103: Create The Operator's Mic Source Profile
Create The Operator’s Mic Source Profile Create new source profile Apply Upload Apply... - Page 104 Create a Guest Mic Source Profile...
- Page 105 Other Helpful Options: the Knob Function...
- Page 106 Other Helpful Options: Default Backfeed Other Mic Profile Types Create a CD Player Source (Line Source Type)
- Page 108 Create a Telephone Source (Phone Source Type) ...
- Page 109 ...
- Page 110 ...
- Page 111 Create a Codec Source With Custom Backfeed...
- Page 112 ...
- Page 113 ...
- Page 115 Show Profiles How To Create a Show Profile CAPTURE SHOW ...
- Page 116 CAPTURE SHOW LOAD SHOW RENAME SHOW DELETE SHOW UPDATE CURRENT...
- Page 117 Capture show profile Create new show profile...
- Page 118 Show Profile Main Page Monitor Section Aux Masters Record Mode Phone Control Quick Channel Options...
- Page 119 • • • Show Profile Top Menu...
-
Page 120: Channel Configuration Page
Channel Configuration Page Source & Control • • • • • • • •... - Page 121 • • • • • •...
- Page 122 • • • •...
- Page 123 Bus Assignments • • • • • Filters • • •...
- Page 124 Dynamics Equalizer • • • •...
- Page 125 De-Esser Default Backfeed Options • • • •...
- Page 126 Guest Individual Headphones...
- Page 127 Standard Record Mode Options • • • • • Save Show...
- Page 128 Monitor Section Configuration Page Control Room and Studio Monitors • • • •...
- Page 129 • • • • • • • • • • • • • • • •...
- Page 130 • CR Headphones Equalizer Feed to Source...
- Page 131 Automixer Externals Save Show...
- Page 132 Aux Masters Configuration Page Aux Master Sends 1-8 • • • • • Aux Master Returns 1-2...
- Page 133 • • • • • • • • • • • • • • Save Show...
- Page 134 Record Mode Configuration Page • • • Flexible Record Mode Options...
- Page 135 • • • Phone Control Configuration Page...
- Page 136 Telos VX Telos AP Hybrid Settings...
- Page 137 Configuration - 3 Setting up Phones Phone Control Types • • •...
- Page 138 EU Phone Operation Setup Source Profile Settings for EU Phone Operation ...
- Page 139 Telos VX settings for EU Phone operation...
- Page 141 US Phone Operation Setup Source Profile Settings for US Phone Operation – VX & Nx Systems...
- Page 142 Phone Control Source Profile Settings for US Phone Operation – Hx6 & iQ6 Systems Phone Control...
- Page 143 Show Profile Settings For US Phone Operation Phone Control ...
- Page 144 ...
- Page 145 Telos VX settings for US Phone operation Line 1 Line 1 Line 2 Line 2 Line 3 Line 3 Line 4 Line 4 Line 5 Line 5 Line 6 Line 6 Line 7 Line 7 Line 8 Line 8...
- Page 147 GPIO Control Operation Style...
- Page 148 Telos Hx1 DE-9 Pin Axia GPIO port DA-15 Pin-1 Pin-7 Pin-2 Pin-4 Pin-3 Pin-5 Name Type Notes INPUTS ON Command Active Low Input Turns channel ON OFF Command Active Low Input Turns channel OFF PFL Command Active Low Input Turns PFL ON RESET Command Active Low Input Turns channel off while not...
-
Page 149: Working With Layers
Configuration - 4 Working with Layers The Layer Concept Explained Apply... -
Page 150: Configuring Layers
Configuring Layers ... - Page 151 Apply Reset to Defaults...
- Page 152 User Keys/Buttons MTS-MON Module User 1-8 Buttons Apply Programming MTS User Buttons With Pathfinder...
- Page 154 Test 1 Test 2 Test 3 Test 4 Test 5 Test 6 Disconnect Z/IP ONE Z/IP ONE Connect...
- Page 155 XR-4FAD Module User 1-4 Buttons Remapping The XR-4FAD Module Keys...
- Page 156 Apply Programming Fader User Buttons With Pathfinder...
- Page 158 Configuration - 5 Practical Configuration Guides Setting Up The Console Talkback When the Operator is the Host...
- Page 159 When the Studio Guest is the Host...
- Page 160 Setting Up The Monitors & PFL/AFL...
- Page 161 Monitoring PFL in the CR Headphones Monitoring PFL in the CR Loudspeakers...
- Page 162 Triggering an ON AIR light GPIO Control Room Monitor Logic...
- Page 164 Setting Up Mix-Minuses...
- Page 165 Standard Vs. Flexible Record Modes The Standard Record Mode ...
- Page 166 The Flexible Record Mode ...
- Page 168 Configuration - 6 Audio Metering Options ...
- Page 169 The Main Meters Meter Ballistics...
- Page 170 Quasar Meter Types Specifications...
- Page 172 LOUDNESS START/STOP/RESET The Analog VU Meters...
- Page 173 Reference Level Alignment The Loudness Meters ...
- Page 174 START/STOP/RESET Relative Loudness Loudness Range Control LOUDNESS START/STOP/RESET...
-
Page 175: Gpio Configuration
Configuration - 7 GPIO Configuration GPIO Port Definitions... -
Page 176: Gpio Operator's Microphone Logic
GPIO Operator’s Microphone Logic... -
Page 177: Gpio Control Room Guest Microphone Logic
GPIO Control Room Guest Microphone Logic... - Page 178 GPIO Producer’s Microphone Logic...
-
Page 179: Gpio Line Input Logic
GPIO Line Input Logic... -
Page 180: Gpio Codec Logic
GPIO Codec Logic Name Pin Type Notes INPUTS ON Command Active Low Input Turns channel ON OFF Command Active Low Input Turns channel OFF TALK (to CR) Active Low Input Mutes channel outputs and routes Command source audio to PFL speakers MUTE Command Active Low Input Mutes channel outputs... -
Page 181: Gpio Telephone Hybrid Logic
GPIO Telephone Hybrid Logic Name Pin Type Notes INPUTS ON Command Active Low Input Turns channel ON OFF Command Active Low Input Turns channel OFF PFL Command Active Low Input Turns PFL/AFL ON RESET Command Active Low Input Turns channel off while not sending a STOP pulse READY Command Active Low Input... -
Page 182: Gpio Control Room Monitor Logic
GPIO Control Room Monitor Logic Name Pin Type Notes INPUTS MUTE CR Command Active Low Input Mutes CR monitors and PFL speakers DIM CR Command Active Low Input Allows external dimming of CR monitor speakers. Enable EXT PFL Active Low Input Feeds External Audio Input to PFL bus Command TALK TO EXT... -
Page 183: Gpio Computer Playback Device Logic
GPIO Computer Playback Device Logic Name Pin Type Notes INPUTS ON Command Active Low Input Turns channel ON OFF Command Active Low Input Turns channel OFF & sends 100 msec STOP pulse PFL Command Active Low Input Turns PFL/AFL ON Not Used Active Low Input READY Command... - Page 184 Comparative Table Of GPIO Commands...
-
Page 185: About Gpio Connections
About GPIO Connections... - Page 187 Configuration - 8 The Quasar Engine Web UI...
- Page 188 System Menu Home ...
- Page 189 Hardware Info Software Commit Choose File Upload...
-
Page 190: Status Menu
Apply Selected Bank Status Menu Fader Channels... - Page 191 Aux Returns and Monitor Inputs...
- Page 192 Prog, Mon, Aux Outs VMIX and VMODEs I/Os...
- Page 193 Configuration Menu Program & Monitor Outs • • •...
- Page 194 • • • • • • • •...
- Page 195 Auto Ch # Apply ...
- Page 196 Integrated Omnia Processing • • Apply...
- Page 197 Auxiliary Outputs AoIP and Options...
- Page 199 Network Setup Apply...
- Page 200 Backup / Restore Backup Choose File Restore...
- Page 201 Diagnostics Menu Stream Statistics...
- Page 202 ...
- Page 203 Logging...
- Page 204 Download Trace Clear Trace View Startup Log DSP Parameters Back to Main Page...
-
Page 205: V-Mixer And V-Mode
V-Mixer and V-Mode V-Mixer V-Mixer Main page... - Page 206 Auto Ch # Apply V-Mix Submixer Settings...
- Page 208 Apply...
- Page 209 Some VMix Examples...
- Page 210 Combining VMix with Pathfinder Core PRO Routing Control...
- Page 211 GPIO control of your VMIX with Pathfinder...
- Page 212 V-Mode V-Mode Main Page ...
- Page 213 V-Mode Settings page...
- Page 214 ...
- Page 215 Import SDP Apply to AES67 Settings...
- Page 216 Preview Refresh Apply ...
- Page 223 Appendix A Previous Quasar Engine Platforms ...
- Page 224 Appendix B Quasar Surface Specifications...
- Page 225 Quasar Engine Specifications Input Filters 4-Band Equalizer Compressor Expander/Noise Gate De-esser...
- Page 226 Mechanical Data Power Supply Operating Temperatures CE CONFORMANCE INFORMATION:...
- Page 227 Quasar I/O Specifications (Axia xNodes) Microphone Preamplifiers Analog Line Inputs Analog Line Outputs Digital Audio Inputs and Outputs...
- Page 228 Frequency Response Dynamic Range Equivalent Input Noise Crosstalk Isolation, Stereo Separation and CMRR...
- Page 229 Appendix C CE Declaration Of Conformity – EU...
- Page 230 UK Conformity Assessed...
Need help?
Do you have a question about the Axia QUASAR and is the answer not in the manual?
Questions and answers