Advertisement
Quick Links
QUICK START GUIDE
®
Axia
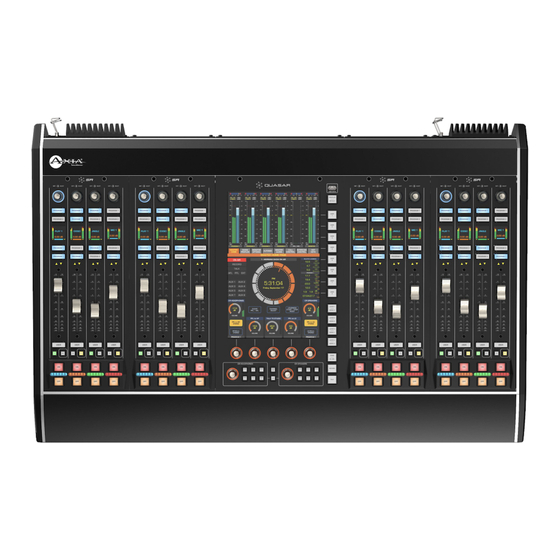
Quasar
AoIP Mixing Console
Welcome to Quasar
Setup of a networked audio mixing console, though we have made it as easy as possible,
is challenging to condense into a few pages. The following material is intended to help
the busy engineer get up and running in a few minutes.
This Quickstart Guide assumes a few things:
• That the reader has some knowledge of network basics and terminology,
• That the reader is familiar with other Axia Livewire products,
• And that the reader has a network switch correctly configured for Livewire
We will take you through the basic steps to configure your new Quasar and have you up
and running in no time. But before we get started, let's make sure you are familiar with
the Quasar System anatomy.
PN: 1490-00223-003 --- Quasar Quick Start Guide
TelosAlliance.com
Advertisement

Related Manuals for Telos Alliance Axia Quasar


Summary of Contents for Telos Alliance Axia Quasar
- Page 1 QUICK START GUIDE ® Axia Quasar AoIP Mixing Console Welcome to Quasar Setup of a networked audio mixing console, though we have made it as easy as possible, is challenging to condense into a few pages. The following material is intended to help the busy engineer get up and running in a few minutes.
- Page 2 QUICK START GUIDE Example of simple Studio configuration. Connection of the optional TBP-IO module is included in this drawing. REQUIRED EQUIPMENT, CABLES, AND ACCESSORIES: There are a few additional items required for a successful installation. Please check the list below. Included items: Items you need to supply: •...
- Page 3 QUICK START GUIDE Steps to complete in order to get audio from the console: Network Switch – Configuration for Livewire Quasar Surface - Physical connections Quasar Surface - Network configuration Initial Setup Quasar Surface – Modules discovery & configuration Quasar Engine – Installation & network configuration Checking Connection to the Quasar Engine Quasar Engine –...
- Page 4 5. Make Sure your AC Mains are properly grounded! The Quasar (like every other professional device) is grounded through the AC Mains cables, and does not require a separate chassis ground. 6. Continue to Network Configuration with your Axia Quasar surface modules. TelosAlliance.com PN: 1490-00223-003 --- Quasar Quick Start Guide...
- Page 5 QUICK START GUIDE Quasar Surface - Network configuration Quasar is shipped with pre-set IP addresses on both the Surface and the Engine. Normally the default IPs are: Surface (Master) 192.168.2.10, Engine 192.168.2.100, Surface Modules 192.168.2.11-12-13…etc. In case you need to change the default settings, or in case once the console is started up the warning message: “No Connection to Engine”...
- Page 6 QUICK START GUIDE Quasar Surface – Modules’ discovery & configuration Using a PC connected to your studio network, launch a web browser and enter the IP address you previously assigned to the MTS into the browser’s address bar. In the left column, click on Console Discovery menu.
- Page 7 QUICK START GUIDE Once all addresses have been set, please check access to each fader module by entering its IP address in your browser and by navigating each module’s Web UI. You can also click the IP address directly from the list you see in the Console Discovery. The default access credentials will be the same used for the MTS Module: user –...
- Page 8 QUICK START GUIDE Checking connection to the Quasar Engine Using a PC connected to your studio network, launch a web browser and enter the IP address assigned to the Engine into the browser’s address bar. When prompted for authentication enter user name “user”, and leave the password field blank.
- Page 9 QUICK START GUIDE Quasar Engine - Audio outputs configuration 1. Using a PC connected to your studio network, go to the Engine Web UI home page 2. In the left column, select Program and Monitor outputs. 3. Enter the channel numbers you planned for the Quasar Engine (Livewire Sources) outputs.
- Page 10 QUICK START GUIDE Surface Layer Configuration Layers are useful when you need to access a number of DSP input channels on your engine which is larger than the number of faders (or phisical channel strips) available on your Quasar surface. Since any fader on any module could access any input channel on the Quasar Engine, you will need to assign four input channel to each of the 4 layers available, on every Fader Module.
- Page 11 QUICK START GUIDE In case you don’t need to use Layers, just make sure that layers are disabled. You can disable Layers by navigating the Master Module Web UI and selecting the Customize menu. This will switch off the Layer buttons on the Master module. TelosAlliance.com PN: 1490-00223-003 --- Quasar Quick Start Guide...
- Page 12 QUICK START GUIDE Input Source creation and configuration You’ll use your Web browser to create your first audio source in just a few fast steps: 1. Browse the Quasar MTS module Web UI. In the left column under Profiles select Sources 2.
- Page 13 QUICK START GUIDE Assign Sources to Input Channels Once all the required Sources are created, you need to assign them to the input channels of your Quasar Engine, and save this configuration in what we call “Show Profile”. You can do so in two ways: 1.
- Page 14 QUICK START GUIDE From the Web UI: From your PC, navigate the “Shows” main page, and create a New Show Profile TelosAlliance.com PN: 1490-00223-003 --- Quasar Quick Start Guide...
- Page 15 QUICK START GUIDE After clicking on “Create new show profile” button, a dialog will appear, to let you type in the new profile name, and confirm. Then the following page will appear, and here you will be able to assign sources to each of the input channels, by picking them up from the drop-down menu.
- Page 16 QUICK START GUIDE Program assignment & monitoring Press the Program 1 key on the fader strip; it will illuminate to show you’ve assigned that fader to PGM-1. Press the ON key at the bottom of the fader strip and move the fader up.
- Page 17 INFORMATION ABOUT YOUR NEW PRODUCT IMPORTANT! Telos Alliance strongly suggests that you use an Uninterruptible Power Supply (UPS) with power line filtering to prevent damage to the unit during electrical storms and power surges. Please note that damage due to lightning is not covered under the product Warranty (refer to your User Manual for warranty information).
- Page 18 QUICK START GUIDE This page intentionally blank TelosAlliance.com PN: 1490-00223-003 --- Quasar Quick Start Guide...
- Page 19 QUICK START GUIDE This page intentionally blank TelosAlliance.com PN: 1490-00223-003 --- Quasar Quick Start Guide...
-
Page 20: Quick Links
Radio: support@telosalliance.com TV: support@linearacoustic.com 1241 Superior Ave. • Cleveland, Ohio, 44114, USA • +1.216.241.7225 • TelosAlliance.com © 2021 TLS Corp. Telos Alliance®. All Rights Reserved. C21/3/16083. P/N 1490-00223-003 QUASAR QUICK START GUIDE TelosAlliance.com PN: 1490-00223-003 --- Quasar Quick Start Guide...
Need help?
Do you have a question about the Axia Quasar and is the answer not in the manual?
Questions and answers