Table of Contents
Advertisement
Quick Links
Advertisement
Table of Contents

Related Manuals for Hytera PD50X


Summary of Contents for Hytera PD50X
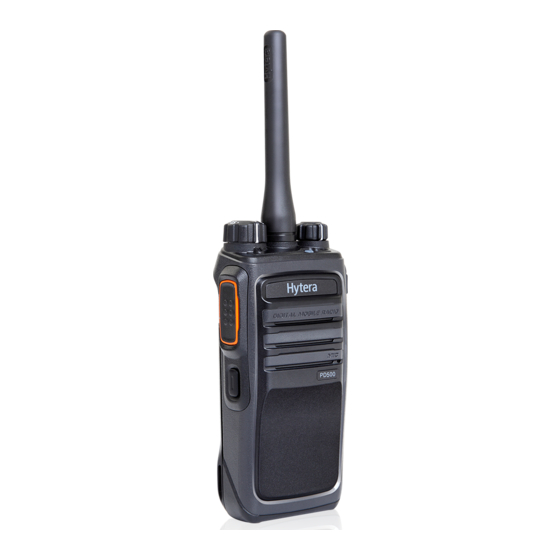
- Page 1 DIGITAL PORTABLE RADIO PD50X USER MANUAL...
- Page 2 Welcome to the world of Hytera and thank you for purchasing this product. This manual includes a description of the functions and step-by-step procedures for use. It also includes a troubleshooting guide. To avoid bodily injury or property loss caused by incorrect operation, please carefully read the Safety Information Booklet before use.
- Page 3 We do not guarantee, for any particular purpose, the accuracy, validity, Copyright Information timeliness, legitimacy or completeness of the third- party products and Hytera is the trademark or registered trademark of Hytera Communications contents involved in this manual. Corporation Limited (the Company) in the People's Republic of China (PRC) If you have any suggestions or would like to receive more information, and/or other countries or areas.
- Page 4 control your exposure ensure compliance with Operation is subject to the following two conditions: occupational/controlled environmental exposure limits, always adhere to the l This device may not cause harmful interference. following procedures. l This device must accept any interference received, including interference that may cause undesired operation.
- Page 5 which exceed the FCC's occupational/controlled environmental RF exposure limits. l Use of non-approved antennas, batteries, and accessories causes the radio to exceed the FCC RF exposure guidelines. l Contact your local dealer for the product's optional accessories. EU Regulatory Conformance As certified by the qualified laboratory, the product is in compliance with the essential requirements and other relevant provisions of 2014/53/EU.
-
Page 6: Table Of Contents
Contents Documentation Information Checking the Battery Power Icon Conventions Selecting a Zone Notation Conventions Selecting a Channel Packing List Call Services Product Overview Call on Digital Channel Product Layout Call on Analog Channel Programmable Key General Features LED Indications Basic Settings Before Use Audio Settings Charging the Battery... - Page 7 Troubleshooting Care and Cleaning Product Care Product Cleaning Optional Accessories Abbreviations...
-
Page 8: Documentation Information
Item Description Example Documentation Information Denotes messages, The screen displays "Invalid Battery!". directories, file Icon Conventions Open "PDT_PSS.exe". " " names, folder names, "D:/opt/ Icon Description and parameter local". Indicates references that can further describe the related values. In the Port text box, enter "22". topics. -
Page 9: Product Overview
LED Indications Product Overview Radio Status Product Layout Indicator Flashes green The radio is being turned on. Glows green The radio is receiving. Glows red The radio is transmitting. Flashes orange The radio is scanning, roaming or hunting. slowly Flashes orange The radio is working in emergency mode. -
Page 10: Before Use
Before Use LED Indicator Charging Status Flashes red slowly No battery is placed on the charger. Charging the Battery Glows red The battery is being charged. Glows orange The battery is charged to 90% or above. l Read the Safety Information Booklet before charging. Glows green The battery is fully charged. -
Page 11: Attaching The Antenna
Attaching the Antenna Attaching the Audio Accessory For optimal waterproof and dustproof performance, close the accessory Do not hold the radio by the antenna and swing it. This may affect connector cover and fasten the screw when no accessory is attached. the antenna performance and shorten the life span of the antenna. -
Page 12: Basic Operations
Basic Operations Alert Tone Battery Power Indicator Glows green Three beeps High Turning the Radio On or Off Glows orange Two beeps Medium Glows red One beep battery Under the low battery threshold. Glows red tone Recharge or replace the battery. Selecting a Zone A zone is a group of channels within the same operational area, allowing you to manage channels in a convenient manner. -
Page 13: Call Services
Call Services Listening and Responding to a Call You can listen to an incoming private/group/all call without any operation. When you are speaking during a call, keep the microphone about 2.5 to 5 To respond to a private or group call, press and hold the PTT key within the cm away from your mouth. - Page 14 To initiate a call with signaling, press the PTT key or preprogrammed One Touch Call key to send code. The LED indicator of the calling radio glows red. When receiving the matched signaling, the called radio automatically decodes the signaling and its LED indicator glows green. The call is established successfully.
-
Page 15: General Features
General Features Feature Digital Analog MIC AGC √ √ The features supported by the radio are listed in the following table. Audio Feedback Suppression √ × Feature Digital Analog Always Treble Boost √ √ LED Indicator √ √ One Touch Call √... -
Page 16: Basic Settings
Feature Digital Analog Feature Feature Descriptio Description Settings Settings The feature allows you to transmit voice Monitor × √ without pressing and holding the PTT key. Press Adjust Squelch Level × √ With the feature enabled, the radio preprogrammed CTCSS/ ×... -
Page 17: Audio Settings
Audio Settings Feature Description Settings Press Microphone Setting preprogrammed feature allows radio Enabling the Mic AGC Feature Talk Around communicate in DMO mode when the The Mic AGC feature allows the calling radio to control the voice output Talk Around key to change repeater malfunctions or the radio is out of gain within a proper range during transmission, so as to provide improved... -
Page 18: One Touch Call
activities are detected on a channel, the radio stays on the channel, and the One Touch Call LED indicator glows green. The One Touch Call feature allows you to press the preprogrammed One Touch Call key to quickly access a service assigned by your dealer. The services available for assignment are as follows: If you do not want to listen to the activities on the channel, press the preprogrammed Nuisance Temporary Delete key to temporarily... -
Page 19: Features On Digital Channel
This features is enabled by default to prevent interference from other radios Feature Description Operation on the same channel during transmission. repeater mode to automatically Features on Digital Channel select an idle time slot for communication. In this way, the Feature Description Operation... -
Page 20: Features On Analog Channel
Feature Description Operation Feature Description Operation after seeing the alert. disabled radio are locked out. The radio must be reprogrammed by The feature allows you to check the dealer or enabled by the whether the radio of a private Radio Press the preprogrammed Radio Enable command for reuse. -
Page 21: Personal Safety Services
Feature Feature Description Operation Description Operation received CTCSS/CDCSS l Press and hold matches transmitted dealer. down the CTCSS/CDCSS. preprogrammed Monitor Personal Safety Services Momentary key to enable Emergency the feature, and The Emergency feature allows you to initiate emergency alarms or calls to release the key ask for help from your companion or the control center in case of to disable the... - Page 22 Initiating an Emergency Call Emergency Description Type You can press the preprogrammed Emergency On key to initiate an emergency call to the preset contact. listen to a received call. When the emergency mode is set to "Alarm" or "Call Only", you can enable The radio gives audible indication only upon receiving a the Alarm w/Call to Follow feature.
-
Page 23: Communication Security Services
Lone Worker Scrambler The Lone Worker feature allows the radio to automatically send an The Scrambler feature allows the radio to invert the frequency spectrum of emergency alarm to your companion or the control center if you do not transmitted audio signals. Only the receiving radio with the same scrambler operate your radio within the preset time period. - Page 24 Troubleshooting Phenomena Analysis Solution The battery may be installed improperly. Remove and reattach the battery. The battery power may run out. Recharge or replace the battery. The terminal cannot be turned on. The battery may be poorly connected due to dirtied or Clean the battery contacts or replace the battery.
- Page 25 Phenomena Analysis Solution Verify that you are on the correct digital or analog The channel type (digital or analog) may be set incorrectly. channel. You may be too far away from other members. Move towards other members. Make sure call participants within The signal is poor.
- Page 26 Optional Accessories Care and Cleaning To guarantee optimal performance as well as a long service life of the product, please follow the tips below. Use the accessories specified by the Company only. Otherwise, we will Product Care not be liable for any loss or damage arising out of the use of any l Do not pierce or scrape the product.
- Page 27 Hytera Communications Corporation Limited. 2019 Hytera Communications Corporation Limited. Address: Hytera Tower,Hi-Tech Industrial Park North,9108#Beihuan Road, Nanshan District,shenzhen,People’s Republic of China...
Need help?
Do you have a question about the PD50X and is the answer not in the manual?
Questions and answers