Table of Contents
Advertisement
Welcome to the world of Hytera and thank you for purchasing this product. This manual
includes a description of the functions and step-by-step procedures for use. It also includes
a troubleshooting guide. To avoid bodily injury or property loss caused by incorrect
operation, please carefully read the Safety Information Booklet before use.
This manual is applicable to the following product:
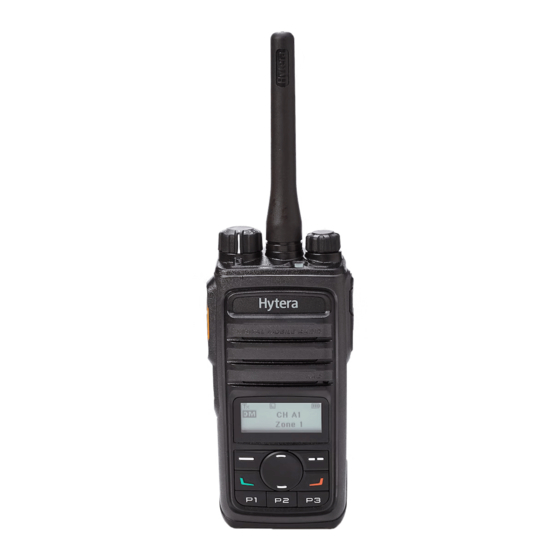
PD562i Digital Portable Radio
Advertisement
Table of Contents

Related Manuals for Hytera PD562i


Summary of Contents for Hytera PD562i
- Page 1 Welcome to the world of Hytera and thank you for purchasing this product. This manual includes a description of the functions and step-by-step procedures for use. It also includes a troubleshooting guide. To avoid bodily injury or property loss caused by incorrect operation, please carefully read the Safety Information Booklet before use.
- Page 2 Company. Hytera is the trademark or registered trademark of Hytera Communications Corporation Limited (the Company) in the People's Republic of China (PRC) We do not guarantee, for any particular purpose, the accuracy, validity, and/or other countries or areas.
- Page 3 Compliance with RF Exposure Standards are not met. Operating Instructions: Hytera's radio complies with the following RF energy exposure standards and guidelines: l Transmit no more than the rated duty factor of 50% of the time. To transmit (talk), press the Push-To-Talk (PTT) key. To receive calls, l United States Federal Communications Commission, Code of Federal release the PTT key.
- Page 4 L'exploitation est autorisée aux l When worn on the body, always place the radio in a Hytera-approved deux conditions suivantes: (1) l'appareil ne doit pas produire de brouillage, holder, holster, case, or body harness or by use of the correct clip for et (2) l'utilisateur de l'appareil doit accepter tout brouillage radioélectrique...
-
Page 5: Table Of Contents
Contents Selecting a Zone and Channel Contents Documentation Conventions Selecting a Zone and Channel Packing List Status Indications Documentation Conventions Product Overview LCD Icons Product Controls LED Indications Programmable Keys Call Services Before Use Call on Digital Channel Charging the Battery Call on Analog Channel Attaching the Battery Message Services... - Page 6 Talk Around Scan Roam Talk Around Control Services Analog Services Personal Safety Services Control Services Communication Security Services Analog Services Troubleshooting Personal Safety Services Care and Cleaning Communication Security Services Product Care Troubleshooting Product Cleaning Care and Cleaning Optional Accessories Product Care Abbreviations Product Cleaning...
-
Page 7: Documentation Conventions
Documentation Conventions Item Description Example The screen displays "Invalid Icon Conventions Denotes messages, Battery!". Icon Description directories, file names, Open "PDT_PSS.exe". " " folder names, and Indicates references that can further describe the related Go to "D:/opt/local". parameter values. topics. In the Port text box, enter "22". -
Page 8: Packing List
Packing List Please unpack carefully and check that all items listed below are received. If any item is missing or damaged, please contact your dealer. Item Quantity (PCS) Item Quantity (PCS) Radio Antenna Battery Belt Clip Charger Strap Power Adapter Documentation Kit Check whether the frequency band marked on the antenna label matches that on the radio label. -
Page 9: Product Overview
Product Overview Product Controls... -
Page 10: Programmable Keys
Programmable Keys To determine the charging status, check the light-emitting diode (LED) indicator on the charger according to the following table: You can request your dealer to program your radio to use the following keys as shortcuts to radio features: SK1, P1 key, P2 key, P3 key, P4 key, LED Indicator Charging Status and P5 key. -
Page 11: Attaching The Battery
Attaching the Battery Attaching the Belt Clip 1. Use a Phillips screwdriver to turn the screws counter-clockwise on the back of the radio and remove them. 2. Align the screw holes on the belt clip with those on the back of the radio. -
Page 12: Basic Operations
1. Open the accessory connector cover. Basic Operations Turning on or off the Radio 2. Plug the accessory into the accessory connector. Adjusting the Volume 3. Rotate the screw on the accessory plug clockwise until hand tight. -
Page 13: Checking The Battery Power
To allow the keypad to be locked automatically, enable the Keypad Lock Checking the Battery Power feature as follows: To check the battery power, press and hold the preprogrammed Battery 1. Press the OK/Menu key from the home screen, and then go to Settings Power Indicator key. -
Page 14: Status Indications
Status Indications Icon Radio Status The Scrambler or Encrypt feature is enabled. LCD Icons The radio is scanning. Icon Radio Status The radio stays on a non-priority channel. Direct Mode: The radio transmits and receives directly. The radio stays on priority channel 1. Repeater Mode: The radio transmits and receives The radio stays on priority channel 2. -
Page 15: Led Indications
Icon Radio Status contact list. LED Indications LED Indicator Radio Status Flashes green Being turned on. Glows green Receiving. Glows red Transmitting. Call on Digital Channel Flashes orange slowly Scanning or roaming. You can initiate or receive the following types of calls on a digital channel: Flashes orange rapidly Working in emergency mode. -
Page 16: Call On Analog Channel
2. Press and hold the PTT key to call the private contact, group Call Without Signaling contact, or all call contact preset for the selected channel. A call without signaling is a call initiated to all the other users on an analog l Contact List or Call Log channel without signaling. -
Page 17: Sending A Message
To view a received message or a sent message, do as follows: Resending a Message To resend a message from the OutBox, do as follows: 1. Press the OK/Menu key. 2. Go to Message > InBox/OutBox > InBox List / OutBox List. 1. -
Page 18: Supplementary Features
Supplementary Features Feature Digital Analog Analog Services × √ The supplementary features of the radio vary with the operation mode. For Personal Security Services √ √ details, see the following table. Encrypt √ × Feature Digital Analog Scrambler × √ Basic Settings √... -
Page 19: Contact Management
If you want to... Then... If you want to... Then... operation or activity is performed within the rental period preset period. Turn off all visible Adjust the brightness Select Brightness, and then press the Up or Down and audible Select Covert Mode, and then select On. of the backlight key. -
Page 20: One Touch Call
optimized voice with proper volume for the receiving party. 2. Go to Settings > Audio Set > LQO. 3. Select On or Off. To turn on or off this feature, do as follows: Turning on or off the Audio Feedback 1. -
Page 21: Scan
Adding a Channel to a Scan List Service Type Description 1. Press the OK/Menu key, and then go to Scan > Scan List. Data Service To send a quick text message. 2. Select the required scan list, and then select Edit/View. 3. -
Page 22: Roam
This feature aims to prevent a radio user from occupying a channel for an Roam extended period and to avoid radio damage due to overheating. The Roam feature allows you to enjoy seamless communication across sites or networks. To turn on or off this feature, press the OK/Menu key, go to Roam > Roam The VOX feature allows you to transmit voice without pressing and holding On/Off, and then select On or Off. -
Page 23: Analog Services Vox
To turn on or off this feature, press the OK/Menu key, go to Settings > Feature Description Operation Radio Set > Compandor, and then select Enable or Disable. Allows you to alert a private Alert Call contact to call you back. Turning on or off the Monitor Feature To activate a feature, do as Allows you to check whether... -
Page 24: Personal Safety Services Control Services
Setting the Squelch Level Emergency Type Description The squelch level refers to the squelch threshold required for the radio's Regular The radio gives audible and visible indications. speaker to be turned on. The radio gives no audible or visible indication, Silent To set the squelch level, press the OK/Menu key, go to Settings >... -
Page 25: Communication Security Services Analog Services
data. Only the receiving radio with the same key value or ID can decrypt Triggering the Emergency Mode the voice or data. To trigger the emergency mode, press the preprogrammed Emergency On key. The radio then enters the preset emergency mode with or without Turning on or off the Encrypt Feature indications depending on the preset emergency type. -
Page 26: Troubleshooting
Troubleshooting Phenomena Analysis Solution The battery may be installed improperly. Remove and reattach the battery. The battery power may run out. Recharge or replace the battery. You cannot turn on the radio. The battery may suffer from poor contact caused by dirty or Clean the battery contacts or replace the battery. - Page 27 Phenomena Analysis Solution You may be too far away from other members. Move towards other members. You may be in an unfavourable position. For example, your You are unable to hear anyone Move to an open and flat area, restart the radio, and try communication may be blocked by high buildings or blocked because of too much noise and again.
-
Page 28: Care And Cleaning
Care and Cleaning Optional Accessories To guarantee optimal performance as well as a long service life of the Contact your local dealer for the optional accessories used with the product. product, please follow these tips. Product Care Use the specified accessories only; otherwise, we will not be liable for l Do not pierce or scrape the product.
Need help?
Do you have a question about the PD562i and is the answer not in the manual?
Questions and answers