
Related Manuals for infaco PW3


Summary of Contents for infaco PW3
-
Page 1: Table Of Contents
PW3, a multi-function handle Compatible tools Precautions before use Personal protection equipment Protection of the environment General product view Specifications Compatible batteries User guide Speed settings Telescopic pole adjustment Tool gap adjustment Use and safety precautions Servicing and maintenance... -
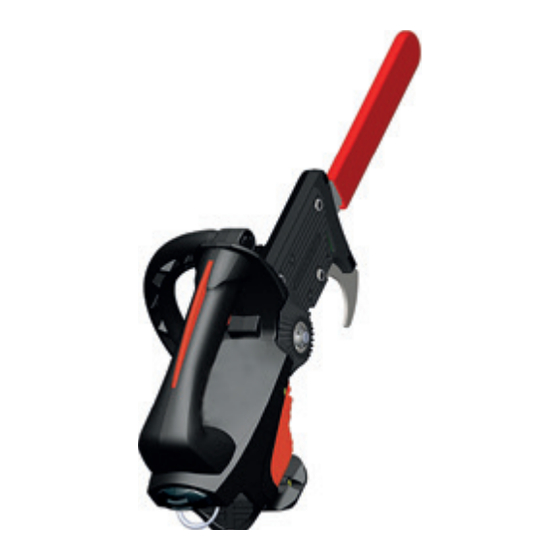
Page 2: Pw3, A Multi-Function Handle
PW3, a multi-function handle Hand tools + TR9 + SC160P3 + PWMP3 + THD600P3 + THD700P3 + PWP36RB Pole tools + PW930P3 + PW930P3 + PW930P3 + PW930P3 SC160P3 + TR9 + THD600P3 + THD700P3 + PB100P3 (hoeing) PB150P3 (hoeing) -
Page 3: Compatible Tools
Compatible tools reference description THD600P3 Double hedge-trimmer, blade length 600mm. THD700P3 Double hedge-trimmer, blade length 700mm. Arborists chainsaw, maximum cutting capacity Ø150mm. SC160P3 Saw head, max cutting capacity Ø100mm. PW930p3 Carbon extension, length 930mm. Pw1830p3 Carbon extension, length 1830mm. PWT1650p3 Carbon extension, length 1650mm. -
Page 4: Precautions Before Use
> Power tools must not be disposed of with household refuse. > The device, accessories and packaging must be taken to a recycling center. > Ask the approved INFACO dealer for up-to-date information on the eco- compatible elimination of waste. -
Page 5: General Product View
General product view Comb supports Box contents rods Manual Left comb Vibrating head Pole Right comb Specifications Reference v5000p3AF v5000p3AT Rated power supply 48VDC Max power 960W Weight 3200g 3900g Length 2.25m 2.2 to 3m Speed 1040 beats / minute These specifi cations are given as an indication. -
Page 6: Compatible Batteries
Compatible batteries 820Wh battery L850B Cable compatibility L856CC 120Wh battery 831B Cable compatibility 825S 500Wh battery L810B Cable compatibility PW225S 150Wh battery 731B Cable compatibility PW225S (requires fuse replacement by 539F20). -
Page 7: User Guide
Comb assembly Ask your dealer for advice in assembling the comb. Incorrect assembly can cause comb or rod wear. Ref: E710 It is strongly recommended to use the INFACO screwdriver (E710) for tightening to avoid damaging the tightening tips. - Page 8 Left comb assembly:...
- Page 9 Right comb assembly...
- Page 10 Comb assembly: WASHER Ref: E712 COUNTER FORCE Ref: CLE13...
- Page 11 WASHER COUNTER FORCE...
- Page 12 Installation and connection Only use INFACO brand 48 volt power supply batteries. Any use with batteries other than INFACO batteries may lead to damage. The warranty on the motorized handle will be void if batteries other than those manufactured by INFACO are used.
- Page 13 > Tighten the wing nut > Connect the power cable...
- Page 14 > Connect the battery > First power up & Exit from standby mode 2 short presses on the trigger ON > 2 start-up modes 1 short press on the trigger = ON 1 short press on the trigger = OFF 1 long press on the trigger = ON Release the trigger = OFF...
-
Page 15: Speed Settings
speed settings 10 speed settings available > On power up > to enter speed setting mode, give one long press on the trigger until the machine starts > Select the required speed using successive short trigger presses. 10 speed settings are available. Short presses to access the ten speed settings (1 press = 1 speed setting) >... -
Page 16: Telescopic Pole Adjustment
telescopic pole adjustment telescopic pole adjustment... -
Page 17: Tool Gap Adjustment
Tool gap adjustment It is imperative to disconnect the machine. No movements GAP OK ADJUST THE Presence of movements... -
Page 18: Use And Safety Precautions
Use and safety precautions The tool is fi tted with an electronic protection system. As soon as the tool jams due to excessive resistance, the electronic system stops the motor. Restart the tool: see the “User manual” section. We also advise keeping the tool’s protective packaging for possible returns to factory customer service. -
Page 19: Servicing And Maintenance
Servicing and maintenance All servicing and maintenance operations must be carried out with the machine disconnected from all power sources. Adapt the servicing frequencies to your tool use. Occasional use, extend the intervals. Intensive use, shorten the intervals. Visual inspection of its condition Complete machine Cleaning... - Page 20 Greasing Generously grease the vibrating head at least once every day, in the morning before starting work. Use NLGI class 2 grade type grease > Unscrew the screws > Grease through the conical hole Grease reference class 2...
- Page 21 > Re-tighten the screw when greasing is OK > Handle + tip greasing Lubricate at least once per week...
-
Page 22: Safety Instruction
Safety instruction IMPORTANT. To reduce the risk of electric discharges, injuries and fire when using electric tools, follow the fundamental safety measures indicated below. Read and follow these instructions before using the tool and keep the safety instructions! Outside operations related to the use of the tool, your tool and its accessories must be disconnected and stored in their relevant packs. -
Page 23: Warranty Conditions
The warranty cannot, under any circumstances, entitle to compensation for the possible immobilization of the tool during repairs. All work carried out by a person other than approved INFACO agents will cancel the tool warranty. The repair or replacement during the warranty period does not extend or renew the initial warranty. -
Page 24: Advice
Advice Keep your work zone tidy. Clutter in work zones increases accident risks. Take into account the work zone. Do not expose power tools to rain. Do not use power tools in damp or wet environments. Make sure the work area is properly lit. Do not use power tools if there are flammable liquids or gases nearby. -
Page 25: Troubleshooting
Troubleshooting Disruptions Causes Solutions Refi t the comb following the Incorrect comb assembly procedure, and contact the dealer if necessary. Re-tighten the comb following Incorrect comb tightening the procedure. Re-tighten the rods following the Signifi cant abnormal Incorrect rod tightening procedure. -
Page 26: Form To Be Returned On Purchase Of The Tool
To be returned to infaco To validate the warranty, REGISTER IMMEDIATELY ONLINE ON : www.infaco.com, , your warranty declaration or send this form filled out IN BLOCK CAPITALS AS SOON AS THE TOOL IS PURCHASED. Surname > ............. First name > .......... - Page 27 Serial number dealer To be kept by the dealer for the INFACO customer file INFACO S.A.S. Bois de Roziès 81140 CAHUZAC-SUR VERE France...
-
Page 28: Technical Information
Technical information or after sales service INFACO S.A.S. Bois de Roziès 81140 CAHUZAC-SUR VERE France Phone: (+33) 05 63 33 91 49 - Fax: (+33) 05 63 33 95 57 Email: electrocoup@infaco.fr Technical videos available on the website: www.infaco.com... -
Page 29: Ce Declaration Of Conformity
Directive 200/14/EC “on the noise emission by equipment for use outdoors” (order of 18 march 2002) modified by directive 2005/88/EC (order of 22 may 2006). La personne autorisée à constituer le dossier technique au sein d’INFACO est M. ALVAREZ Grégory. The person authorized to compile the technical file for INFACO is Mr. Gregory ALVAREZ.
Need help?
Do you have a question about the PW3 and is the answer not in the manual?
Questions and answers