Table of Contents
Advertisement
Installation and service
instructions
for contractors
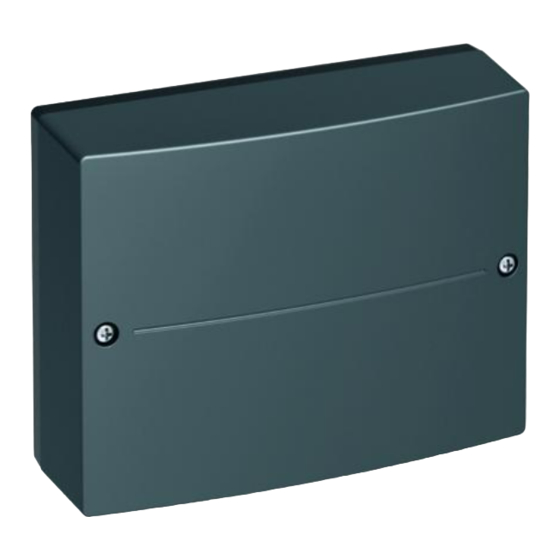
EM-P1 extension
Function extension for connecting a heating circuit pump
Safety instructions
Please follow these safety instructions closely to prevent accidents
and material losses.
Safety instructions explained
Danger
This symbol warns against the
risk of injury.
!
Please note
This symbol warns against the
risk of material losses and envi-
ronmental pollution.
Note
Details identified by the word "Note"
contain additional information.
Installation, initial start-up, inspection,
maintenance and repairs must only be
carried out by a competent person
(heating engineer/installation contrac-
tor).
5831394 GB
6/2018
VIESMANN
Before working on the equipment/heat-
ing system, isolate the power supply
(e.g. by removing a separate mains
fuse or by means of a mains isolator)
and safeguard against unauthorised
reconnection.
When using gas as fuel, also close the
main gas shut-off valve and safeguard
against unauthorised reopening.
Repairing components which fulfil a
safety function can compromise the
safe operation of your heating system.
For replacements, use only original
spare parts supplied or approved by
Viessmann.
Please keep safe.
Advertisement
Table of Contents

Summary of Contents for Viessmann EM-P1
- Page 1 VIESMANN Installation and service instructions for contractors EM-P1 extension Function extension for connecting a heating circuit pump Safety instructions Please follow these safety instructions closely to prevent accidents and material losses. Safety instructions explained Danger This symbol warns against the Before working on the equipment/heat- risk of injury.
- Page 2 Wall mounting Overview of electrical connections [{] [{] [{] [{{] fÖ sÖ 230 V~/50 Hz...
-
Page 3: Overview Of Electrical Connections
Connect plug ) to slot TS3 (see Over- view of electrical connections). Connecting the heating circuit pump Heating circuit pump 230 V~ Specification Rated current Recommended H05VV-F3G connecting cable 0.75 mm H05RN-F3G 0.75 mm A Heating circuit pump B Plug sÖ to EM-P1 extension... - Page 4 Pumps with switching input N PE External ON/OFF A Heating circuit pump D Separate power supply (observe manufacturer's instructions) B Plug sÖ to EM-P1 extension C Contactor Specification for switching the con- tactor: Rated voltage 230 V~ Rated current Recommended...
- Page 5 Specification for switching the con- tactor: Rated voltage 230 V~ Rated current Recommended H05VV-F3G connecting cable 0.75 mm H05RN-F3G 0.75 mm N PE A Heating circuit pump B Plug sÖ to EM-P1 extension C Contactor D Separate power supply (observe manufacturer's instructions)
- Page 6 Heating circuit pump 400 V~ Specification for switching the con- tactor: L1 L2 L3 N PE Rated voltage 230 V~ Rated current Recommended H05VV-F3G connecting cable 0.75 mm H05RN-F3G 0.75 mm A Heating circuit pump B Plug sÖ to EM-P1 extension C Contactor...
- Page 7 Rotary switch S1 Rotary switch S1 must be set to 1 (fac- tory setting). Connecting the PlusBus to the heat generator control unit Note If making the connection to the heat generator with an external plug for the DI1 DI2 DI3 bus connection, disconnect plug jF 1 2 3 4 5 6 and connect the wires directly.
-
Page 8: Separate Power Supply
Power supply Power supply at the heat generator control unit Create the power supply connection. Route the power cable to the heat gen- erator control unit and connect to plug aBH. If power is supplied to a further acces- sory, use plug fÖA provided Heat generator installation and service instructions Danger... - Page 9 Power supply (cont.) Connect the power supply and Isolators for non-earthed conductors implement all safety measures ■ The mains isolator (if installed) must (e.g. RCD circuit) in accordance simultaneously isolate all non- with the following regulations: earthed conductors from the mains ■...
- Page 10 Power supply (cont.) Connect the power supply in accord- ance with the diagram. If the power supply to the appliance is connected with a flexible cable, ensure that the live conductors are pulled taut before the earth conductor in the event of strain relief failure.
-
Page 11: Connection And Wiring Diagram
Connection and wiring diagram A1 PCB, EM-P1 extension S1 Rotary switch A2 PCB F1 Fuse 230 V~ plugs No function P1 sÖ Heating circuit pump (on site) TS3 ) Immersion temperature sen- sor, low loss header P3 sK DHW circulation pump... -
Page 12: Parts List
Parts list The following details are required when ordering parts: ■ Serial no. (see type plate) ■ Position number of the part... - Page 13 Parts list (cont.) 0015 0001 0014 0004 0005 0013 0006...
-
Page 14: Specification
Parts list (cont.) Pos. Part 0001 Extension 0004 Connecting cable 40 0005 PlusBus cable with plug 74 0006 ADIO/M2IO plug set 0013 Strain relief fittings 0014 Fuse, 2.0 A (slow) 250 V (10 pce) 0015 Installation and service instructions Specification Rated voltage 230 V~ Rated frequency... -
Page 15: Declaration Of Conformity
Curve 10 30 50 70 90 110 Temperature in °C Declaration of Conformity We, Viessmann Werke Conformity has been verified with the GmbH & Co. KG, D-35107 Allendorf, CE designation. Using the serial num- declare as sole responsible body that... - Page 16 Viessmann Werke GmbH & Co. KG Viessmann Limited D-35107 Allendorf Hortonwood 30, Telford Telephone: +49 6452 70-0 Shropshire, TF1 7YP, GB Fax: +49 6452 70-2780 Telephone: +44 1952 675000 www.viessmann.com Fax: +44 1952 675040 E-mail: info-uk@viessmann.com...


Need help?
Do you have a question about the EM-P1 and is the answer not in the manual?
Questions and answers