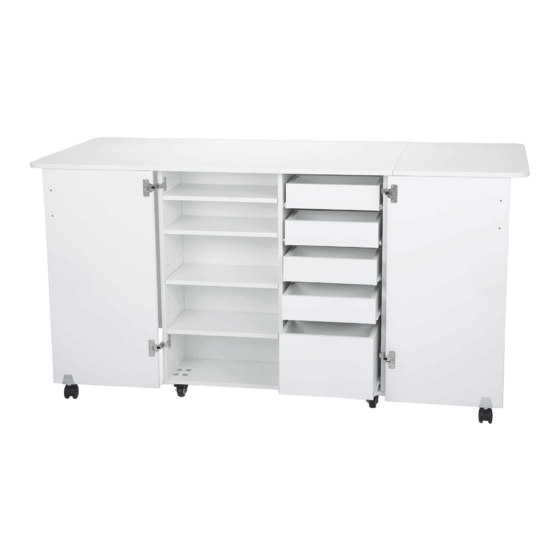
Summary of Contents for Arrow Sewing Cabinets K9411
- Page 1 ASSEMBLY INSTRUCTIONS ITEM No.:K9411 Assembly video can be found on our website at www.arrowcabinets.com in the Video Section. Questions? Call 1-800-533-7347 press 1 or Email: cs@arrowcabinets.com...
- Page 2 Incorrect Correct The arrow direction=front Turn clockwise to lock cam with bolt. Screw cam bolts all the way in. x2 F1 x1 O L1,2,3,4 K1,2,3,4...
-
Page 3: Parts List
PARTS LIST ITEM DESCRIPTION QTY. Top panel Platform Cover Platform Top panel Bottom Left Side Panel Right Side Panel Left Partition Right Partition Center Panel Shelves Shelves Left Door Right Door Insert Holder Drawer Front/Back Drawer Left Side Drawer Right Side Drawer Bottom Large Drawer Front/Back 2 Large Drawer Left Side... -
Page 4: Item Description
PARTS LIST QTY. QTY. ITEM DESCRIPTION ITEM DESCRIPTION 6*35 Cam Bolt Hinge 8*30 Dowel pin Handle (58")Cam Cover Fix Bolt Threaded Dowel Pin 8*16 Fix Bolt Castor 4*14 Screw Castor Hinge Body 14mm Spanner 3.5*25 Screw 3.5*10 Screw Cable Port Magnet c1 6*35 Cam Bolt-76 d1 8*30 Dowel Pin-42... - Page 5 STEP 1 x2 A3 V1/V2 Preparing panels A,A3, G, D, X, Z, Y1, Y2, V1 and V2 1. Insert cams bolts c1 into panels Y1, X, D, A, G and Z as illustrated above. 2. Insert dowel pins d1 to panels X,Z,Y1,Y2,G and D as illustrated above. 3.
- Page 6 STEP 2 Screw 1. Fix Lifter Rail (right) to X panel with s1 screws following predrilled holes as shown on the illustration above. STEP 3 Screw 1. Fix Lifter Rail (left) to Y2 panel with s1 screws following predrilled holes as shown on the illustration above.
- Page 7 STEP 4 Panel D,Y1,Y2,X, and Z assembly. 1.Insert cam bolts on panel Y1,Y2,X and Z into cams on panels D and tighten in a clockwise direction as illustrated above. STEP 5 Panel G assembly. 1. Fix castors t2 to panels G with screws b1 as illustrated above.
- Page 8 STEP 6 Panel G assembly. 1.Insert cam bolts on panel G into cams on panels X,Z,Y1,Y2 and D and tighten in a clockwise direction as illustrated above. STEP 7 Screw Lifter Panel assembly. 1. Fix Lifter to A2 panel with s1 screws following predrilled holes as shown on the illustration above.
- Page 9 STEP 8 Lifter Rail Cable Plastic Guides Rail tabs Mounting the Lifter Assembly. 1.Position lifter onto side rails using plastic guides; by lowering the lifter make sure the cable is catch onto the rail tabs on both sides. See illustration above. 2.When lifter pushed to first lock position remove a small wooden block that will be released from lifter.
- Page 10 STEP 10 Panel O assembly. 1.Insert cam bolts on panel Y2 into cams on panels O and tighten in a clockwise direction as illustrated above. STEP 11 F1 Y2 Moveable shelf assembly. 1.Press in pegs with flat surface facing upwards at the same level on panels Z and Y2.
- Page 11 STEP 12 Door panel V1,V2 assembly. 1.Attach V1, V2 door assembly using hinge g1 with screws s1 to panels X and Z as illustrated above. STEP 13 k2 k4 Panel K2,K3 ,K4 assembly. 1.Insert cam bolts on panel K2 and K3 into cams on panels K4 and tighten in a clockwise direction as illustrated above.
- Page 12 STEP 14 Panel K1 assembly. 1.Insert cam bolts on panel K1 into cams on panels K2,K3 and K4 and tighten in a clockwise direction as illustrated above. Panel L1,L2,L3 and L4 assembly. 1. Slide bottom panel L4 into L3, L1, L2 slots. 2.
- Page 13 STEP 16 Moveable shelf assembly. 1.Press in pegs with flat surface facing upwards at the same level on panels X and Y1. 2.Slide shelf E2 with cut in grooves (if available) downwards on top of p1 pegs. STEP 17 Panels A3 assembly. 1.Fix Hinges h1 with screws s1 into panels A as illustrated above.
- Page 14 You have now successfully completed the assembly on item: ITEM No.:K9411...


Need help?
Do you have a question about the K9411 and is the answer not in the manual?
Questions and answers