Advertisement
Quick Links
Advertisement

Related Manuals for Leica Geosystems Scan Station P16


Summary of Contents for Leica Geosystems Scan Station P16
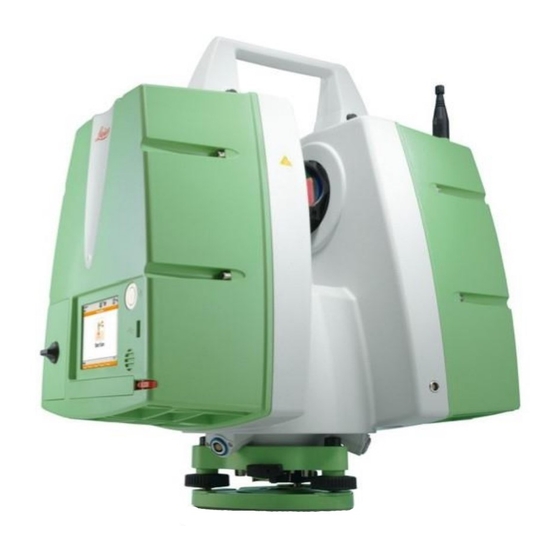
- Page 1 Scan Station P16 Set up and Scan Product by Leica Geosystems General set up instructions...
-
Page 2: Simple Setup
Simple Set up 1. Tripod Set up: 2. Level the Device • First, set tripod to chest level (p1) • Place the adapter (p2), use it to level the • Kick out legs to equal space given your allowable space, the legs. - Page 3 Start Up The standard screen and buttons are shown here. Remember to place the 2 batteries in their respective housing units After it starts up, you will see this main menu screen A. Time G. Status Bar: Includes Battery B. Caption status and Level Status.
- Page 4 Leveling, Again The inner computer has a Compensator, you want to get this into the correct “range” for the compensator, or your scans will not be accurate. Sometimes shifts on the ground (earthquake, disturbance to the ground the legs are on) can bring this out of range mid-scan and you will have to rescan or pick a better surface area.
- Page 5 Configuring the Scans 1 On the Main Screen, click on Parameters (Param) The image to the left is the first Screen. Field of View. Leave everything as is except for the Scan Mode You can choose: Scan Only for just measurements Images Only for only photos Scans and Images for both.
- Page 6 Configuring the Scans 2 Resolution of Scans: This determines how much space between laser points at certain distances. The closer Resolution: the laser points, the more measurements 6.3mm@10mm taken and more detailed image you have. Est. Time: 1 Min 49 s Essentially, this is pixilation for the image.
- Page 7 Configuration 3 Photo Filter Setting This is only for photos. The settings should be automatic, but the only setting to change is White Balance depending on your scene. Sunny: for sunny outdoor. Cloudy: Overcast weather Cold Light: Indoor with light source Warm Light: Indoor with warm light source...
- Page 8 Configuration 4 Image Crtl and Filters These settings are automatic and do not require changes. Used Camera: Leave as is. Exposure Time:...
- Page 9 Configeration 5 Detailed Scan This setting is for the close detailed scans after the initial scan is complete. Resolution: This is preset and only slide it to a more detailed setting depending on the need of the 6.3mm@10m scan and what is being accomplished. The more detailed the setting (to the right + Ready Store...
- Page 10 Name the Project Date: Name the Project the Case Number Description is the address or crime type Go main screen, select Project. Creator is the scan operator with badge number Device: Where the scans are saved, keep Internal. Once stored, project scans will be in this folder name on device.
- Page 11 Scan!!! From main menu, press Start Scan The machine should do 2 total revolutions. First laser, second scans When the scan is done, you will see the screen below. The monitor will also reset to the same position it was when you started the scan.
- Page 12 Detailed Scan 1. Clock on the dotted square icon 2. Use the stylist to Encompass the area you want to detail scan 3. Press the play bottom 4. Scanner should automatically go to the location and scan. Hit return button when done with scans.
Need help?
Do you have a question about the Scan Station P16 and is the answer not in the manual?
Questions and answers