
Related Manuals for Cayin CS-55A


Summary of Contents for Cayin CS-55A
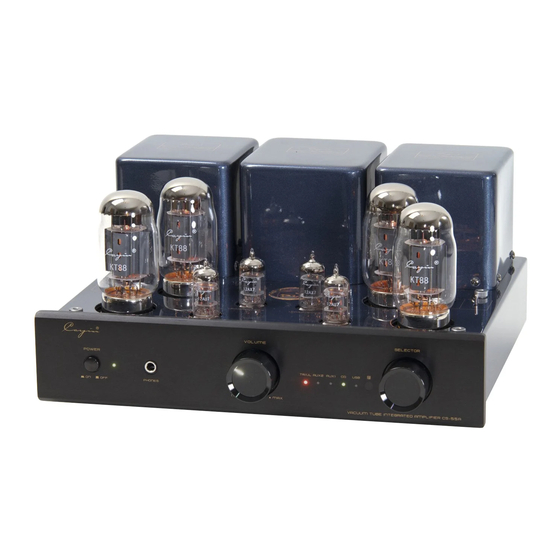
- Page 1 V O L U M E SELECTOR POWER PHONO PHONES M I N M A X VACUUM TUBE INTEGRATED AMPLIFIER CS- Vacuum Tube Integrated Amplifier User's Manual REV:1.1...
-
Page 2: Table Of Contents
Thanks for choosing CAYIN CS-55A Vacuum Tube Integrated Amplifier and please read the user's manual carefully before installation and operation. In order to prevent damage during transportation, the amplifier is packed with protective foams surrounding the tubes. Before installation and operation, please remove these foams to avoid any risks. -
Page 3: Package Contents
NOTE: CAYIN CS-55A Vacuum Tube Integrated Amplifier is designed and manufactured with our original parts and reaching the best results. We are not responsible for problems and damages caused by non-original parts replacement in the amplifier. Package Contents Please carefully check the package first and then open it. -
Page 4: Product Features
◆ Four pairs of input include one USB input, one Phono input and two line inputs. ◆ CS-55A takes outstanding USB audio technology which utilizes high speed USB 2.0 receiving and decoding 32bit/384kHz high resolution digital signals.Internal USB DAC which supports asynchronous clocking. -
Page 5: Specifications
◆ To reduce the risk of electric shock, do not remove the cover. ◆ No user serviceable parts inside. Refer servicing to qualified service personnel. ◆ To reduce the risk of fire or electronic shock, do not expose the unit to rain or moisture. -
Page 6: Maintenance
Maintenance NOTE: ◆ Use the soft dry cloth to clean up the chassis regularly. ◆ Do not use any chemicals for cleaning. V O L U M E SELECTOR POWER PHONO PHONES M I N M A X VACUUM TUBE INTEGRATED AMPLIFIER CS- Warranty Service 1.This product is warranted for a period of twelve months beginning from the date of purchase. -
Page 7: Precautions
Precautions Connected to power socket VACUUM TUBE INTEGRATED AMPLIFIER MODEL : CS SER.NO.: INPUT TUBE SEL. RIGHT OUTPUT LEFT OUTPUT PHONO ZHUHAI SPARK ELECTRONIC EQUIPMENT CO.,L TD. Connected to AC INPUT Connection of power cord: Connect the speaker cables and signal cables first and then insert the power cord into the power socket. NOTE: ◆... -
Page 8: Front Panel
④. Power Indicator/Mute Indicator Cayin CS-55A can memorize last operation of Used to indicate the working state. The indicator the unit once turned off. will be on when it is working normally. The ⑧.IR Remote Sensor indicator will flicker for 30 seconds when it Used to receive the code of remote control. -
Page 9: Rear Panel
1. Refer to the "Tube Replacement" on page 13 and ②.Ground find out which kind of tubes can be used for Ground for Phono input replacement for CS-55A amplifier. ③.Signal Input Terminal 2.Tube Sel. switch on the rear panel must be turned to Used for audio source input. -
Page 10: Top Panel
Note: When working normally, the pointer should stay within the A zone, still , it would move for the voltage fluctuation. Diagram 3 :CS-55A TOP ①. B ias adjustment for the power tube: Bias Selector Switch(A1、A2、A3、A4) Used to select corresponding tube for bias Turn the BIAS SELECTOR Switch to the adjustment. -
Page 11: Remote Control
Remote Control 1. TR/UL Selector Installation 2. Audio Source Input Selector 1.Place the remote control upside up. Screw the rear 3. Mute Button cover open with the screwdriver. 4. Volume Control Selector 2. Pull out the battery case carefully (do not break the wires connected). -
Page 12: Operation System Requirement
Operation system requirement Computer should meet the following requirements if you are going to use USB audio: 1.Hardware requirement: ◆ Intel or AMD CPU with 1.2GHz or higher processing speed. ◆ Higher than 512MB system RAM. ◆ High speed USB 2.0 socket. 2.Operation system requirement: ◆... - Page 13 Class 2.0 driver software. software and install USB Audio Class 2.0 driver software. 8. In Media player please choose Cayin USB DAC as the output instrument and then you can music by USB DAC of the CS-55A amplifier. Note: No need to install the driver software for Mac...
-
Page 14: Installation
Installation Carefully read and follow the manual for installation: ◆ Do not place the machine near heat sources such as radiators, heat registers or other products that produce heat. ◆ In order to avoid being overheated please keep the unit's ventilation open. ◆... -
Page 15: Audio Connection
Audio Connection Please take the following picture for your reference of the connection methods of CS-55A amplifier with other equipments like Computer, cd player and turntable etc. Connection with the computer: please use the USB cable attached or other USB cable which complies with USB 2.0 specification to connect the USB Audio input interface and computer. -
Page 16: Speaker Connection
Speaker Connection VACUUM TUBE INTEGRATED AMPLIFIER MODEL : CS SER.NO.: INPUT TUBE SEL. RIGHT OUTPUT LEFT OUTPUT PHONO ZHUHAI SPARK ELECTRONIC EQUIPMENT CO.,L TD. SPEAKER(R) SPEAKER(L) BLACK BLACK Check the impedance of your speakers: Attach the positive from your speaker to the 4 or 8 ohm terminal and the negative to the 0 ohm terminals separately. -
Page 17: Turn On
Turning On Before turning on the amplifier please make sure all connections are right and power supply is stable. • Turn on the amplifier, the power indicator will be on and the working indicator will keep flickering. • The working indicator will be on after 30 seconds. It means that the amplifier is working normally. If the working indicator is off, please turn off the power and contact with our local agent or our company. -
Page 18: Troubleshooting
Troubleshooting Please follow the instruction in the manual in order to keep the amplifier work in its best state. If wrongly operated and you thought that would be troubles please check according to following tips to look for the exact reasons. -
Page 19: How To Install Vacuum Tubes
How to Install Vacuum Tubes How to Install 9-Pin Vacuum Tubes How to Install 8-Pin Vacuum Tubes Pin No. 9 Pin No.1 Positioning Pin Applicable vacuum tube: Applicable vacuum tube: 、 5BK7、 12BH7、 12AU7( ECC82)、 12AX7( ECC83) KT150、 KT170、 KT88、 6550、 EL34、 6V6、 6SN7、 6SL7、 5AR4 12AT7(ECC81)、6922(ECC88), etc.
Need help?
Do you have a question about the CS-55A and is the answer not in the manual?
Questions and answers