Table of Contents
Advertisement
Quick Links
Advertisement
Table of Contents

Related Manuals for Electrolux EMSB25XC


Summary of Contents for Electrolux EMSB25XC
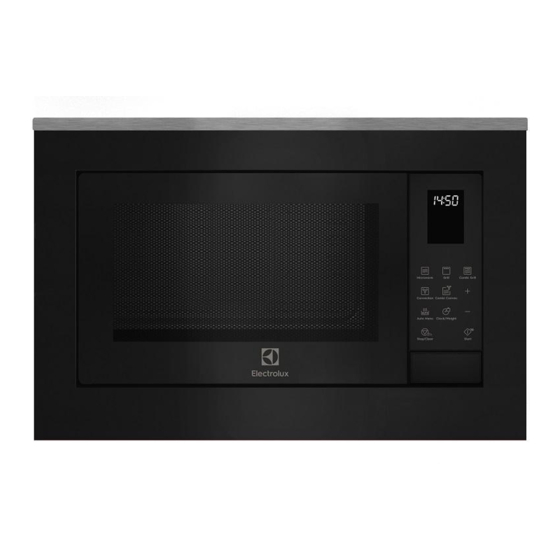
- Page 1 EMSB25XC Installation & User manual Build-in microwave...
-
Page 2: Table Of Contents
CONTENT CONTENT ......................... 1 SPECIFICATIONS ....................2 PRECAUTIONS TO AVOID POSSIBLE EXPOSURE TO EXCESSIVE MICROWAVE ENERGY ..2 IMPORTANT SAFETY INSTRUCTIONS ..............3 INSTALLATION GUIDE ..................6 GROUNDING INSTRUCTIONS ................8 RADIO INTERFERENCE ..................8 BEFORE CALLING FOR SERVICE ................ 8 COOKING TECHNIQUES .................. -
Page 3: Specifications
Oven Cavity Dimensions: 214mm(H)×342mm(W)×360mm(D) Oven Capacity: 25Litres Net Weight: Approx. 17kg Model number: EMSB25XC Plug Type& Cable Length Thailand plug( Thailand),UK plug(Singapore ), 1010MM PRECAUTIONS TO AVOID POSSIBLE EXPOSURE TO EXCESSIVE MICROWAVE ENERGY 1. Do not attempt to operate this oven with the door open since open-door operation can result in harmful exposure to microwave energy. -
Page 4: Important Safety Instructions
IMPORTANT SAFETY INSTRUCTIONS When using electrical appliance basic safety precautions should be followed, including the following: WARNING!--To reduce the risk of burns, electric shock, fire, injury to persons or exposure to excessive microwave energy: 1. Read all instructions before using the appliance and keep for future reference. 2. - Page 5 10. Do not fry food in the oven. Hot oil can damage oven parts and utensils and even result in skin burns. 11. Eggs in their shell and whole hard-boiled eggs should not be heated in microwave ovens since they may explode even after microwave heating has ended.
- Page 6 should be kept away. 25. During use the appliances becomes hot. Care should be taken to avoid touching heating elements inside the oven, for cooking ranged and ovens. 26. The temperature of accessible surfaces may be high when the appliance is operating.
-
Page 7: Installation Guide
INSTALLATION GUIDE 1. Make sure that all the packing materials are removed from the inside of the door. 2. WARNING!--Check the oven for any damage, such as misaligned or bent door, damaged door seals and sealing surface, broken or loose door hinges and latches and dents inside the cavity or on the door. -
Page 9: Grounding Instructions
GROUNDING INSTRUCTIONS This appliance must be grounded. This oven is equipped with a cord having a grounding wire with a grounding plug. It must be plugged into a wall receptacle that is properly installed and grounded. In the event of an electrical short circuit, grounding reduces risk of electric shock by providing an escape wire for the electric current. -
Page 10: Cooking Techniques
the outlet, wait 10 seconds, and plug it in again securely. Check for a blown circuit fuse or a tripped main circuit breaker. If these seem to be operating properly, test the outlet with another appliance. Check to ensure the control panel is programmed correctly and the timer is set. ... -
Page 11: Product Diagram
between foil and cavity. The list below is a general guide to help you select the correct utensils. Cookware Microwave Grill Convection Combination* Heat–Resistant Glass Non Heat–Resistant Glass Heat–Resistant Ceramics Microwave–Safe Plastic Dish Kitchen Paper Metal Tray Metal Rack Aluminum Foil & Foil Container * Combination: applicable for both "microwave + grill", and "microwave + convection"... -
Page 12: Control Panel
CONTROL PANEL Button Action Behavior Press to set microwave Microwave Quick Press cooking power level Press to set grill Grill Quick Press cooking program Press to set microwave Combi Grill Quick Press and grill combination cooking program Press to set convection Convection Quick Press cooking program... -
Page 13: Operation Instructions
OPERATION INSTRUCTIONS When the oven first plugged in, a beep will sound and the display will show "1:00" and " ". In the process of setting, broke about 20 seconds the oven will return to standby mode. During cooking, if press STOP/CLEAR button once, the program will be paused, Start/+30 and then press button once to resume. -
Page 14: Microwave Cooking
ICROWAVE OOKING In standby mode, press MICROWAVE button repeatedly to set power level. Press +/- buttons to set cooking time. The longest time is 95 minutes. Press Start/+30 button to start. Press MICROWAVE button to set cooking power level: Press Power Microwave Press... -
Page 15: Convection
ONVECTION During convection cooking, hot air is circulated throughout the oven cavity to brown and make crisp foods quickly and evenly. This oven can be programmed for ten different cooking temperatures (110℃→120℃→130℃→140℃ →150℃→160℃→ 170℃ →180℃→190℃→200℃). The longest cooking time is 95 minutes. To preheat and cook with convection: Your oven can be programmed to combine preheating and convection cooking operations. -
Page 16: Speed Defrost
PEED EFROST In standby mode, press AUTO MENU button 9 times to select “A-9”. Press +/- buttons to set defrosting time. The time ranges from 10 seconds to 95 minutes. Press Start/+30 button to start. NOTE: During defrosting, the oven will pause to remind user to turn food over, after that, press Start/+30 button to resume. -
Page 17: Cook Menu
For the following food, it is recommended to use time and power for better cooking effect. Cooking Cooking Food type Power/Temperature Weight/Share function time 1 cup 1:30 Beverage / coffee 100% 2 cups 2:40 3 cups 3:50 Popcorn 100% 100 g 2:00~3:00 200 g 1:30... -
Page 18: Auto Cook
For the following food or cooking mode, it is not necessary to program the cooking power and time. It is sufficient to indicate the type of food that you wish to cook as well as the weight or servings of the food. In standby mode, press AUTO MENU button repeatedly to select food code. -
Page 19: Trouble
ROUBLE Trouble Possible cause Remedy (1) Power cord not plugged Unplug. Then plug again after in tightly 10 seconds. Replace fuse or reset circuit (2)Fuse blowing or circuit ( Oven can not be breaker repaired started breaker works professional personnel of our company)... - Page 20 warm sudsy water or in a dishwasher. 9. The roller ring and oven floor should be cleaned regularly to avoid excessive noise. Simply wipe the bottom surface of the oven with mild detergent. The roller ring may be washed in mild, soapy water or in a dishwasher. When removing the roller ring, be sure to replace it in the proper position.
-
Page 21: Consumers Care Contact Center
Consumer Care Tel : (+66 2) 725 9000 Consumer Care Center Tel: 1300-88-11-22 Electrolux Thailand Co., Ltd. Electrolux Home Appliances Sdn. Bhd. Electrolux Building 14th Floor Corporate Office Address: Unit T2-7, 7th Floor, Tower 2, PJ33, 1910 New Phetchaburi Road, No. - Page 22 © 2018 Electrolux Home Products Pty Ltd. EMAN_EMSB25XC_Micro_June 15 referring to attached UM...
Need help?
Do you have a question about the EMSB25XC and is the answer not in the manual?
Questions and answers