
Related Manuals for Electrolux EMS17256OX


Summary of Contents for Electrolux EMS17256OX
- Page 1 ....................)!,-./01% GB !"#$%&'()*%()+ 2,)$3!'+2'4...
-
Page 2: Table Of Contents
GUARANTEE/CUSTOMER SERVICE ......... . 33 WE’RE THINKING OF YOU Thank you for purchasing an Electrolux appliance. You’ve chosen a product that brings with it decades of professional experience and innovation. Ingenious and stylish, it has been designed with you in mind. -
Page 3: Safety Information
ENGLISH SAFETY INFORMATION IMPORTANT SAFETY INSTRUCTIONS: READ CAREFULLY AND KEEP FOR FUTURE REFERENCE To avoid the danger of fire Do not use the microwave oven to heat oil for The microwave oven should not be left deep frying. The temperature cannot be unattended during operation. - Page 4 Never adjust, repair or Do not attempt to replace modify the oven yourself. It the oven lamp yourself or is hazardous for anyone allow anyone who is not other than a competent authorised by Service Force person to carry out any to do so.
-
Page 5: The Microwave Oven
ENGLISH Do not cook eggs in their Keep children away from shells and whole hard the door and accessible boiled eggs should not be parts that may become hot heated in microwave ovens when the grill is in use. since they may explode Children should be kept even after microwave away to prevent them... - Page 6 To prevent the turntable from breaking: a) Before cleaning the turntable with water, leave experience and knowledge the turntable to cool. if they have been given b) Do not put hot foods or hot utensils on a cold turntable.
-
Page 7: Product Description
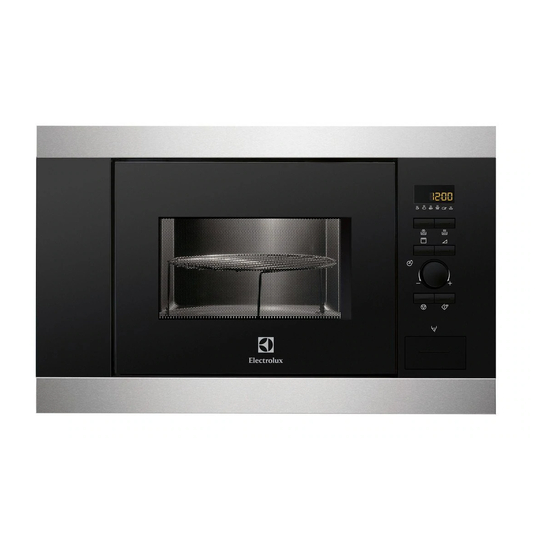
ENGLISH PRODUCT DESCRIPTION MICROWAVE OVEN AND ACCESSORIES Grill heating element Front trim Oven lamp Control panel Door opening button Waveguide cover Oven cavity Seal packing Door seals and sealing surfaces Fixing points (4 points) Ventilation openings Outer cover Rear cabinet Power supply cord Check to make sure the following accessories are provided:... -
Page 8: Control Panel
CONTROL PANEL DIGITAL DISPLAY indicators Plus/Minus Grill Auto defrost bread Microwave Auto defrost Dual Clock Weight Cooking stages AUTO COOK indicators AUTO COOK button AUTO DEFROST button POWER LEVEL button GRILL button TIMER/WEIGHT knob START/+30 button STOP button DOOR OPENING button... -
Page 9: Using The Stop Button
ENGLISH Example: To set the clock to 23:30 (24 hour (If you want to change the clock to 24 H, clock). press the START/+30 button again.) 1. Open the door. 3. Press the STOP button. 2. The display will show: ‘Econ’. 4. -
Page 10: Operation
OPERATION MICROWAVE COOKING ADVICE To cook/defrost food in a microwave oven, the It is important to turn, rearrange or stir food to microwave energy must be able to pass through ensure even heating. the container to penetrate the food. Therefore it Standing time is necessary after cooking, as it is important to choose suitable cookware. -
Page 11: Microwave Safe Cookware
ENGLISH MICROWAVE SAFE COOKWARE Cookware Microwave Comments safe Aluminium foil/ Small pieces of aluminium foil can be used to shield food from containers overheating. Keep foil at least 2 cm from the oven walls, as arcing may occur. Foil containers are not recommended unless specified by the manufacturer. -
Page 12: Microwave Power Levels
MICROWAVE POWER LEVELS Your oven has 6 power levels. Power Suggested use setting 800 W/HIGH Used for fast cooking or reheating (e.g. soup, casseroles, canned food, hot beverages, vegetables, fish). 560 W Used for longer cooking of dense foods such as roast joints, meat loaf and plated meals, also for sensitive dishes such as cheese sauce and sponge cakes. -
Page 13: Kitchen Timer
ENGLISH KITCHEN TIMER PLUS AND MINUS Example: To set the kitchen timer for 7 minutes. The PLUS and MINUS function enables you to decrease or increase the cooking time 1. Press the POWER LEVEL button 7 times. when using the automatic programmes. If you prefer boiled potatoes which are cooked but still firm, use MINUS 2. - Page 14 GRILL AND DUAL GRILL COOKING 2. Dual grill cooking This mode uses a combination of grill power and This microwave oven has two GRILL cooking microwave power (240 W to 400 W). The modes: microwave power level is preset to 240 W.
-
Page 15: Multiple Sequence Cooking
ENGLISH MULTIPLE SEQUENCE COOKING AUTO COOK AND AUTO DEFROST A sequence of 3 stages (maximum) can be AUTO COOK and AUTO DEFROST programmed using MICROWAVE, GRILL OR automatically works out the correct cooking DUAL GRILL. mode and cooking time. You can choose from 6 AUTO COOK and 2 AUTO DEFROST menus. -
Page 16: Auto Defrost
Auto Defrost Food Symbol Meat/fish/poultry AUTO AUTO Bread Example: To defrost 0.2 kg of bread. 1. Select the menu required by pressing the AUTO DEFROST button twice. 2. Turn the TIMER/WEIGHT knob until 0.2 is displayed. 3. Press the START/+30 button. -
Page 17: Programme Charts
ENGLISH PROGRAMME CHARTS AUTO COOK AND AUTO DEFROST CHARTS Auto cook Weight Button Procedure (increasing unit)/Utensils Beverage 1-4 cups • Place cup towards edge of turntable. (Tea/Coffee) 1 cup = 200 ml Boiled and jacket 0.1-0.8 kg (100 g) Boiled potatoes: Peel the potatoes and cut them into potatoes Bowl and lid similar sized pieces. - Page 18 Auto defrost Weight Button Procedure (increasing unit)/Utensils Meat/fish/poultry 0.2-0.8 kg (100 g) • Place the food in a flan dish in the centre of Flan dish the turntable. • When the audible bell sounds, turn the food over, rearrange and separate. Shield thin parts and warm spots with aluminium foil.
-
Page 19: Recipes For Auto Cook
ENGLISH RECIPES FOR AUTO COOK 1. Thread meat and vegetables alternately on 3 Grilled skewers wooden skewers. 3 pieces 2. Mix the oil with the spices and brush over the 300 g pork cutlets, cubed kebabs. 60 g streaky bacon 3. - Page 20 1. Mix together the leaf spinach with the onion Spinach gratin and season with salt, pepper and nutmeg. 0.5 kg 1.0 kg 1.5 kg 2. Grease the gratin dish. Place alternate layers 150 g 300 g 450 g leaf spinach,...
-
Page 21: Cooking Charts
ENGLISH COOKING CHARTS Abbreviations used tbsp = tablespoon cup = cupful g = gram ml = millilitre min = minutes tsp = teaspoon kg = kilogram l = litre cm = centimetre Heating food and drink Food/drink Quantity Setting Power Time Method -g/ml-... -
Page 22: Defrosting And Cooking
Defrosting and cooking Food Quantity Setting Power Time Added Method Standing Level -Min- water time -tbsp- -Min- Fish fillet Micro 800 W 10-12 - cover One plate meal 400 Micro 800 W 9-11 - cover, stir after 6 minutes... -
Page 23: Recipes
ENGLISH RECIPES All the recipes in this book are calculated on Foods which have little moisture, such as the basis of 4 servings unless otherwise platters of food, should have the surface stated. moistened prior to heating or cooking. The amount of liquid to be added to raw Adapting recipes for the microwave oven foods, which are to be braised, should be If you would like to adapt your favourite... - Page 24 Ratatouille 1. Place the olive oil and garlic in the bowl. Add the prepared vegetables, except the Utensils: Bowl with lid (2 l capacity) artichoke hearts, and season with pepper. 5 tbsp olive oil Add the bouquet garni, cover and cook, 1 clove garlic, crushed stirring once.
- Page 25 ENGLISH Prawns with chilli 1. Wash the prawns. Cut each prawn into 2 or 3 pieces. Put the prawns into a bowl and Utensils: Bowl with lid (1 l capacity) add the wine. Cover and marinate. Bowl with lid (2 l capacity) 2.
- Page 26 Lasagne 1. Chop the tomatoes, mix with the ham and onion, garlic, minced meat and tomato Utensils: Bowl with lid (2 l capacity) puree. Season, cover and cook. Shallow square gratin dish with lid 7-9 min. 800 W (approx. 20 x 20 x 6 cm) 2.
- Page 27 ENGLISH Fruit jelly with vanilla sauce 1. Put some of the fruit to one side for decoration. Purée the rest of the fruit with the Utensils: Dish with lid (2 l capacity) white wine, put it into a dish, cover and heat. Bowl with lid (1 l capacity) 7-9 min.
-
Page 28: Care And Cleaning
CARE AND CLEANING CAUTION: DO NOT USE cleaning the control panel. COMMERCIAL OVEN Using a cloth dampened with CLEANERS, STEAM water only, gently wipe the CLEANERS, ABRASIVE, panel until it becomes clean. HARSH CLEANERS, ANY Avoid using excessive amounts THAT CONTAIN SODIUM of water. - Page 29 ENGLISH Turntable and turntable support Remove the turntable and turntable support from the oven. Wash the turntable and turntable support in mild soapy water. Dry with a soft cloth. Both the turntable and the turntable support are dishwasher safe. Door To remove all trace of dirt, regularly clean both sides of the door, the door seals and...
-
Page 30: Troubleshooting
TROUBLESHOOTING Problem Check if . . . The microwave appliance • The fuses in the fuse box are working. is not working • There has not been a power outage. properly? • If the fuses continue to blow, please contact a qualified electrician. -
Page 31: Installation
ENGLISH INSTALLATION The microwave can be fitted in position A, B, C or D: Position Niche size Position A Position B Position C Position D 560 x 550 x 360 560 x 300 x 350 560 x 300 x 360 Conventional oven 560 x 500 x 350... -
Page 32: Electrical Connections
SAFE USE OF THE APPLIANCE • Before installing, tie a piece of string to the power supply cord to facilitate connection to If fitting the microwave in position B or C point (A) when the appliance is being installed. -
Page 33: Environment Concerns
We, Electrolux, undertake that if within 12 months of the date of the purchase this • This guarantee is in addition to your statutory Electrolux appliance or any part thereof is proved and other legal rights. to be defective by reason only of faulty... - Page 34 Service Force Centre covering below: your postcode area). For address of local Service Electrolux Group (Irl) Ltd, Long Mile Road, Dublin Force Centre and further information, please visit: 12, Republic of Ireland www.serviceforce.co.uk Before calling out an...
- Page 35 SK, Seberíniho 1, 821 03 Bratislava Suomi 030 600 5203 www.electrolux.fi Sverige +46 (0)771 76 76 76 Electrolux Service, S:t Göransgatan 143, S-105 45 Stockholm Türkiye +90 21 22 93 10 25 Tarlaba ı caddesi no : 35 Taksim stanbul...
- Page 36 5"+,6'1782$$9 www.electrolux.com/shop...