Table of Contents

Related Manuals for JUKI MO-655N


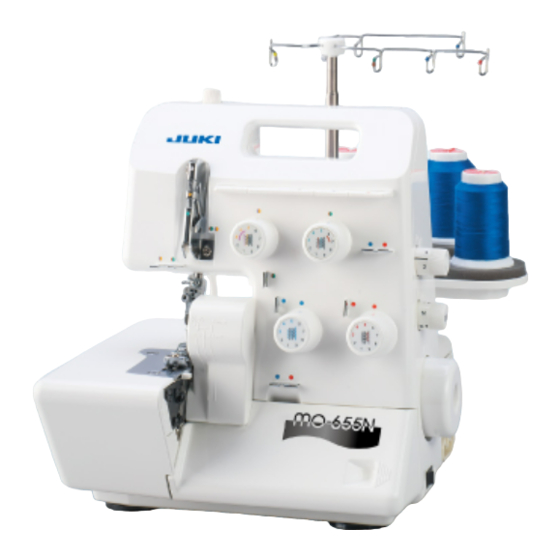
Summary of Contents for JUKI MO-655N
- Page 1 2-NEEDLE, 2/3/4/5-THREAD OVERLOCK SEWING MACHINE MO-655N INSTRUCTION MANUAL IMPORTANT: Read all safety regulations carefully and under-stand them before using your sewing machine. Retain this in- struction manual for future reference.
-
Page 2: Safety Instructions
“IMPORTANT SAFETY INSTRUCTIONS” When using an electrical appliance, basic safety precautions should always be followed, including the following: Read all instructions before using this sewing machine. “DANGER To reduce the risk of electric shock:” ____ 1. The appliance should never be left unattended when plugged in. 2. - Page 3 Congratulations on your purchase of a JUKI sewing machine. Please be sure to read safety precautions in “To use the sewing machine safely” in the Instruction Manual before use to fully understand the functions and operating procedures of the sewing machine so as to use the sewing machine for a long time.
- Page 4 WARNING For the combination of the material and the thread and needle, in particular, refer to the explanation table in “Replacement of the needle”. If the needle or thread does not match the material used such as in the case that an extra heavy- weight material (e.g., denim) is sewn with a thin needle (#11 or higher), the needle can break result- ing in an unexpected personal injury.
-
Page 5: Table Of Contents
Contents Safety instructions ········································1-3 Adjusting the thread tension ······················· 31-32 Contents······················································· 4 Sewing in tape ··············································33 Details of the machine ···································5-6 Roll hemming ···············································34 • Accessories ················································ 6 Differential feed ·············································35 Assembling thread stand ·······························7-8 Gathering ····················································36 Preparing the machine ···································· 9 Unpicking seams ···········································36 •... -
Page 6: Details Of The Machine
Details of the machine Details of the machine 1. Looper cover 2. Looper cover opening handle 3. Chip guard cover 4. Cloth plate 5. Throat plate 6. Presser foot 7. Lower looper thread tension dial 8. Upper looper thread tension dial 9. -
Page 7: Accessories
Details of the machine View with cloth plate open 1. Lower knife adjusting knob 2. Stitch length adjusting knob 3. Chainstitch looper threader Accessories 1. Foot control 2. Lower knife blade 3. 2/3 thread converter 4. Nets 5. Spool caps 6. -
Page 8: Assembling Thread Stand
Assembling thread stand Raise the support rod fully Turn the thread stand until it engages the positioning stopper (A) with a click. Put the thread guide on the support rod. Insert the thread guide into the tip of the support rod so that the arrow in the thread guide points toward you. - Page 9 Assembling thread stand For large spools For spools of large inside diameter, position the anti-vibration come upside down. For home sewing spools When using home sewing spools, remove the anti-vibration cones. Place a spool on the spool holder with its notch downward and push the spool caps on with the rounded outside edge at the bottom.
-
Page 10: Preparing The Machine
Preparing the machine Attaching the foot control 1. Plug foot control into machine-socket-inlet. 1. Plug foot control into machine-socket-inlet. 2. Plug foot control into socket-outlet. 2. Plug foot control into socket-outlet. 3. Lay your foot on the foot control. Press firmly on the foot control to increase sewing speed. Press lighty on the foot control to decrease sewing speed. -
Page 11: Operation And Function
Operation and function Handwheel (Pulley) The handwheel turns toward you. ・ Upon completion of threading, at sewing start or sewing end, be sure to turn the handwheel toward you. Opening and closing the looper cover Opening: To open the looper cover, pull the looper cover opening handle to the right, and tilt the looper cover toward you. -
Page 12: Presser Foot Lifter
Operation and function Presser foot lifter (To raise the presser foot by the presser foot lifter) A : For regular sewing operation (sewing a medium-weight materi- al), raise the presser foot to position (A) illustrated in the figure. B : When you sew a heavy-weight material, raise the presser foot to position (B) illustrated in the figure, to provide more space between presser foot and throat plate. -
Page 13: Releasing The Upper Knife
Betrieb und Funktion/Opération et fonction Caution, Raising and lowering the upper knife. Operation and function Make sure to set the upper knife at a prescribed position. 1. Raising the upper knife. Turn the knob clockwise until the knife reaches a pr Caution, Raising and lowering the upper knife. -
Page 14: Lower Knife Adjusting Knob
Operation and function Lower knife adjusting knob (adjusting the lower knife position for cutting width) Switch the machine off (power switch”O”) Turn the lower knife adjusting knob by pressing part (C) in the figure. (E): If the edge of the sewing material curls, set the lower knife ad- justing knob (D) to a lower number setting. -
Page 15: Differential Feed Adjusting Knob
Operation and function Differential feed adjusting knob (To adjust the feeding for gathering or stretching) To adjust feeding for gathering or stretching, turn the differential feed adjusting knob upward or downward. The differential feed prevents fluting or waving in seams in stretchy materials by differen- tiating the feed of the front feed dog (A) and rear feed dog (B). -
Page 16: Presser Foot Pressure Adjusting Screw
Operation and function Presser foot pressure adjusting screw Pressure of the presser foot has been factory-adjusted properly. Therefore you do not need to adjust it except when sewing a special material. ・ To increase the pressure of the presser foot : For heavy-weight materials such as denim, tweed, or heavy linen. -
Page 17: Stitch Chart
Stitch Chart Stitch Stitch width Tension settings Basic settings 5 thread overlock (chainstitch 3 - 5 mm, right needle Right needle green 3 - 5 Stitch length: 2, 5 and narrow 3 thread overlock) Upper looper blue 3 - 5 Cutting width: 2 Chainstitch needle Lower looper red 3 - 5... -
Page 18: Threading
Threading Thread the machine carefully and in the correct sequence. This is important for making beautiful seams. Preparation Switch the machine off (power switch”O”) 1. Retractable support rod with thread guide must be fully raised. 2. Open the looper cover and cloth plate. 3. -
Page 19: Threading: 5-Thread Overlock
Threading: 5-thread overlock (chainstich & 3-thread overlock) 1. Upper looper thread (Blue) Place the spool on the spool pin right under blue marking on the retractable support rod thread guide. (1,2) Bring thread up from the rear of the retractable support rod thread guide with blue marking, to the front of it. - Page 20 Threading: 5-thread overlock (chainstich & 3-thread overlock) 2. Lower looper thread (Red) Place the spool on the spool pin right under red marking on the retractable support rod thread guide. Bring thread up from the rear of the retractable support rod thread guide.
- Page 21 Threading: 5-thread overlock (chainstich & 3-thread overlock) 3. Right-hand needle thread (Green) Place the spool on the spool pin right under the green marking on the retractable support rod thread guide. Bring thread up from the rear of the retractable support rod thread guide with the green marking.
- Page 22 Threading: 5-thread overlock (chainstich & 3-thread overlock) 4. Chainstitch looper thread(purple) Place the spool on the spool pin right under the purple marking on the retractable support rod thread guide. (1,2) Bring the thread up from the spool and take it from back to front through the purple guides.
- Page 23 Threading: 5-thread overlock (chainstich & 3-thread overlock) 5. Chainstitch needle thread (purple) Place the spool on the spool pin right under the puple marking on retractable support rod thread guide. Bring the thread up from the spool to the thread guide and take it through the purple thread guide.
-
Page 24: Chainstitch & Wide 3-Thread Overlock
Threading: 5-thread overlock (chainstich & wide 3-thread overlock) Left-hand needle (brown) If chainstitch is sewn with a wide 3 thread overlock, use the left- hand needle and follow the brown markings. Place the spool on the spool pin under the brown markings on the thread guide. Bring the thread up from the spool and take it from back to front through the brown guide. -
Page 25: 2-Thread Chainstitch
2-thread chainstitch 2-thread chainstitch (Purple) Raise the upper knife. Remove the right and left-hand needles. Thread the chainstitch looper and needle. Open the looper cover and turn the handwheel towards you until the upper looper is in its lowest position (A). Push the upper looper release back to disengage the looper (B). -
Page 26: Threading: 4-Thread Overlock
Threading: 4 thread overlock 1. Upper looper thread (Blue) Place the spool on the spool pin right under blue marking on the retractable support rod thread guide. (1,2) Bring thread up from the rear of the retractable support rod thread guide with blue marking to the front of it. (3,4) Pass the thread through the thread guide plate. - Page 27 Threading: 4 thread overlock 2. Lower looper thread (Red) Place the spool on the spool pin right under red marking on the retractable support rod thread guide. Bring thread up from the rear of the retractable support rod thread guide. (2,3) Pass the thread through the thread guide plate.
- Page 28 Threading: 4 thread overlock 3. Right-hand needle thread (Green) Place the spool on the spool pin right under the green marking on the retractable support rod thread guide. Bring thread up from the rear of the retractable support rod thread guide with the green marking. (2,3) Pass the thread through the thread guide plate.
- Page 29 Threading: 4 thread overlock 4. Left-hand thread needle (Yellow) Place the spool on the spool pin right under the yellow marking on retractable support rod thread guide. Bring the thread up from the spool to the thread guide and take it through the yellow thread guide. (2,3) Thread the thread guide.
-
Page 30: 3-Thread Overlocking
3-thread overlocking 4 mm wide 3-thread overlocklng (Right-hand needle) (Blue, red, and green) * Remove the left-hand needle. Thread in the following order. Upper looper thread (Blue) Lower looper thread (Red) Right-hand needle thread (Green) * If the machine is already threaded with the left-hand needle cut off and remove the thread. -
Page 31: How To Use The 2/3 Thread Converter
Be sure to turn power switch OFF. 2/3 thread converter How to use the 2/3 thread converter 2-thread flatlook Switch the machine off (power switch”O”) * This attachment enables the machine to perform 2 thread overedging or decorative-stitching, using 2 needles to perform 3-thread super stretch stitching. -
Page 32: Trial Sewing
Trial sewing After threading, make a sample stitch. Be sure to use a double layer of fabric in order to check whether the seam and thread tension for correctness. Chainstitch sewing test: Set the thread tension dials. Lower the upper knife, depending on stitch choice. Lower the presser foot. -
Page 33: Adjusting The Thread Tension
Adjusting the thread tension Adjusting the thread tension Turn the thread tension dial in the direction of the arrow, and make a trial sewing. A- If the upper looper thread meet on the underside of the fabric: B- If the lower looper thread meet on the upper side of the fabric: C- If the right-hand needle thread forms loops on the underside of the fabric: D- If the chainstitch needle thread forms loops on the underside of... -
Page 34: Sewing In Tape
Sewing in tape Sewing in tape Be sure to turn power switch OFF. Switch the machine off (power switch”O”) The standard presser foot is equipped with a tape guide. When sewing shoulders or side seams of stretchy fabrics as a knitted fab- ric, a tape works effectively to stabilize the seam. -
Page 35: Roll Hemming
Roll hemming Roll hemmer Be sure to turn power switch OFF. Be sure to turn power switch OFF. Switch the machine off (power switch”O”) The roll hemmer is built-in to the sewing machine. The fabric edge is automatically rolled and oversewn. The result is a very fine and narrow edge finishing. -
Page 36: Differential Feed
Differential feed Differential feed Gathering and stretching of the fabric can be adjusted by adjusting the differential feed adjusting knob (differentiate the feeding amount of front feed dog (A) or rear feed dog (B).) After adjusted, be sure to sew on trial. Sewn with waves Sewn with puckerings ・... -
Page 37: Gathering
Gathering Gathering 1. A single layer of light-weight fabric can be gathered. 2. Set the stitch length adjusting knob at max. “4”. 3. Set the differential feed adjusting knob at “1.5 - 2”. For examples: Sleeve heads, lower edges, yokes, lace edging or frills * When sewing without differential feed, set the differential feed 4-thread gathering... -
Page 38: Thread Breakage During Sewing
Thread breakage during sewing Thread breakage during sewing Switch the machine off (power switch”O”) 1. Turn the workpiece at a right angle direction and stop sewing immediately. Then remove the workpiece. 2. Rethread * If the lower looper thread is broken, cut the both needle threads off at the needle. -
Page 39: Maintenance
Maintenance Replacing the upper knife Always must be disconnected plug from socket-outlet. The upper knife is made of special extra-hard steel and does not need to be replaced. Replace the upper knife only when the knife blade lip is damaged. For a replacement, contact your local dealer. -
Page 40: Troubles And Corrective Measures
Before you call for help: Troubles and corrective measures The following problems should not be regarded as the machine trouble. Check the following table before you call for help from us. Trouble Cause (reason) Corrective measures Page Fabric does not 1. -
Page 41: Optional Accessories
Optional accessories A98106340A0A A9810 634 0A0 A98606550A0C A9860 634 0A0 A98156550A0A A98656550A0A A9815 634 0A0 A9865 634 0A0 A98206550A0A A98706340A0 A9820 634 0A0 A9870 634 0A0... - Page 44 2-11-1, TSURUMAKI, TAMA-SHI, TOKYO, 206-8551, JAPAN PHONE : (81)42-357-2341 FAX : (81)42-357-2379 Copyright © 2020 JUKI CORPORATION All rights reserved throughout the world. 40241297 000727...
Need help?
Do you have a question about the MO-655N and is the answer not in the manual?
Questions and answers