Beko WMI 71641 Installation & Operating Instructions And Washing Guidanse
Automatic fully integrated washing machine
Hide thumbs
Also See for WMI 71641:
- Installation & operating instructions and washing guidance (52 pages) ,
- User manual (56 pages)
Table of Contents
Advertisement
Advertisement
Table of Contents

Related Manuals for Beko WMI 71641


Summary of Contents for Beko WMI 71641
- Page 1 Automatic Fully Integrated Washing Machine WMI 71641...
- Page 2 Dear Customer, We hope that your product which has been manufactured in modern facilities and passed through a strict quality control procedure will give you the best results. Therefore, we advise you to read through this manual carefully before using your product and keep it for future reference.
-
Page 3: Table Of Contents
TABLE OF CONTENTS 1 Your Washing Machine Overview ......4 Specifications ....5 2 Warnings General Safety. -
Page 4: Your Washing Machine
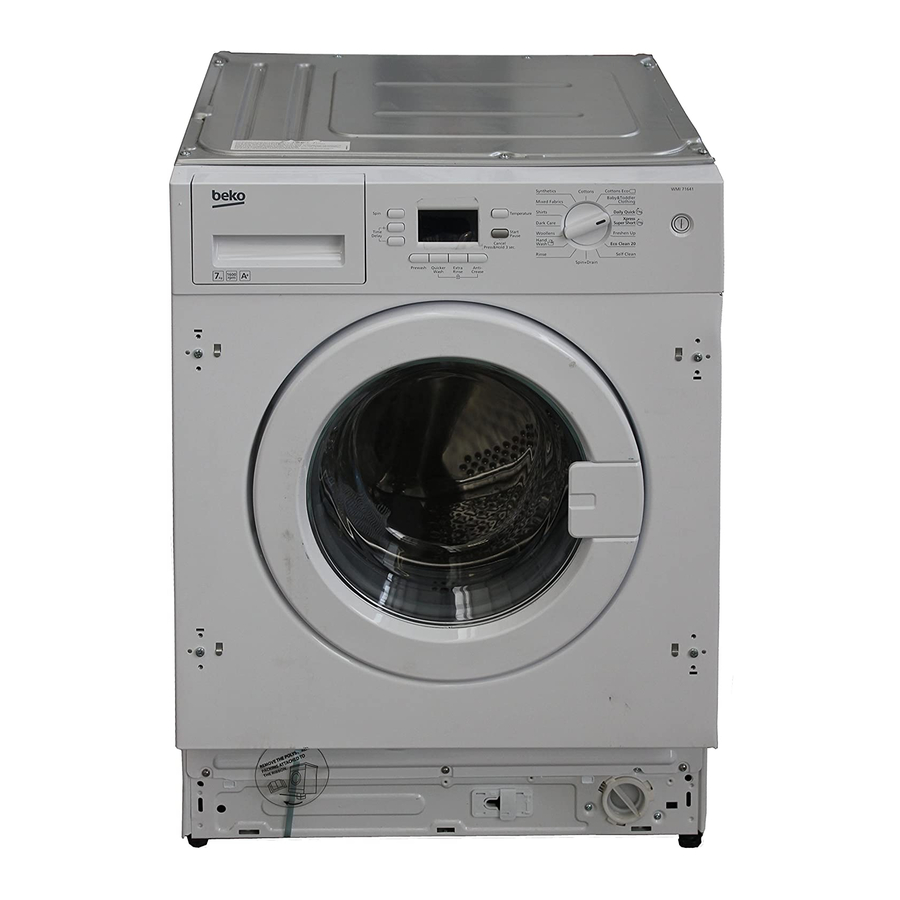
Overview 1 - Detergent Drawer 2 - Door 3 - Top Lid 4 - Control Panel 5 - Filter Cap 6 - Height-adjustable feet... -
Page 5: Specifications
Specifications Models Maximum dry laundry capacity (kg) Height (cm) Width (cm) Depth (cm) Net Weight (±4 kg) Electricity (V/Hz.) Total Current (A) Total Power (W) Spinning cycle (rpm max.) Specifications of this appliance may change without notice to improve the quality of the product. Figures in this manual are schematic and may not match your product exactly. Values stated on the machine labels or in the documentation accompanying it are obtained in laboratory in accordance with the relevant standards. -
Page 6: Warnings
Warnings Please read the following information. Otherwise, there may be the risk of personal injury or material damage. Moreover, any warranty and reliability commitment will become void. General Safety • Never place your machine on a carpet covered floor. Otherwise, lack of airflow from below your machine may cause electrical parts to overheat. This may cause problems with your washing machine. • If the power cable or mains plug is damaged you must call Authorised Service for repair. -
Page 7: If There Are Children In Your House
an earthed outlet protected by a fuse of suitable capacity. • The supply and draining hoses must always be securely fastened and remain in an undamaged state. • Fit the draining hose to a washbasin or waste system securely before starting up your machine. There may be a risk of being scalded due to high washing temperatures! • Never open the door or remove the filter while there is still water in the... - Page 8 used. Do not forget to refit the fuse cover. In the event of losing the fuse cover, the plug must not be used until a replacement fuse cover has been fitted. Colour of the replacement fuse cover must be the same colour as that visible on the pin face of the plug.
-
Page 9: Installation
Raising the appliance In order to raise the appliance to eliminate the gap below the worktop, you will need to order special optional kit. Please call Beko Spare Part Department. (0845 6004911) and see built-in installation section. Without optional With optional raising raising feet. -
Page 10: Adjusting The Feet
Adjusting the feet Do not use any tools to loosen the lock nuts. Otherwise, they can be damaged. 1. Manually (by hand) loosen the lock nuts on the feet. 2. Adjust them until the machine stands level and firm. 3. Important: Tighten all lock nuts up again. Connecting to the water supply. Important: • The water supply pressure required to run the machine must be 1-10 bar (0,1 – 1 MPa). (Practically, it is necessary to have 10 – 80 liters of... -
Page 11: Electrical Connection
of connections. Your house may be flooded if the hose falls out of its housing during water discharging. • The hose should be attached to a height of at least 40 cm, and 100 cm at most. • In case the hose is elevated after laying it on the floor level or close to the ground (less than 40 cm above the ground), water discharge becomes more difficult and the laundry may come out wet. -
Page 12: Initial Preparations For Washing
Initial preparations for washing Sorting the laundry • Sort the laundry according to type of fabric, colour, and degree of soiling and permissible water temperature. Always follow the advice on the garment labels. Non machine Washing water Wash with washable temperature sensitive, short programmes. Bleach can be Do not use Dry-cleanable used... -
Page 13: Loading Door
the "Programme Selection Table". Washing results will degrade when the machine is overloaded. Following weights are given as examples. Laundry type Bathrobe Napkin Duvet cover Bed Sheet Pillowcase Tablecloth Towel Hand towel Evening gown Underclothing Men’s coveralls Men’s shirt Men’s pyjamas Blouses Loading door The loading door will be locked while the Programme is running. The door can only be opened a while after the Programme comes to an end. - Page 14 (II) Main Wash Compartment Before starting the washing Programme, put powder detergent into the left compartment with number "II". Use the detergent manufacturer's measuring cup and follow the instructions on the package. Powder bleach/stain remover must also be put into this compartment. Put the liquid detergent into the main wash compartment with number "II " before starting the washing Programme.
- Page 15 it must be added from the compartment number "II" right after the detergent foams with water. Eliminating lime formation • When required, use only appropriate lime removers developed specifically for washing machines and always follow the instructions on the package.
-
Page 16: Selecting A Program And Operating Your Machine
Selecting a Program and Operating Your Machine Control panel Spin Speed Adjustment Button Display Temperature Adjustment Button 4 - Program Selection Knob 5 - On/Off Button 6 - Time Delaying Button (+/-) Auxiliary Function Buttons 8 - Start/Pause/Cancel Button... -
Page 17: Display Symbols
Display symbols c d e - Spin Symbol - Spin Speed Indicator c – Water cut-off symbol (According to your machine’s model) - Economy Symbol - Temperature Indicator - Temperature Symbol - Door Locked Symbol - Standby Symbol - Start Symbol - Auxiliary Function Symbols - Remaining Time and Delaying Time Indicator - Program Indicator Symbols (pre- wash/main wash/rinse/softener/spin) -
Page 18: Special Programs
in cottons program in longer periods which ensure very good washing performance. Cottons economy program consumes less energy compared to other cottons programs. • Baby+Toddler Clothing Increased hygiene is provided by a longer heating period and an additional rinse cycle. It is recommended for baby clothes and clothes worn by allergic people. -
Page 19: Spin Speed Selection
When the “Temperature” button is pressed after Cold is selected, the maximum temperature of the program you have selected will be displayed. To decrease the temperature, press the “Temperature” button again. Normally soiled, white cottons and 90˚C linens. (Ex.: coffee table covers, tablecloths, towels, bed sheets) Normally soiled, fade proof coloured linens, cottons or synthetic clothes 60˚C (Ex.: shirts, nightgowns, pyjamas) and lightly soiled white linen clothes... -
Page 20: Program And Consumption Table
Program and consumption table Programme (°C) Cottons Cottons Cottons Baby&Toddler Clothing 90 Cottons Eco 60** 7 Cottons Eco Synthetics Synthetics Eco Clean 20 3.5 39 0.16 1600 Mixed Fabrics 40 3.5 45 0.55 1000 • Shirts 40 3.5 45 0.55 800 • Xpress Super Short Daily Quick Daily Quick... -
Page 21: Auxiliary Functions
Auxiliary functions Auxiliary Function Selection Buttons • Depending on the program, you can select the desired auxiliary function by pressing the buttons a, b, c,d. • Select the required auxiliary functions before starting the program. • Some combinations cannot be selected together. Ex.: Pre-wash and Quick Wash. • Symbol of the selected auxiliary function will light up. Auxiliary function selection If an auxiliary function that should not be selected together with a previously selected function is chosen, the first... -
Page 22: Starting The Program
Time delay With the “Time delay” function you can delay the program start up to 24 hours. Setting can be made in intervals of 30 minutes. 1. Open the loading door, place the laundry inside and fill detergent drawer. 2. Set the washing program, temperature, spin speed and, if required, select the auxiliary functions. 3. Press “Time delaying” buttons “+” and “-” to set your desired time delay. The Time delaying symbol will flash. -
Page 23: Changing The Selections After The Program Has Started
special programs. • If the machine is not spinning, the program may be in rinse hold mode or the automatic spin correction system has been activated due to an excessive unbalanced distribution of laundry in the machine. Changing the selections after the program has started The selected spin speed and program temperature fade out. -
Page 24: Program In Rinse Hold Mode
Program in rinse hold mode • This process is shown with the flashing Spin Symbol and the lit up Standby Symbol. If you wish to spin when the machine is in this mode: Adjust the spin speed. Press “Start/Pause/ Cancel” button. The program continues, pumps out the water and spins. The Standby Symbol fades out and Start Symbol lights up. -
Page 25: Quick Instructions For Daily Use
Quick instructions for daily use Preparation 1. Turn the tap on completely. Check that the hose is connected tightly. 2. Place the laundry in the machine. 3. Add detergent and softener. Starting 1. Press the “On/Off” button. 2. Select the Programme and the temperature. 3. If desired (according to your machine’s model): – select any auxiliary function, – adjust the spin speed, – set the time delay, 4. -
Page 26: Maintenance And Cleaning
Maintenance and cleaning Detergent Drawer Remove any powder residue build up in the drawer. To do this; 1. You can remove the detergent drawer by pulling it towards yourself strongly. If more than a normal amount of softener and liquid detergent mixture starts to remain in the softener compartment, the siphon must be cleaned. -
Page 27: Draining Any Remaining Water And Cleaning The Pump Filter
• Close the taps. • Remove the nuts of the water intake hoses to clean the surfaces of the filters on the water intake valves with an appropriate brush. • If the filters are very dirty, you can pull them out by means of pliers and clean them. • Take out the filters on the flat ends of the water intake hoses together with the gaskets and clean thoroughly under streaming water. - Page 28 • Pull out the pump outlet hose from its housing. • Place a large container at the end of the hose. Drain the water off into the container by pulling out the plug at the end of the hose. If the amount of water to be drained off is greater than the volume of the container, replace the plug, pour the water out and then resume the draining process.
-
Page 29: Solution Suggestions For Problems
Solution suggestions for problems Cause Programme cannot be started or selected. Machine may have switched to self protection mode due to an infrastructure problem (such as line voltage, water pressure, etc.). Water in the machine. There may be some water in your machine when you receive it. This is from the quality control process and is normal. There is water coming from the bottom of the machine. - Page 30 The door is jammed. - Water level might be above the lower level of the door. - Machine might be heating up the water or it may be at the spinning cycle. - Due to an electrical mechanism, the door can only be opened a few minutes after the Programme has stopped.
- Page 31 It continuously washes. Remaining time does not count down. In the case of a paused countdown while taking in water: - Timer will not countdown until the machine is filled with the correct amount of water. (On models with display) - Time might have gotten stuck during heating step. (On models with display) In the case of a paused countdown at the spinning step:...
- Page 32 - Washing performance is poor: Oily stains appear on laundry. - Washing performance is poor: Bad odour - Oily accumulations on the drum may have stuck to the laundry. - Oily accumulations on the drum may have stuck to the laundry. Colour of the clothes faded. - Excessive laundry loaded into machine. - Detergent may have gotten damp. - A higher temperature might have been selected. It does not rinse well. - The amount, brand and storage conditions of the detergent used might not be appropriate.
- Page 33 - Too much softener was put in. The detergent dispenser is problematic. Water is siphoned (pulling the softener into the washer early) during the fill or rinse cycles. Valves are problematic. Mix 1 tablespoonful softener and ½ liter water and pour into the main wash compartment of the...
- Page 34 Machine does work. Nothing is displayed on the screen. The plug might not be plugged in the mains outlet. Fuse may have blown. Electricity may be cut off. The “On/Off” button might have not been pressed. The machine did not start after the program was selected and the «Start/Pause/Cancel» button was pressed. The front door may be ajar. The Rinse Symbol amongst the Program Indicator Symbols is flashing. (Subject to the model of your machine, water cut-off symbol may light up too) Water may have been cut off. Check the plug. Check the fuse.
-
Page 35: Guarantee
• Beko disclaims any liability for incidental or consequential damages. • The guarantee does not in anyway diminish your statutory or legal rights. Should you experience any difficulty in obtaining service please contact the Beko Customer Help-Line. Tel: 0845 600 4911 e-mail:service@beko.co.uk... -
Page 36: Service
Should you experience any difficulty in obtaining service please contact the Beko Customer Help-Line. Tel: 0845 600 4911 e-mail:service@beko.co.uk 0845 600 4903 0845 600 4902... -
Page 37: Built-In Installation
BUILT-IN INSTALLATION GUIDE BUILT-IN INSTALLATION 820 mm 10,4 mm 150,3 mm... - Page 41 IF THE CABINET DOOR OPENS TO RIGHT Use 35mm hinge cutting tool IF THE CABINET DOOR OPENS TO LEFT...
- Page 45 ±2mm ±2mm ±2mm ±2mm...
- Page 46 To increase height of product order optional part no: 1493...
Need help?
Do you have a question about the WMI 71641 and is the answer not in the manual?
Questions and answers