Table of Contents
Advertisement
Quick Links
Advertisement
Table of Contents

Related Manuals for KitchenAid KIO 3T133 PFE UK


Summary of Contents for KitchenAid KIO 3T133 PFE UK
- Page 1 Instruction for use...
-
Page 3: Table Of Contents
Installation .......................................4 Product description ....................................5 First time use ......................................6 Programs table .......................................8 Options and functions ..................................9 Loading the racks ....................................10 Daily use ........................................ 11 Advice and tips ....................................11 Care and maintenance ..................................12 Troubleshooting ....................................13 After-sales service ....................................14... -
Page 4: Installation
Before using the appliance carefully read the Safety Instruction. Installation ATTENTION: If the appliance must be moved at any time, keep it in an upright position; if absolutely necessary, it may be tilted onto its back. CONNECTING THE WATER SUPPLY ELECTRICAL CONNECTION Adaptation of the water supply for installation should only be performed WARNING: Under no circumstances should the water inlet hose... -
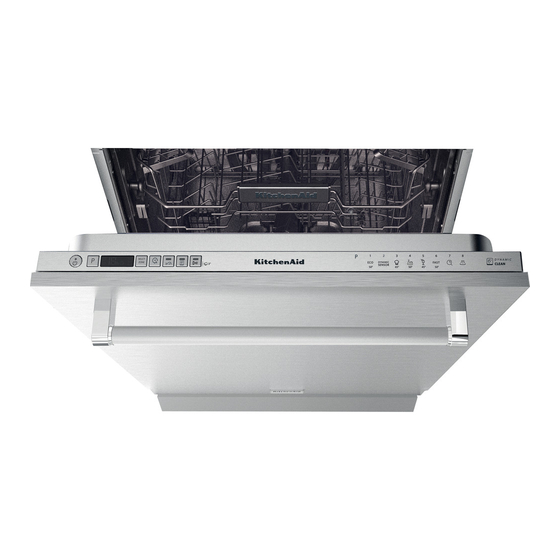
Page 5: Product Description
Product description APPLIANCE Upper rack Cutlery rack Foldable flaps Upper rack height adjuster Upper spray arm Lower rack Dynamic Clean support Lower spray arm Filter Assembly 10. Salt reservoir 11. Detergent and Rinse Aid dispensers 12. Rating plate 13. Control panel Service: 0000 000 00000 CONTROL PANEL... -
Page 6: First Time Use
First time use ADVICE REGARDING THE FIRST TIME USE FILLING THE SALT RESERVOIR After installation, remove the stoppers from the racks and the retaining The use of salt prevents the formation of LIMESCALE on the dishes elastic elements from the upper rack. and on the machine’s functional components. - Page 7 FILLING THE RINSE AID DISPENSER FILLING THE DETERGENT DISPENSER Rinse aid makes dish DRYING easier. The rinse aid dispenser A should Only use detergent which has been specifically designed be filled when the RINSE AID REFILL indicator light for dishwashers. in the control panel is lit.
-
Page 8: Programs Table
Programs table Duration Water Energy of wash Program Available options consumption consumption program (litres/cycle) (kWh/cycle) (h:min) 1. Eco 50° 3:10 0.85 2. Dynamic Sensor 50-60° 1:25 - 3:00 7.0 - 14.0 0.90 - 1.40 3. Professional 65° 2:27 16.5 1.70 4. -
Page 9: Options And Functions
Options and functions OPTIONS can be selected directly by pressing the corresponding button (see CONTROL PANEL). If an option is not compatible with the selected program see PROGRAMS TABLE, the corresponding LED flashes rapidly 3 times and beeps will sound. The option will not be enabled. MULTIZONE TABLET (Tab) If there are not many dishes to be washed, a half loading may... -
Page 10: Loading The Racks
Loading the racks CUTLERY RACK Knives and other utensils with third rack designed to house the cutlery. sharp edges must be positioned Arrange the cutlery as shown with blades facing downwards. in the figure. A separate arrangement of the cutlery makes collection easier after washing The geometry of the rack makes and improves washing and drying... -
Page 11: Daily Use
Daily use 1. CHECK WATER CONNECTION The machine will switch off automatically during certain extended Check that the dishwasher is connected to the water supply and that periods of inactivity, in order to minimise electricity consumption. the tap is open. If the crockery is only lightly soiled or if it has been rinsed with water before being placed in the dishwasher, reduce the amount 2. -
Page 12: Care And Maintenance
Care and maintenance ATTENTION: Always unplug the appliance when cleaning it and when performing maintenance work. Do not use flammable liquids to clean the machine. CLEANING THE DISHWASHER At least once per month or after each 30 cycles, check the filter assembly and if necessary clean it thoroughly under running water, using a non- Any marks on the inside of the appliance may metallic brush and following the instructions below:... -
Page 13: Troubleshooting
Troubleshooting In case your dishwasher doesn’t work properly, check if the problem can be solved by going through the following list. For other errors or issues please contact authorized After-sales Service which contact details can be found in the warranty booklet. The manufacturer ensures the availability of spare parts for at least 10 years after production date of this appliance. -
Page 14: After-Sales Service
After-sales service Policy and standard documentation and additional product information can be found by: • Visiting our website docs.kitchenaid.eu • Using QR Code • Alternatively, contact our After-sales Service (See phone number in the warranty booklet). When contacting our After-sales Service, please state the codes provided on your product‘s identification plate. - Page 16 Printed in Italy 02/21 400011528488...
Need help?
Do you have a question about the KIO 3T133 PFE UK and is the answer not in the manual?
Questions and answers