Table of Contents
Advertisement
Quick Links
○ генератор за ток бензинов
инверторен
○ gasoline generator inverter
○ generator benzina invertor
○ benzinski generator invertor
○ generator moči inverter
○ генератор на струја
инвертер
○ ισχύ γεννήτριας
αντιστροφέας
○ pramac agregat za struju
inverter
RD-GG05
USER'S MANUAL
www.raider.bg
Contents
2
BG
схема
3
BG
оригинална инструкция за употреба
15
EN
original instructions' manual
26
RO
instructiuni originale
RAIDER POWER TOOLS
1
Advertisement
Table of Contents

Related Manuals for Raider RD-GG05


Summary of Contents for Raider RD-GG05
- Page 1 RAIDER POWER TOOLS ○ генератор за ток бензинов инверторен ○ gasoline generator inverter ○ generator benzina invertor Contents ○ benzinski generator invertor ○ generator moči inverter схема ○ генератор на струја инвертер оригинална инструкция за употреба ○ ισχύ γεννήτριας...
-
Page 2: Safety Label Locations
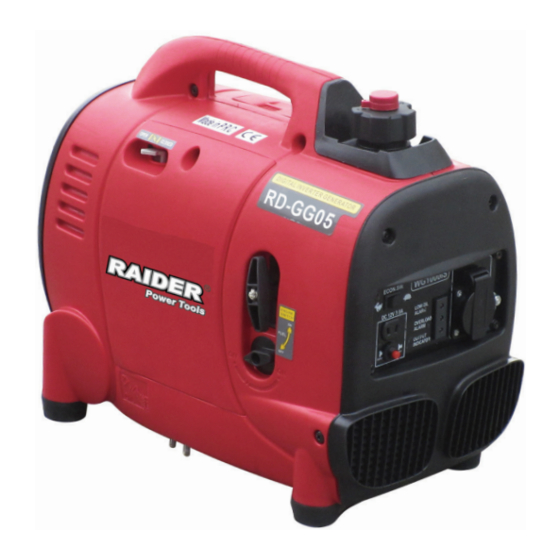
SAFETY LABEL LOCATIONS Chock level Hot Caution Add Oil Engine Switch Fuel Cock Safety Caution Прочетете ръководството преди употреба! Refer to instruction manual booklet! COMPONENT IDENTIFICATION: CONTROL PANEL: 1. Chock Level 1. Efficiency Mode Switch D. Frequency lamp 2. Fuel Cock & Engine Switch 2. -
Page 3: Технически Данни
електрически, бензинови и пневматични машини - RAIDER. При правилно инсталиране и експлоатация, RAIDER са сигурни и надеждни машини и работата с тях ще Ви достави истинско удоволствие. За Вашето удобство е изградена и отлична сервизна мрежа с 45 сервиза в цялата страна. -
Page 4: Мерки За Безопасност
мерна параметър стойност машината Ниво на звуковата мощност L K = 3 dB(A) 67 dB(A) dB(A) Тегло Носете защитни очила, антифони и каска. Носете защитни ръкавици. Носете предпазни обувки с усилени подметки. Прочетете инструкциите за употреба. МЕРКИ ЗА БЕЗОПАСНОСТ... - Page 5 преработка, на определените за това места. Предназначение на уреда. Генераторът RAIDER RD-GG05 е предназначен да захранва ръчни електрически инструменти или прибори с максимална мощност до около 1000W. Да се има в предвид, че някои уреди имат по-висока стартова мощност от указаната.
- Page 6 Проверете маслото – да бъде SAE 10W-30 или SAE 15W40. Работещ двигател с недостатъчно масло може да предизвика сериозна повреда на двигателя. ЗАБЕЛЕЖКА: Low Oil алармената система автоматично ще спре двигателя, преди нивото на маслото да падне под безопасната граница. Въпреки това, за да се избегне...
- Page 7 3.3 Проверка на въздушния филтър. Проверете въздушния филтър, за да сте сигурни, че е чист и в добро състояние. Разхлабете винта на капака и махнете капака на лявата страна. Натиснете капачето на върха на тялото на въздущния филтър, махнете капака на въздушния...
- Page 8 Изключете евентуално включен електрически уред от електрогенератора. При стартиране носете защитни ръкавици. 4.1. Завъртете докрай лоста на капачката за гориво по посока на часовниковата стрелка в положение “ON”. Завъртете крана за гориво в положение “ON”. ЗАБЕЛЕЖКА: Завъртете лоста на капачката за гориво в положение “OFF”, когато...
- Page 9 4.5. Преместете лоста на смукача в позиция “RUN”, след като двигателят загрее. ■ Ако двигателят спре и не се рестартира, проверете нивото на маслото в двигателя преди да пристъпите към ремонтни дейности. Работа при голяма надморска височина При голяма надморска височина стандартната смес в карбуратора въздух-гориво ще бъде...
- Page 10 Заземителна клема За да се предотврати токов удар от неизправни уреди, генераторът трябва да бъде заземен. Свържете клемата на генератора и външен източник на земята с помоща на кабел за високо напрежение. Връзките за резервно захранване на електрическата система на сградата трябва...
- Page 11 Напрежението на нулево натоварване е 15 V-30 V. ■ В DC операция, завъртете ключа за режим ефективност в изходно положение. 1. Свържете кабелите за зареждане към DC гнездото на генератора и след това към клемите на акумулатора. ■ За да се предотврати възможността за създаване на искра в близост до акумулатора, свържете...
-
Page 12: Спиране На Двигателя
Ниска масло-алармена система ■ Ниско система масло-аларма е предназначена да предотврати повреди на двигателя, причинени от недостатъчно количество масло в картера. Преди нивото на маслото в картера да падне под опасната граница, ниско маслената алармена система автоматично ще се включи и двигателя ще спре (ключа на двигателя ще остане в “ON” позиция). - Page 13 3. Turn the fuel cap lever fully clockwise to the “OFF” position. Turn the fuel cock to the “OFF “ position. 7. Почистване, поддръжка и съхранение. 7.1. Поддържайте защитните приспособления, въздушните прорези и корпуса на мотора незамърсени от прах и мръсотия, колкото е възможно. 7.2.
- Page 14 Повреда Проверете: Запалителната свещ Нивото на горивото Двигателят не може да запали. Положението на спирателния кран Проверете нивото на маслото Двигателя стартира и работи Превключвателя на електрическото нормално, но не подава подаване електричество Причина: Регулаторът или кондензаторът е дефектен.
- Page 15 Congratulations on the purchase of machinery from the fastest growing brand of electric and pneumatic tools - RAIDER. When properly installed and operating, RAIDER are safe and reliable machines and work with them will deliver a real pleasure. For your convenience has been built and excellent service network of 45 service station across the country.
- Page 16 Wear safety goggles, earmuffs and a helmet. . Wear protective gloves. Wear safety shoes with reinforced sole. Read the instructions’ manual. 1. Safety Guidelines In use of the devices must comply with certain precautions associated with safety to prevent injury and damage.
- Page 17 2. Purpose of the unit. Generator RAIDER RD-GG05 is intended to supply hand-held power tools or appliances with maximum power to about 1000 W (notice that some appliances have larger starting power than the one that is marked for them) The generator is equipped with a AC 230 V and DC output 12 V, which is used to charge the batteries.
- Page 18 3.2. Check the fuel level. Use automotive gasoline (Unleaded or low leaded is preferred to minimize combustion chamber deposits). If the fuel level is low, refuel the fuel tank until the level increased to the specified mark. Never use an oil/gasoline mixture or dirty gasoline. Avoid getting dirt, dust or water in the fuel tank.
-
Page 19: Starting The Engine
Maintenance Cover Screw Air Cleaner Cover Air Cleaner body Air Cleaner Cover Air Cleaner Elements Air Cleaner Cover Screw 4. STARTING THE ENGINE Ensure sufficient ventilation of the unit. Ensure that the ignition cable is attached to the spark plug. Consider the immediate environment of the electric generator. - Page 20 3. Move the choke lever to the “START” position. NOTE: Do not use the choke when the engine is warm or the air temperature is high. 4. Pull the starter grip until resistance is felt, the pull the starter grip briskly toward the arrow as shown below.
-
Page 21: Generator Use
5.Move the choke lever to the “RUN” position after the engine warms up. ■ If the engine stops and will not restart, check the engine oil level before trouble shooting in other areas. High altitude operation At high altitude, the standard carburetor air-fuel mixture will be excessively rich. Performance will decrease, and fuel consumption will increase. - Page 22 AC and DC. Most appliance motors require more than their rated wattage for start-up. AC Applications 1. Start the engine and the multi monitor will display “0000”. 2. Confirm that the appliance to be used is switched off, and plug in the appliance.
-
Page 23: Stopping The Engine
■ To prevent the possibility of creating a spark near the battery, connect charging cable first to the generator, then to the battery. Disconnect cable first at the battery. ■ Before connecting charging cables to a battery that is installed in a vehicle, disconnect the vehicles grounded battery cable. - Page 24 2. Turn the engine switch to the “OFF” position 3. Turn the fuel cap lever fully clockwise to the “OFF” position. Turn the fuel cock to the “OFF “ position.
-
Page 25: Cleaning, Maintenance And Storage
7. CLEANING, MAINTENANCE AND STORAGE. 7.1. Keep safety equipment, air slots and the motor housing contaminated by dust and dirt as possible. 7.2. Clean the unit with a clean cloth or with compressed air at low pressure. 7.3. We recommend that you clean the unit after each use. 7.4. -
Page 26: Caracteristici Tehnice
Felicitări pentru achiziționarea unui Generator pe benzina marca - Raider. Daca este instalat i utilizat corect, RAIDER sunt masini sigure și fiabile ce va vor oferi satisfacii garantate. Pentru confortul dvs. este pusa la punct o retea de unitati service pe teritoriul intregii tari. - Page 27 Purtați ochelari de protecție, protecție și cască auzului. Purtați mănuși de protecție. Purtati pantofi cu tălpi armate. Citiți instrucțiunile de utilizare. МЕРКИ ЗА БЕЗОПАСНОСТ Caracteristici produs: IDENTIFICARE COMPONENTE: 8. Teava evacuare gaze C. Indicator Tensiune 1. Maneta SOC PANOU DE CONTROL: D.
- Page 28 2. Utilitatea produsului Generator RAIDER RD-GG05 este destinat să alimenteze instrumente sau aparate cu o putere maximă până la aproximativ 1000 W (observați că unele aparate au o putere de pornire mai mare decât cea care este marcata pe ambalaj) Generatorul produce o tensiune alternativa de 230 V și ieșire DC 12 V, care este folosit pentru a încărca bateriile de acumulatori.
- Page 29 camera de ardere). În cazul în care nivelul de combustibil este scăzut, alimentați rezervorul de carburant până la nivelul maxim marcat . Nu folosiți niciodată un amestec de ulei / benzină sau benzină murdară. Evitați pătrunderea de murdărie, praf sau apă în rezervorul de combustibil.
- Page 30 Maintenance Cover Screw Air Cleaner Cover Air Cleaner body Air Cleaner Cover Air Cleaner Elements Air Cleaner Cover Screw 4. PORNIRE MOTOR Trebuie asigurată o aerisire suficientă a unității. Asigurați-vă că cablul de aprindere este atașat la bujie. Luați în considerare mediul imediat al generatorului electric.
- Page 31 2. Rotiți comutatorul motorului în poziția “ON”. 3. Deplasați maneta de șoc în poziția “START”. NOTĂ: Nu utilizați șocul atunci când motorul este cald sau temperatura aerului este ridicată. 4. Trageți mânerul demarorului până când se simte o rezistență, trage mânerul demarorului spre săgeata vioi așa cum se arată...
- Page 32 5. Deplasați maneta de șoc în poziția “RUN”, după ce motorul se încălzește. ■ Dacă motorul se oprește și nu va reporni, verificați nivelul uleiului de motor înainte de a inspecta probleme în alte zone. Operațiune la altitudine mare: La mare altitudine, amestecul standard aer-combustibil va fi excesiv de bogat.
- Page 33 Terminalul la sol Pentru a preveni șocurile electrice de la aparatele defecte, generatorul trebuie să fie egat la impamantare. Conectați n cablu de la borna de impamantare a generatorului la o conexiune la pamant. Conexiunile facute la instalatia de putere a unei gospodarii trebuiesc facute doar de catre personal specializat.
- Page 34 ■ Pentru a preveni posibilitatea de a crea o scânteie lângă baterie, conectați cablul de încărcare mai întâi la generator, apoi la baterie. cablu de deconectare mai întâi la baterie. ■ Înainte de a conecta cablurile de încărcare la o baterie care este instalata într-un vehicul, deconectați cablul bateriei ce este conectat la turism .
-
Page 35: Oprirea Motorului
■ Dacă sistemul de alarmă scăzut de ulei oprește motorul, indicatorul luminos de alarmă de ulei (roșu) se va aprinde când acționați demarorul, iar motorul nu va rula. În cazul în care se întâmplă acest lucru, se adaugă ulei de motor. Alarmă... - Page 36 3. Se rotește pârghia capacului de combustibil complet sensul acelor de ceasornic în poziția “OFF”. Rândul său, robinetul de combustibil în poziția “OFF”. 7. CURĂȚARE, ÎNTREȚINERE ȘI DEPOZITARE. 7.1. Păstra echipamentul in siguranță, Cu fantele de aer și carcasa motorului fara praf și murdărie.
- Page 37 8. Rezolvarea problemelor: eșec Verificați: bujie Nivelul de combustibil Motorul nu poate fi pornit. Poziția robinetului Verificați nivelul uleiului Motorul pornește și rulează în mod normal, dar nu trimite energie Comutator de alimentare electrică electrică Motivul: Regulator sau condensator este defect. Generatorul are puține sau nici o De protecție la supracurent activat.
-
Page 38: Ec Declaration Of Conformity
Euromaster Import Export Ltd. Address: Sofia 1231, Bulgaria, 246 Lomsko shausse Blvd. Product: Gasoline Generator Inverter Trademark: RAIDER Model: RD-GG05 is designed and manufactured in conformity with following Directives: 2006/42/EC of the European Parliament and the Council dated 17-th May 2006 on machinery... -
Page 39: Ео Декларация За Съответствие
Евромастер Импорт Експорт ООД Адрес: София 1231, България, “Ломско шосе“ 246. Продукт: Генератор за ток бензинов инверторен Запазена марка: RAIDER Модел: RD-GG05 е проектиран и произведен в съответствие със следните директиви: 2006/42/EО на Европейския парламент и на Съвета от 17 май 2006 година... -
Page 40: Declaraţie De Conformitate
Adresa: Sofia 1231, Bulgaria, 246 Lomsko shausse Blvd. Produs: Generator benzina Trademark: RAIDER Model: RD-GG05 este proiectat şi fabricat în conformitate cu următoarele directive Directivelor: este proiectat şi fabricat în conformitate cu următoarele directive Directivelor: Directiva 2006/42/CE a Parlamentului European şi a Consiliului din 17 mai 2006 privind echipamentele tehnice;... -
Page 41: Declaration Of Conformity
DECLARATION OF CONFORMITY Gasoline Generator Inverter RAIDER RD-GG05 Euromaster Import Export Ltd. Address: Sofia 1231, Bulgaria, 246 Lomsko shausse Blvd. (BG) Декларираме на собствена отговорност, че szabványoknak és eloírásoknak: този продукт е в съответствие със следните (CZ) Na naši vlastní zodpovednost prohlašujeme, že стандарти... - Page 42 - 24 месеца за физически лица за инструменти от серията Raider Pneumatic; - 12 месеца за юридически лица за инструменти от серията Raider Pneumatic; - 24 месеца за физически лица за всички бензинови машини от сериите: Raider Power Tools и Raider Garden tools - 12 месеца...
- Page 43 територията на Република България, е както следва: - 18 месеца за батерията и зарядното устройство от сериите: Raider Industrial, Raider Pro; - 12 месеца за батерията и зарядното устройство от сериите: Raider Power Tools, Raider Garden Tools; Гаранционният срок започва да тече от датата на закупуване. Гаранцията покрива всички дефекти, възникнали...
- Page 44 - когато е правен опит за ремонт, монтаж, демонтаж, модификация от потребителя или промени от неупълномощени лица или фирми; - при използване на батерията и зарядното устройство не по предназначение; - повреди причинени в резултат на използването и съхранението на батерията и/или зарядното в друга среда...
-
Page 45: Гаранционна Карта
ГАРАНЦИОННА КАРТА МОДЕЛ............................. СЕРИЕН № ............................ СРОК ............................... (за подробности виж гаранционните услови) №, дата на фактура / касов бон....................ДАННИ ЗА КУПУВАЧА ИМЕ/ФИРМА ..........................(попълва се от служителя) АДРЕС............................. (попълва се от служителя) ПОДПИС НА КУПУВАЧА....................... (запознат съм с гаранционните условия и правилата за експлоатация, изделието... - Page 46 Elektroinstrumenti „RAIDER” su konstruisani i proizvedeni u saglasnosti sa normativnim dokumen- tima i standardima u skladu sa svim zahtevima za bezbednost koji važe na teritroiji Srbija Sadržaj i obuhvat trgovačke garancije Uslovi garancije Garantni rok na teritoriji Srbija je 2 godinе i teče od datuma kupovine elektrouredjaja.
- Page 47 GARANTNI LIST MODEL ..........................SERIJSKI BROJ........................GARANCIJSKI ROK......................PRODAVAC IME/FIRMA..........................ADRESA..........................DATUM I PEČAT ........................DEKLARACIJA Naziv proizvođača: Euromaster Import-Export Co. Ltd, Adresa proizvođača: Bulgaria, Sofia, Lomsko shose blvd., 246, tel.: +359 2 934 10 10 UVOZNIKE: “BRIKO SPEC” D.O.O, “Dorda Stanojevica” 12, 11070, Beograd, Srbija SERVIS: ELMAG, ADRESA: NIS, TRG UCITELJ TASE 4, TEL.: 018/240 799 PRIJEMNI DATUM...
-
Page 48: Certificat De Garantie
Denumirea produsului___________________________________________________ Seria de fabricatie a produsului____________________________________________ Caracteristici tehnice____________________________________________________ Garantie comerciala : PODUS HOBBY.Termen de garantie: 24 luni de la data vanzarii catre consumatorii casnici (pentru toata gama RAIDER). Durata medie de utilizare: 3 ani Vandut prin societatea____________________________________din localitatea _______________________________str.___________________nr.____________cu factura nr._______________din__________________... - Page 49 Garantia presupune repararea gratuita a defectelor datorate producatorului,in cadrul termenului de garantie 1.Vanzatorul care comercializeaza produsul are obligatia sa faca demonstratia de functionare a produsului si sa explice consumatorului modul de utilizare al acestuia,in cazul in care consumatorul solicita acest lucru. 2.Produsul defect va fi receptionat de catre unitatea de service de care apartine care va efectua diagnosticarea defectului.
- Page 50 LISTA CENTRELOR SERVICE AUTORIZATE BUCUREŞTI: Steco S.R.L. – Str. Precupetii Vechi , nr.29, Tel: 0723.686.274 BUCURESTI: Euromaster S.R.L. – Drumul Garii Otopeni, Nr.6, Otopeni, Tel: 0213 510 106 BACĂU: S.C Bifa Electronic S.R.L.- Str. Milcovului,nr 136, Sc.A,Tel: 0728.936.835 BACAU: COMELECTRO BG S.R.L. - Str. Energiei, nr. 34-36, Tel: 0234 519 963 BAIA MARE: SC PIATETA SRL, str.Pasunii nr 1/6 , Tel: 0262-277266...
- Page 52 Електричните апарати “Рајдер” се дизајнирани и произведени во согласност со нормативните документи и стандарди во согласност со сите барања за безбедност што се применуваат. Содржината и опфат на гаранцијата Услови на Гаранцијата Рокот на гаранцијата се наведува во гарантниот лист и важи од датумот на купување на производот.
- Page 54 EUROMASTER IMPORT EXPORT LTD 1231, Sofia, Bulgaria, 246 Lomsko shose Blvd., tel.: +359 700 44 155 fax: + 359 2 934 00 90 www.euromasterbg.com; e-mail: info@euromasterbg.com...
Need help?
Do you have a question about the RD-GG05 and is the answer not in the manual?
Questions and answers