Advertisement
Quick Links
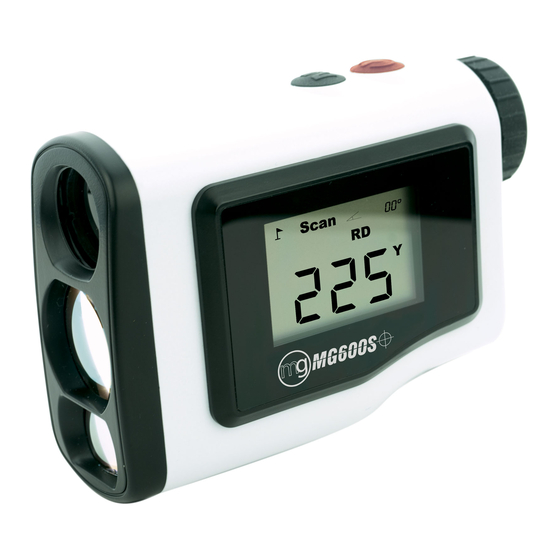
LASER RANGEFINDER
INSTRUCTIONS
Power On & Take
Measurement
Hold red
button for
approx 1 sec. (Automatically
shuts off after 1 minute, no manual off.)
Subsequent press and release of red
Changing Modes
Pressing and releasing black
Measurement Mode (MD) which locks onto pin, and MG-Lock
Recommended Distance Mode (RD) which locks onto pin & adjusts for
slope.
Vibrating MG-Lock Confirmation Feature
In MG-Lock (Measurement and Recommended Distance) Modes, a
vibrating pulse gives tactile feedback that the rangefinder has locked on
to the targeted object.
M
button takes a measurement.
M
button switches between MG-Lock
MG-Lock Recommended Distance Mode (Scan RD)
- - -
Y
^
^
^
|
Scan
Lock, indicated by
icon, which locks onto a target with something
(like a bunker or tree) behind it.
Example: Measurement modes (MD and standard) will measure 150
yards for both the level and uphill distances resulting in the uphill shot
falling short by several yards. RD mode will instead adjust the distance
higher on the uphill shot, or lower on a downhill shot,
telling you the distance the shot will play.
6°
(For illustrative purposes only. Not to scale.)
(Continued on Reverse Side)
(Slope)
Recommended Distance Mode
(indicated by RD on LCD and
icon) adjusts distance based
on angle of the slope. Aim, then
press and release red
Distance and slope angle readings
will alternate in viewfinder, both
display simultaneously on side LCD
panel. (This mode also includes MG-
X
150 yds.
button.
Advertisement

Related Manuals for MG MG600S


Summary of Contents for MG MG600S
- Page 1 MG-Lock yards for both the level and uphill distances resulting in the uphill shot Measurement Mode (MD) which locks onto pin, and MG-Lock falling short by several yards. RD mode will instead adjust the distance higher on the uphill shot, or lower on a downhill shot, Recommended Distance Mode (RD) which locks onto pin &...
- Page 2 Specifications • Slope Distance • ±3 Adjustable Diopters Recommendation (Glasses Unnecessary) • MG-Lock Finds Pins In Front • Measurement in Yards • Precision to +/- 1 Yard of Trees Etc... • Vibrating MG-Lock • 3V Battery (CR2) 零 件 代 号...
Need help?
Do you have a question about the MG600S and is the answer not in the manual?
Questions and answers
I have an MG 600 S rangefinder. I haven’t used it for a while and tried to use it. All functions and modes are working. The only thing that won’t display is the actual yardage. Any way to fix it?
The provided context does not contain specific troubleshooting steps for fixing a yardage display issue on the MG 600S rangefinder. However, you can try the following general steps:
1. Check the Battery – If the display shows "Lo," replace the CR2 3V battery.
2. Ensure Proper Targeting – Aim at a clear target and press the button to scan.
3. Adjust the Diopter – Use the adjustable diopters for a clear display.
4. Reset the Device – Turn it off and on again.
5. Check for Obstructions – Make sure nothing is blocking the lens.
If the issue persists, consult the device manual or contact the manufacturer.
This answer is automatically generated