
Related Manuals for Inovance H0U Series


Summary of Contents for Inovance H0U Series
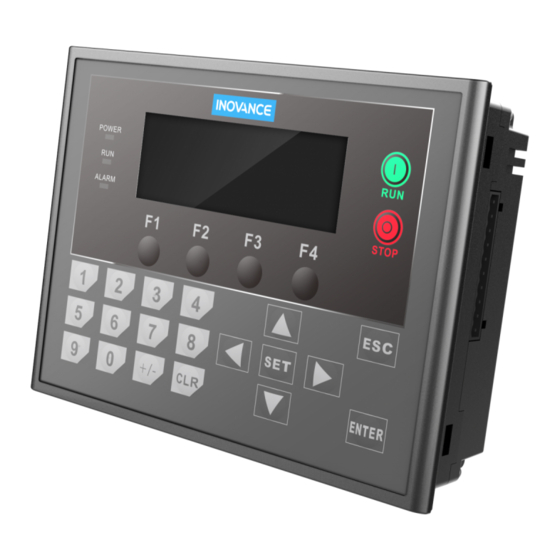
- Page 1 H0U series PLC with built-in HMI HMI display programming manual User Guide Data code XXXXXX...
- Page 2 (PLC) and text (TOD). The logic (PLC) programming software is AutoShop software, and the text (TOD) programming software is HTodEditor software. Both are developed and issued by Inovance. The user can realize the logic (PLC) or text (TOD) program control of H0U-XP by using the corresponding programming software.
-
Page 3: Table Of Contents
5 Create and download project Contents Programming software and its installation ................4 1.1 Installation and use of logic programming software AutoShop ..........4 1.2 Installation of text programming software HTodEditor ............6 2 Quick start ........................... 10 2.1 Structure layout of page editing software ................11 2.2 Make a simple project ...................... - Page 4 5 Create and download project A.1.2 Basic parameters ......................54 A.2 Buttons ..........................54 Appendix B: Version Change Record .................... 56...
-
Page 5: Programming Software And Its Installation
1.1 Installation and use of logic programming software AutoShop 1) Acquisition of AutoShop software Visit Inovance's official website http://www.inovance.com, download the latest version of AutoShop software, and save it to your local computer. 2) Installation: follow the installation prompts to complete the software installation... - Page 6 ※ For more information about the operation guidance of AutoShop software, please refer to the "Help" of AutoShop software and the "Inovance H1U\H2U PLC Instruction and Programming Manual" separately issued by Inovance.
-
Page 7: Installation Of Text Programming Software Htodeditor
2) Install HTodEditor programming software ▪ Software source The HTodEditor programming software is independently developed by Inovance. You can ask for the latest version of the software from the supplier, or download it on the Inovance website: http://www.inovance.com Computer configuration requirements (recommended configuration) ▪... - Page 8 5 Create and download project Step 3: According to the instructions, click "Next" to confirm the installation. After the installation is complete, click "Close" to complete the installation process.
- Page 9 5 Create and download project...
- Page 10 Step 4: When you want to execute the program, you can click on the desktop; or you can find the corresponding execution program under the menu [Start]/[Programs]/[Inovance Control]. The meaning of each option in the software menu is as follows:...
-
Page 11: Quick Start
5 Create and download project 2 Quick start After the installation is complete, click on the desktop; or find the corresponding executable program under the menu [Start]/[Programs]/[Inovance Control]. As shown in the figure below, click HTodEditor to enter the programming interface of HTodEditor software. -
Page 12: Structure Layout Of Page Editing Software
5 Create and download project 2.1 Structure layout of page editing software A project is developed based on pages. Each page completes some specific functions and can switch over to any other pages. After opening the project, the user can create or open a page. Elements such as text, indicator lights, switches, data display setting windows, and jump keys can be placed on each page. -
Page 13: Make A Simple Project
5 Create and download project 2.2 Make a simple project Step 1: First press the "New Project" button on the toolbar. To add an "indicator" control, click on control button (indicator) in the window to complete the control creation. Enter the attribute editing interface to edit "Indicator Attributes". - Page 14 5 Create and download project Step 3: Download the page configuration to the H0U integrated programmable controller. Click tool button (file download), the following dialog box will pop up, and click "download". After the file is downloaded successfully, "File download complete" will be displayed on the interface;...
-
Page 15: Parameter Setting And Display
5 Create and download project 3 Parameter setting and display 3.1 Parameter setting Open the "Tools/Parameter Settings" of the HTodEditor software menu, or click the tool button (parameter settings) to enter the following parameter setting interface, which can set some parameters of project. -
Page 16: Display Parameters
5 Create and download project 3.2 Display parameters Parameter type Parameter description Used to define the page displayed after power-on, generally used to Start page display the welcome page. Used to set the default display page. When the ESC button has no Default page special function, press the ESC button to jump to the default page. - Page 17 5 Create and download project is displayed; when the storage language register is set to non-zero text, the content of Language 2 is displayed. 3) Report password level If the Report password level option is checked, the current password level will be displayed in the associated PLC register.
-
Page 18: Controls
5 Create and download project 4 Controls HTodEditor provides 10 kinds of controls such as indicator light, button, static text, dynamic text, register, bar graph, trend graph, picture, menu, alarm, etc. The functions of these controls are described as follows: Control Description Control... -
Page 19: Static Text
5 Create and download project 4.1 Static text Click the control button, a rectangular dashed frame appears on the screen, and follow the mouse to move, the moving distance is an integer multiple of 4 pixels, now click the left mouse button to confirm the position, after confirmation, the content "TextStr"... -
Page 20: Dynamic Text
5 Create and download project 4.2 Dynamic text Click the control button, a rectangular dashed frame appears on the screen, and follow the mouse to move, the moving distance is an integer multiple of 4 pixels, now click the left mouse button to confirm the position, after confirmation, the content "DynamicStr"... -
Page 21: Function Keys
5 Create and download project 4.3 Function keys Click the control button, a rectangular dashed frame appears on the screen, and follow the mouse to move, the moving distance is an integer multiple of 4 pixels, now click the left mouse button to confirm the position. - Page 22 5 Create and download project Encryption encrypts this function key, and this function key can only Encryption be used when the system password is open (has been set correctly). Set coil The action of this function key is the switch value setting. Screen jump The action of this function key is screen jump.
- Page 23 5 Create and download project If you want to save space, you can cancel the "hand shape" display, and only the function to “Screen Jump”, button shape is displayed on the screen. Then set the set the “Jump to” page number to 2, and define page 2 as parameter setting page. In order to hide the setting page, set the "Encryption"...
- Page 24 5 Create and download project After the function keys are set, place the text "Parameter setting" on the right side of the key ◄ graphic to remind the operator, press the " " key to directly enter the parameter setting screen. As shown below: ►...
- Page 25 5 Create and download project Note: In order to insert new pages at any time, it is recommended to separate page numbers of different types of pages. For example: if you want to add a parameter setting page, you can place it in the No.
-
Page 26: Register
5 Create and download project 4.4 Register For data register function and click the control button. A rectangular dashed frame that moves with the mouse appears on the screen. After moving to the proper position, press the left mouse button to confirm the position. 5 digits such as "12345" are displayed inside the dashed frame, indicating that the control is a register display window or register setting window with a length of 5 digits. - Page 27 5 Create and download project engineering quantity refer to the percentage of the setting data in the upper and lower limits of the input. As shown below: Display value = (input value-input offline)/(input upper limit-input lower limit) * (engineering upper limit-engineering offline). When the data is set to -1000, the offline 0 of the register is displayed.
-
Page 28: Indicator Light
5 Create and download project 4.5 Indicator light Click the control button to insert the indicator, a rectangular dashed frame appears on the screen, and follow the mouse to move the moving distance is an integer multiple of 4 pixels, now press the left mouse button to confirm the position. -
Page 29: Bar Graph
5 Create and download project 4.6 Bar graph The bar graph is used to visually display analog parameters, such as flow, pressure, and liquid level. Height, width and direction can be arbitrarily specified. Click the control button, a rectangular dashed frame that moves with the mouse appears on the screen, move to the proper position and press the left mouse button to confirm. -
Page 30: Trend Chart
5 Create and download project 4.7 Trend chart In the process of industrial control, some parameters change slowly. In order to understand the change process of these parameters in a certain period of time, a trend chart can be established. Click the control button, a rectangular dashed frame that moves with the mouse appears on the screen, move to the proper position and press the left mouse button to confirm. -
Page 31: Graphics
5 Create and download project 4.8 Graphics Inserting a bitmap file can display the graphics of the machine so that the operator can understand it, and it can also display the company logo and logo to enhance the product image. Click the control button, a search dialog box appears on the screen, as follows: Select the bitmap file to be displayed, double-click the left mouse button or click "Open", a... - Page 32 5 Create and download project Note: A bitmap file with a maximum of 192x64 pixels can be displayed. If the number of pixels is too large or the file does not have bitmap format, the software will pop up the following dialog box:...
-
Page 33: Menu
5 Create and download project 4.9 Menu This control can display registers in a menu. The user can select the menu options by pressing ▲ ▼ the “ ” and “ ” buttons on the display. After selecting the corresponding menu, press the ENT key to set the register, or jump to the corresponding interface. - Page 34 5 Create and download project ① Select "register setting"; ② "Register" is valid and the register address can be set; ③ Operating value here represents the value to be written into the register. For example: when the user selects the "High Speed" menu item through the "▲" "▼" buttons, it means write 1000 to the D0 register.
-
Page 35: Alarm List Control
5 Create and download project 4.10 Alarm List Control Set the "Alarm List Control", when an alarm occurs when the PLC is running, the corresponding register can be set. At this time, the control associated with the "Alarm List Control" will display the alarm information on the screen. -
Page 36: Alarm List
5 Create and download project 4.11 Alarm list The alarm list is the simplest and most intuitive way of creating alarm events in industrial automation control applications. Each project of HTodEditor can set a group of alarm list information. One alarm message corresponds to one intermediate relay. -
Page 37: Password Function
5 Create and download project After setting the alarm content and coil, the system will automatically associate the alarm content with the coil. The difference from the "Alarm List Control" is that the "Alarm List Control" is only valid on this page, while the alarm list is valid on all interfaces. "Alarm List Control" only displays alarm information on the current page, while "Alarm List"... - Page 38 5 Create and download project D8310 Current password level (display) M8310 / D8311 / M8311 Level 1 password lock D8312 / M8312 Level 2 password lock D8313 / M8313 Level 3 password lock D8314 / M8314 Level 4 password lock D8315 Password unlock input M8315 The current level password is unlocked D8316 Password level input...
-
Page 39: Create And Download Project
5 Create and download project 5 Create and download project 5.1 New page Open "Page/New Page" in the HTodEditor software menu, or click the icon on the tool button, and the following dialog box will pop up: A simple text description of the screen function. -
Page 40: Save The Project
5 Create and download project 5.4 Save the project After finishing the page editing, you can save the project file and download the display project to H0U, ready for online debugging. Press the key , and the following dialog box will pop up. Enter the project name, select the correct path, and press "OK"... -
Page 41: Examples
Step 1: Open the HTodEditor software, set the home page: the page description is "Home"; add the "picture" control as the company icon; add the "static text" control, and edit the content as "Welcome to Inovance". The completed layout is as follows. - Page 42 6 Examples Step 2: Create a new page 2, the page description is "Manual selection", add a "function key" control for "page switching" settings; add a "static text" control to describe the function of the function key. The finished effect is as follows:...
- Page 43 6 Examples Step 3: Create page 3, and the page description is "Manual". Place 4 "indicator" controls and 9 "function key" controls ① ~ ④, F1 ~ F4 and ENT. As shown in the figure below, "①, ②, ③, ④" is the corresponding light ON indicators, "F1, F2, F3, F4"...
- Page 44 6 Examples Setting of control properties: The indicator 1, 2, 3, 4 is set to address 10, 11, 12, 13 and the type is set to M; the function key turns ON the light, and the setting is as shown in the figure below. The address and type should correspond to the indicator, set to ON;...
- Page 45 6 Examples Step 4: New page 4 is "Auto", place 4 "indicators" (F1 ~ F4), and place 3 "function keys": one is to turn ON the indicator, the other is to turn OFF the indicator, and "ENT" is Return to page 2 "Manual selection".
- Page 46 6 Examples Control property setting: indicator 1, 2, 3, 4 set address 0, 1, 2, 3, type set to M; function key “SET” to turn on the indicators, set as shown in the figure below (type is M, address Is 20, set to...
- Page 47 6 Examples To turn off the indicator, you only need to select the “ESC” and “Set to OFF” to turn off the indicator, and other attributes are consistent with the function key to turn on the indicator "SET"; the "ENT" key setting is the same as the previous "ENT" key setting. 【Complete】...
-
Page 48: Plc Programming
H1U/H2U series PLC instructions. The difference is: 1) The COM0 port of H0U series PLC is a RS485 connection port instead of a RS422 port. The program is downloaded and monitored through the USB to RS232/RS485 converter. -
Page 49: Extended Functions
7 PLC programming 7.3 Extended functions H0U has built-in analog expansion cards 6AT, which can be set and displayed through special registers. Users only need to set and read the corresponding special registers, no instructions are required. D8400~D8409 are display areas, D8410~D8419 are basic parameter setting areas, D8420~ D8429 are AD special parameter setting areas, and D8430~D8439 are DA special parameter setting areas. - Page 50 7 PLC programming Temperature detection 2 channel average filter constant. The default D8419 value is 8. Setting 1 writes the AD offset gain value. It will automatically return to 0 M8420 after writing. 0x6A1 means 6AT station card. Displaying 0x6A2 means 6ATC D8420 AD offset expansion card.
- Page 51 7 PLC programming The temperature detection error status is shown in the table below D8409 (temperature ON state OFF state detection error) There is an error, and any non-zero A/D Bit0 No error conversion of Bit0~Bit3 will stop The hardware is Bit3 Hardware malfunction normal...
-
Page 52: Indicator Light
HTodEditor software to download PLC program and text program respectively to H0U PLC via standard USB cable. The USB driver of Inovance PLC needs to be installed when the new computer uses USB to download for the first time. The driver can be downloaded on the official... - Page 53 COM0 port of H0U. But this function is an alternate port for firmware update, which is not available for regular products. If the customer needs to this function, they can contact the relevant personnel of Inovance. 3) RS485 communication function H0U has 2 RS485 functions, supports 1:1, N:N, computer link protocol and Modbus RTU protocol.
-
Page 54: Appendix A: H0U-Xp Series Plc Instruction
Appendix A: H0U-XP series PLC instruction A.1 Introduction to H0U-XP series PLC Inovance H0U-XP series PLC (H0U integrated programmable controller, hereinafter referred to as H0U) is a controller that integrates PLC and TOD text. The control logic and display interface can be user-programmed. - Page 55 8 Appendix A.1.2 Basic parameters Configuration High- High- Built-in Model Number Total Total Output Communication Speed Speed Analog Inputs Outputs Type Interface Inputs Outputs Card H0U-0808MR- Relay XP-INT 2x60kHz 4 x Relay 4x10kHz H0U-0808MRT- 2x100kHz XP-INT Transistor H0U-1616MR- Relay XP-INT 2x60kHz 4 x Relay 4x10kHz...
- Page 56 8 Appendix The keys shown in the table below are basic buttons with their own default functions. But the basic keys can also be used as custom keys to perform custom functions through controls. When the default function and custom function of the basic buttons on the same page conflict, you should set the priority.
- Page 57 8 Appendix Appendix B: Version Change Record Time Version Changed content 2020-08 V0.0 First edition released...
Need help?
Do you have a question about the H0U Series and is the answer not in the manual?
Questions and answers