Simu DMI5Hz Manual
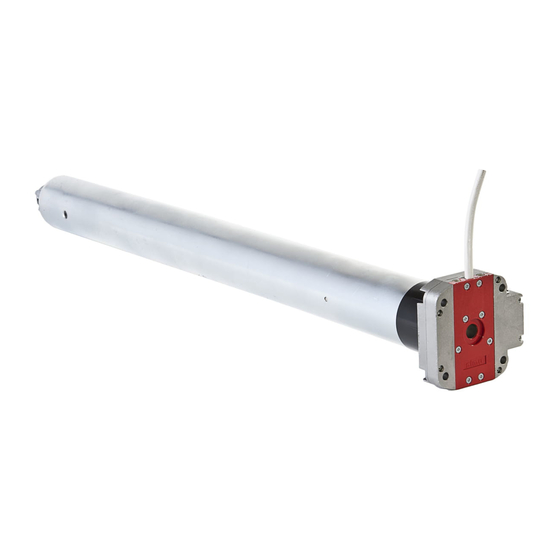
Tubular operators with integrated radio and manual override for blinds, awnings & roller shutters
Hide thumbs
Also See for DMI5Hz:
- Original instructions manual (40 pages) ,
- Manual (16 pages) ,
- Instructions manual (8 pages)
Advertisement
Quick Links
DMI5Hz - DMI6Hz
Tubular operators with integrated radio and manual
override for blinds, awnings & roller shutters.
USA
S.A.S. au capital de 5 000 000 ! - Z.I. Les Giranaux - BP71 - 70103 Arc-Les-Gray CEDEX - RCS GRAY B 425 650 090 - SIRET 425 650 090 00011 - n° T.V.A CEE FR 87 425 650 090
- This device complies with part 15 of the FCC Rules. Operating is subject to the following
two conditions:
(1) This device may not cause harmful interference.
(2) This device must accept any interference received, including interference that may
cause undesired operation.
- Caution: Changes or modifications not expressly approved by the party responsible for
compliance could void the user's authority to operate the equipment.
1
ASSEMBLY
1.1 - TUBE PREPARATION
Warning: do not cut or drill the tube with the motor installed.
- Cut the tube to the required length.
- Remove all burrs from the tube.
- If using a round tube, cut a notch (D wide by C long) into one end of the tube.
- On round tubes measure length (A) and drill 4 holes around the tube. For octagonal
tubes 1 hole is sufficient (see dimension chart next page).
C
D
12 max.
A
A
d1
1 ft. < d1 < 65 ft.
4 x ØB / 90°
Ø min.
ØB
T min.
5047058D
IMPORTANT - Review instruction
throughly before installing Hz motors
d2
d2 > 8 inches min.
For Composite Drive
4 X
STEEL SAE5 or higher
or
4 X
For the Aluminum
Drive use the 5mm X
6mm screws supplied
with the drive
Ø 3/16
Ø 1/4
1/8
Advertisement

Subscribe to Our Youtube Channel
Related Manuals for Simu DMI5Hz


Summary of Contents for Simu DMI5Hz
- Page 1 DMI5Hz - DMI6Hz 5047058D Tubular operators with integrated radio and manual override for blinds, awnings & roller shutters. IMPORTANT - Review instruction throughly before installing Hz motors S.A.S. au capital de 5 000 000 ! - Z.I. Les Giranaux - BP71 - 70103 Arc-Les-Gray CEDEX - RCS GRAY B 425 650 090 - SIRET 425 650 090 00011 - n° T.V.A CEE FR 87 425 650 090 - This device complies with part 15 of the FCC Rules.
- Page 2 - Always install the power cable with a drip loop to prevent water penetration. - SIMU motors conform to IP44 requirements and as such must be protected against direct weather elements such as rain, sleet, ...etc. Failure to do so could result in voiding the warranty.
- Page 3 10 Nm max. (DMI 6 120 : 20Nm max.) WIRING 2.1 - DMI Hz PERMANENT WIRING (shutter, shade or awning) Warning: All wiring must conform to the National Electric Code and local codes. - (1) The motor must be installed with a drip loop to prevent water intrusion. - (2) Connect the motor to power using a listed junction box with appropriate cable strain reliefs.
- Page 4 2.2 - DMI Hz PLUG-IN WIRING (shade or awning) Warning: All wiring must conform to the National Electric Code and local codes. - (1) The motor must be installed with a drip loop to prevent water intrusion. - (2) If used outdoors, a GFCI receptacle with an outdoor cover is required. - Do not use the motor cable to penetrate building walls.
-
Page 5: Direction Of Rotation
PROGRAMMING 4.1 - WAKING UP THE MOTOR Before programming, changing direction of rotation, setting the limits, etc…you must wake the motor up. If using a multi-channel transmitter, confirm you are on the desired channel. Press and hold the up and down together until the motor gives a short up/down bounce. - Page 6 4.4 - ADDING ADDITIONAL TRANSMITTERS (CHANNELS) TO THE MOTOR. Use the transmitter that currently controls the motor and confirm it is on the correct channel. Press and hold the Program Button until the motor gives a short up/down bounce. Confirm transmitter is on the channel you wish to add and press the Program Button.
- Page 7 SETTING THE LIMITS LIMIT ADJUSTMENT SCREWS ON OPPOSITE SIDE FROM MOTOR CABLE MATERIAL ROLLS DOWN ON SAME SIDE AS LIMITS MATERIAL ROLLS DOWN ON OPPOSITE SIDE AS LIMITS UP LIMIT ADJUSTMENT SCREW DOWN LIMIT ADJUSTMENT SCREW DOWN LIMIT ADJUSTMENT SCREW UP ADJUSTMENT SCREW 5.1 - Identify which limit adjustment screw controls the up limit and which controls the down limit (see above diagrams).
- Page 8 SETTING THE LIMITS LIMIT ADJUSTMENT SCREWS ON SAME SIDE FROM MOTOR CABLE MATERIAL ROLLS DOWN ON SAME SIDE AS LIMITS MATERIAL ROLLS DOWN ON OPPOSITE SIDE AS LIMITS DOWN LIMIT ADJUSTMENT SCREW UP LIMIT ADJUSTMENT SCREW MOTOR CABLE MOTOR CABLE MOTOR CABLE MOTOR CABLE UP LIMIT ADJUSTMENT SCREW...
Need help?
Do you have a question about the DMI5Hz and is the answer not in the manual?
Questions and answers