Marey ECO150 Instructional Manual
Electric tankless water heater
Hide thumbs
Also See for ECO150:
- Installation requirements (4 pages) ,
- Faq manual (4 pages) ,
- Troubleshooting manual (5 pages)

Related Manuals for Marey ECO150


Summary of Contents for Marey ECO150
- Page 1 ECO150 ELECTRIC TANKLESS WATER HEATER INSTRUCTIONAL MANUAL Keep this manual with you after your unit has been installed, you may need it for further technical information. USA (855) 627-3955 www.Marey.com PR (787) 727-0277...
- Page 2 Congratulations! You’ve just purchased a new Marey ECO tankless water heater and will soon begin to enjoy the bene ts of “going tankless. ” Please take the time to thoroughly read and understand this safety and installation manual in its entirety before you attempt to install your new tankless water heater, as it contains important safety tips and instructions.
-
Page 3: Table Of Contents
INDEX QUICK START GUIDE WARNING IMPORTANT WARNINGS IMPORTANT SAFETY INFORMATIONS PRODUCT FEATURES PRODUCT ADVANTAGES TECHNICAL SPECIFICATION AND INSTALLATION REQUIREMENTS PRODUCT INNER STRUCTURE INSTALLATION GUIDELINE INSTALLATION DIAGRAM OPERATING INSTRUCTIONS TROUBLE-SHOOTING/DIAGNOSTIC CHART NORMAL MAINTENANCE... -
Page 4: Quick Start Guide
QUICK START GUIDE ECO150 1) Mounting Plot the three holes for the mounting screws onto the wall. Mount vertically on a at surface (i.e. board or walI) larger than the unit itself. Make sure heater is secure by utilizing a stud or the provided wall anchors. Keep away from any potential splashing 2) Water Connections Plumbing connections are ½"... -
Page 5: Warning
WARNING If your water heater requires a reset, be sure to TURN OFF THE BREAKER prior to resetting the unit. Resetting your unit without turning o the breaker can result in personal injury and damage to your water heater. WARNING! There is water contained in the coils of your water heater at all times. If your water heater is exposed to freezing temperatures, the water in the coils could freeze, causing a break in the heat exchanger of the unit, or the supply and return lines. -
Page 6: Product Features
they have been given supervision or instruction concerning use of the appliance by a person responsible for their safety. Children should be supervised to ensure that they not play with the appliance. 6. This appliance MUST be permanently connected to the xed circuit breaker and it must be installed vertically. -
Page 7: Product Advantages
3. Over temperature protection: when the outgoing water temperature reaches over 140°F/60°C, the electricity will be cut o to avoid getting scalded and the screen will display El. The appliance will start working automatically when the temperature drops to the set temperature. 4. -
Page 8: Technical Specification And Installation Requirements
TECHNICAL SPECIFICATIONS AND INSTALLATION REQUIREMENTS PRODUCT CODE ECO150 Voltage 208V - 240V Power 11kW - 14.6kW Min. Required Circuit Breaker Size Double Pole Breaker Max. Amperage 60.8A Recommended Wire Size 6 AWG Min. Water Flow 0.53 GPM / 2L/min to Activate the Unit... -
Page 9: Product Inner Structure
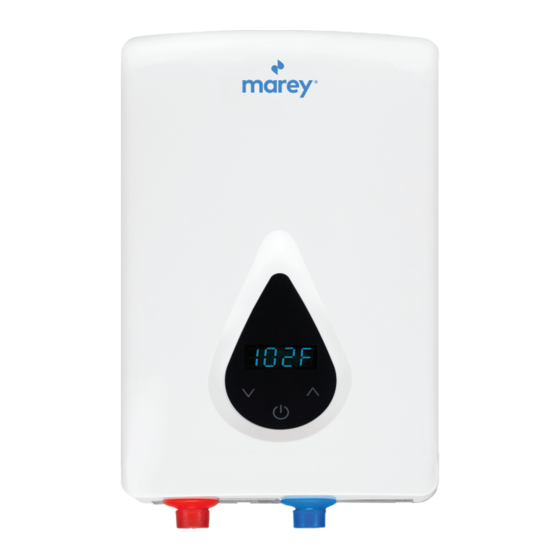
PRODUCT INNER STRUCTURE Terminal blocks Bottom Panel Control Board Display Screen Down On/OFf Heating Chamber Temp. Sensor Flowmeter INSTALLATION GUIDELINE 1. Make sure the appliance is intact, and the ttings are complete. 2. Please make sure the main power supply, water pressure, grounding condition, ammeter and wire reach the standard of installation requirement. -
Page 10: Installation Diagram
INSTALLATION DIAGRAM FIXED INSTALLATION ON THE WALL Locate an appropriate place on a section of the wal I as mentioned above. Fig. 01: Front and back of the appliance. Fig. 02: Remove screws which are xed at the front and back covers of the appliance. - Page 11 Fig. 03: Open the front cover, connect the cable to the terminal blocks, and please notice the guidance logo below the terminal blocks. Fig. 04: Connect PCB row line of the front cover to PCB of the back cover, and then x the front and back cover with locking screws.
- Page 12 Fig. 05: Mark three mounting holes on the wall according to the following picture, then drill three holes of 6.00mm diameter. Put expansion bolts in the holes, and then screw the self tapping screws into the expansion bolts. Fig. 06: Fix the appliance on the mounting screws.
- Page 13 Fig. 07: Connect the water pipe to the water inlet and water outlet connections, please remember to install the rubber seal ring. Water connections 1. All water pipes must comply with national and applicable state and local water pipe codes. 2.
-
Page 14: Operating Instructions
5. Before beginning any work on the electric installation, be sure that the main breaker panel switch is OFF to avoid any danger of electric shock. All mounting and plumbing must be completed before proceeding with electrical hook-up. OPERATING INSTRUCTIONS 1. -
Page 15: Trouble-Shooting/Diagnostic Chart
TROUBLE-SHOOTING / DIAGNOSTIC CHART PROBLEM POSSIBLE CAUSES CORRECTIVE ACTIONS A. Fittings not tight A. Tighten ttings. 1. Inlet and outlet B. Rubber washer worn-out B. Change rubber washer. ttings leaking A. Power not connected. A. Connect power to the unit. B. - Page 16 Please feel free to contact us if you have any questions about our products, warranty service, or if you need assistance installing a unit. We also strive for continuous improvement, so we welcome your comments, feedback and suggestions. U.S.A +1 (855) 627-3955 PUERTO RICO (787) 727-0277 customerservice@marey.com www.Marey.com...
Need help?
Do you have a question about the ECO150 and is the answer not in the manual?
Questions and answers
does the marey eco 150 require a temperature and pressure relief valve?