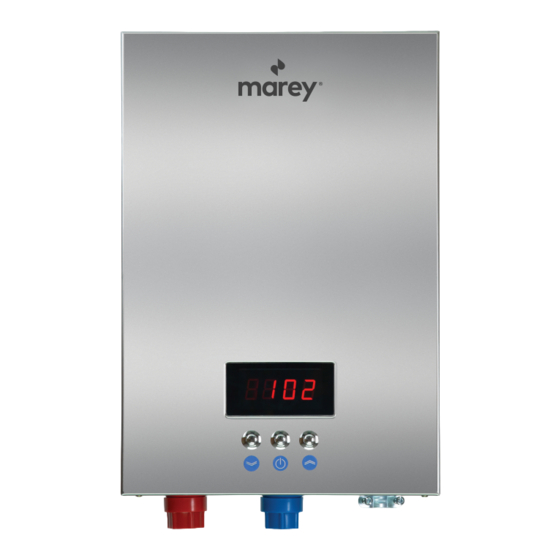
Marey ECO180 Instructional Manual
Electric tankless water heater
Hide thumbs
Also See for ECO180:
- Instruction manual (12 pages) ,
- Quick start manual (12 pages) ,
- Installation requirements (5 pages)

Related Manuals for Marey ECO180


Summary of Contents for Marey ECO180
- Page 1 ECO180 | ECO270 ELECTRIC TANKLESS WATER HEATER INSTRUCTIONAL MANUAL Keep this manual with you after your unit has been installed, you may need it for further technical information. USA (855) 627-3955 www.Marey.com PR (787) 727-0277...
- Page 2 Congratulations! You’ve just purchased a new Marey ECO tankless water heater and will soon begin to enjoy the bene ts of “going tankless. ” Please take the time to thoroughly read and understand this safety and installation manual in its entirety before you attempt to install your new tankless water heater, as it contains important safety tips and instructions.
- Page 3 INDEX QUICK START GUIDE WARNING IMPORTANT WARNINGS IMPORTANT SAFETY INFORMATIONS PRODUCT FEATURES PRODUCT ADVANTAGES INSTALLATION DIAGRAM TECHNICAL SPECIFICATION REQUIREMENTS PRODUCT INNER STRUCTURE INSTALLATION GUIDELINE TROUBLE-SHOOTING/DIAGNOSTIC CHART ELECTRICAL DIAGRAM CUSTOMER SERVICE...
-
Page 4: Operation
QUICK START GUIDE ECO180 | 270 1) Mounting Mount vertically on a flat surface (i.e. board or wall) larger than the unit itself. Make sure bracket is secure by utilizing a stud or the provided wall anchors. Keep away from any potential splashing or leaking water and strong magnetic fields. -
Page 5: Important Warnings
Installation of this product is restricted to indoor locations. Under no circumstances should you attempt to install, repair or disassemble the Marey Heater tankless electric water heater without rst shutting o all power to the unit directly at the circuit breaker panel. -
Page 6: Product Features
12. If there is damage to the wiring or any internal part, you must contact a quali ed electrician to replace it, or send it to one of our service centers for repair. (Replacement parts are available from Marey.) 13. The shower head should be cleaned and checked periodically for debris and build-up. -
Page 7: Product Advantages
7. Micro-computer features an automatic electricity and water consumption calculat- ing function. PRODUCT ADVANTAGES Marey heating elements are made from a single piece of cast aluminum, so there will never be water leakage non electric leakage in the heating chamber. Marey heaters also... - Page 8 ECO270 = 3 x 50am 2-pole 208/240V Breakers Fig. 03 High pressure discharge valve Ball valve/shut off valve Water out Water in Fig. 04...
- Page 9 TECHNICAL SPECIFICATIONS AND INSTALLATION REQUIREMENTS ECO180 PRODUCT CODE ECO180 ECO270 Energy 18kW 27kW Minimum Required Circuit Breaker 2x50A 3x50A 18 kW 2x50 Amp Max. Amp. Load 112.5A Power Breaker Min. Wire Size ECO270 AWG Copper AWG Copper Voltage/Frequency 240V, 60Hz Water Connections 3/4”...
-
Page 10: Product Inner Structure
PRODUCT INNER STRUCTURE 260mm Bottom Case ECO180 ECO180 Heating Chamber Control Board Display Screen Temp. Sensor E L1 L2 L1 L2 Terminal blocks Flowmeter 260mm Bottom Case ECO270 ECO270 Heating Chamber Control Board Display Screen Temp. Sensor E L1 L2 L1 L2 L1 L2... - Page 11 INSTALLATION GUIDELINES NOTE: Installation must be in compliance with the National Electrical Code and your local electrical and plumbing codes. 1. Do not instal I the unit in a room where there is a chance of freezing. 2. DO NOT install this water heater near tinder, volatile or ammable substances, or near a strong magnetic eld.
- Page 12 Fig. 07 Fig. 08 Fig. 09...
- Page 13 Hold the back bracket hanger in position against the wall in the desired hanging location. Check to make sure that the bracket is level. Mark the wall where the mount-ing holes should be located. Drill holes of ¼" diameter in the marked locations.
- Page 14 Fig.12 Attach unit to mounting bracket by sliding onto tabs. Make sure the unit is properly secured to both tabs of the bracket. Install bottom, center screw to a x the unit to the bracket to complete mounting. Important notes about water connections: 1.
- Page 15 Please use a backup wrench when installing water fittings. Connections are 3/4" NPT (Fig. 13). Backup Wrench Outlet Inlet Rubber Washers Fig.13 Important notes about electrical connections: 1. Before beginning any work on the electrical installation, be sure that the main breaker panel switch is OFF to avoid any danger of electric shock.
- Page 16 Ll and L2 should have its own corresponding double polled breaker. Note that the ECO 180 unit will be connected to two double pole circuit breakers while the EC0270 unit will be connected to three double pole circuit breakers (Fig.14). ECO180 ECO270 Fig.14...
-
Page 17: How The Unit Works
Reattach the ribbon cable for the LCD panel if disconnected and reinstal I the front cover using the screws and washers previously removed. (Fig.15). Fig. 15 How the unit works 1. This unit heats water instantaneously as it ows across the heating elements. 2. - Page 18 2. Turn on the circuit breakers to provide power to the unit. 3. Press the center button to turn on the heater. NOTE it will not start heating until water is provided to the unit. If there is power to the unit, but no digital display, turn o the circuit breaker. Double check to make sure that the cable to the LCD panel on the front cover is correctly connected inside the unit, then turn the breaker back on.
- Page 19 Reduce the inlet water ow. WARNING: Corrections to problems 8, 9 and 10 should only be performed by quali ed electrician or plumber. The person who initially installed the unit is the best one to contact for help, or contact Marey for service.
- Page 20 #4 or #9 Campfire Arrows and indicates waves power to indicate heating waterflow elements Fig. 16 NORMAL MAINTENANCE Note: Do not attempt to repair this water heater yourself. Please call a service person for assistance. Always be sure to turn off all the breakers connected to your unit before servicing.
-
Page 21: Electrical Diagram
ELECTRICAL DIAGRAM Thermal Cut-Out 90°C Control System Display Outlet Temp. Sensor Screen Inlet Temp. Sensor Flowmeter Fig. 17 Thermal Cut-Out 90°C Control System L1'' L2'' Display Outlet Temp. Sensor Screen Inlet Temp. Sensor Flowmeter Fig. 18 REMARK: L: LINE R: HEATING SYSTEM T: TRIAC... - Page 22 ECO180 Bottom case Heating Chamber Control Board Display Screen Temp. Sensor E L1 L2 L1 L2 L1 L2 Flowmeter Terminal blocks ECO270 Bottom case Heating Chamber Control Board Display Screen Temp. Sensor E L1 L2 L1 L2 L1 L2 L1 L2...
- Page 23 Please feel free to contact us if you have any questions about our products, warranty service, or if you need assistance installing a unit. We also strive for continuous improvement, so we welcome your comments, feedback and suggestions. U.S.A +1 (855) 627-3955 PUERTO RICO (787) 727-0277 customerservice@marey.com www.marey.com...
Need help?
Do you have a question about the ECO180 and is the answer not in the manual?
Questions and answers