Table of Contents
Advertisement
Quick Links
Advertisement
Table of Contents

Subscribe to Our Youtube Channel
Related Manuals for Electrolux KODEC60X


Summary of Contents for Electrolux KODEC60X
- Page 1 User Manual Oven KODEC60X electrolux.com/register...
-
Page 2: Table Of Contents
WE’RE THINKING OF YOU Thank you for purchasing an Electrolux appliance. You’ve chosen a product that brings with it decades of professional experience and innovation. Ingenious and stylish, it has been designed with you in mind. So whenever you use it, you can be safe in the knowledge that you’ll get great results every time. -
Page 3: Safety Information
SAFETY INFORMATION Before the installation and use of the appliance, carefully read the supplied instructions. The manufacturer is not responsible for any injuries or damage that are the result of incorrect installation or usage. Always keep the instructions in a safe and accessible location for future reference. -
Page 4: Safety Instructions
Disconnect the appliance from the power supply before • carrying out any maintenance. If the mains power supply cable is damaged, it must be • replaced by the manufacturer, its Authorised Service Centre or similarly qualified persons to avoid an electrical hazard. The means for disconnection must be incorporated in the •... - Page 5 • Do not pull the mains cable to disconnect the appliance. Always pull the mains plug. Height of the back of the 576 mm • Use only correct isolation devices: line appliance protecting cut-outs, fuses (screw type Width of the front of the ap‐ 595 mm fuses removed from the holder), earth pliance...
- Page 6 – do not put ovenware or other objects use abrasive products, abrasive cleaning in the appliance directly on the pads, solvents or metal objects. bottom. • If you use an oven spray, follow the safety – do not put aluminium foil directly on instructions on its packaging.
-
Page 7: Product Description
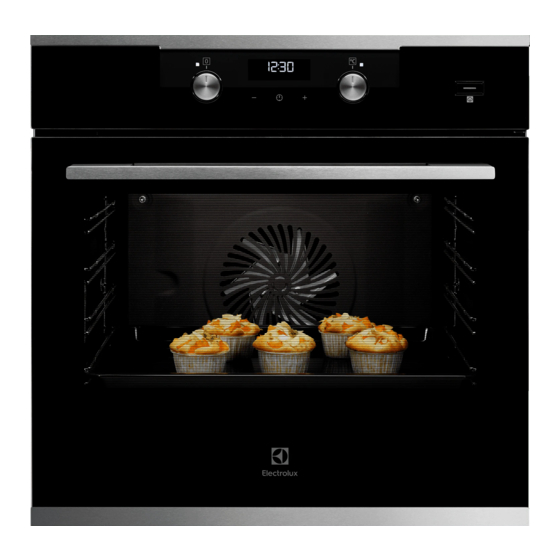
3. PRODUCT DESCRIPTION 3.1 General overview Control panel Knob for the heating functions Power lamp / symbol Display Control knob (for the temperature) Temperature indicator / symbol Plus Steam Heating element Lamp Shelf support, removable Cavity embossment Shelf positions 3.2 Accessories For cakes and biscuits. -
Page 8: Before First Use
4.2 Sensor fields / Buttons To set the time. To set a clock function. To set the time. 4.3 Display A. Clock functions B. Timer 5. BEFORE FIRST USE WARNING! Refer to Safety chapters. 5.1 Before first use The oven can emit an odour and smoke during preheating. Make sure that the room is ventilated. -
Page 9: Daily Use
6. DAILY USE WARNING! Step 2 Turn the control knob to select the tem‐ Refer to Safety chapters. perature. Step 3 When the cooking ends, turn the knobs 6.1 How to set: Heating function to the off position to turn off the oven. Step 1 Turn the knob for the heating functions to select a heating function. -
Page 10: Clock Functions
Heating func‐ Application Heating func‐ Application tion tion To bake on up to three shelf po‐ To grill thin pieces of food and sitions at the same time and to to toast bread. dry food. Grill Set the temperature 20 - 40 °C lower than for Conventional To roast large meat joints or Cooking. - Page 11 Clock function Application To set how long the oven works. Duration To set a countdown. This function has no effect on the operation of the oven. You can set this function at any time, also when the oven is off. Minute Minder 7.2 How to set: Clock functions How to set: Time of Day...
-
Page 12: Using The Accessories
How to cancel: Clock functions Step 1 - press repeatedly until the clock function symbol starts to flash. Step 2 Press and hold: The clock function turns off after few seconds. 8. USING THE ACCESSORIES devices. The high rim around the shelf WARNING! prevents cookware from slipping of the shelf. -
Page 13: Additional Functions
Wire shelf, Baking tray / Deep pan: Push the tray between the guide bars of the shelf support and the wire shelf on the guide bars above. 9. ADDITIONAL FUNCTIONS 9.1 Cooling fan the oven cool. If you turn off the oven, the cooling fan can continue to operate until the When the oven operates, the cooling fan oven cools down. - Page 14 CAKES / PASTRIES / BREADS (ml) (°C) (min) Bread rolls 20 - 25 Bread 35 - 40 Plum cake / Apple pie / Cinnamon rolls, baked in a cake mould 100 - 150 160 - 180 30 - 60 Use 150 ml of water unless specified otherwise. FROZEN READY MEALS (°C) (min)
- Page 15 10.3 Baking change the temperature setting if an unequal browning occurs. The differences equalize For the first baking, use the lower during baking. temperature. Trays in the oven can distort during baking. You can extend the baking time by 10 – 15 When the trays are cold again, the distortions minutes if you bake cakes on more than one disappear.
- Page 16 Use the third shelf position. Use the function: True Fan Cooking. Use a baking tray. CAKES / PASTRIES / BREADS (°C) (min) Cake with crumble topping 150 - 160 20 - 40 Fruit flans (made of yeast dough / sponge cake mix‐ 35 - 55 ture), use a deep pan Fruit flans made of short pastry...
- Page 17 BISCUITS (°C) (min) Biscuits made of sponge cake True Fan Cooking 150 - 160 15 - 20 mixture Puff pastries, preheat the emp‐ True Fan Cooking 170 - 180 20 - 30 ty oven Biscuits made of yeast dough True Fan Cooking 150 - 160 20 - 40 Macaroons...
- Page 18 BIS‐ CUITS / SMALL (°C) (min) 2 positions 3 positions CAKES / PAS‐ TRIES / ROLLS Rolls 20 - 30 1 / 4 Short pastry biscuits 150 - 160 20 - 40 1 / 4 1 / 3 / 5 Biscuits made of 160 - 170 25 - 40...
- Page 19 BEEF (°C) (min) Roast beef or fillet, well per cm of thickness Turbo Grilling 170 - 180 8 - 10 done, preheat the empty oven VEAL Use the function: Turbo Grilling. (kg) (°C) (min) Roast veal 160 - 180 90 - 120 Veal knuckle 1.5 - 2 160 - 180...
- Page 20 GAME Use the function: Conventional Cooking. (kg) (°C) (min) Saddle / Hare leg, preheat up to 1 30 - 40 the empty oven Venison saddle 1.5 - 2 210 - 220 35 - 40 Haunch of venison 1.5 - 2 180 - 200 60 - 90 POULTRY...
- Page 21 10.10 Crispy baking with: Pizza Function PIZZA PIZZA Preheat the empty oven before cook‐ ing. Use the first shelf position. Use the second shelf position. (°C) (min) (°C) (min) Tarts 180 - 200 40 - 55 Pizza, thick 180 - 200 20 - 30 Spinach flan 160 - 180...
- Page 22 GRILL Use the function: Grill (°C) (min) (min) 1st side 2nd side Beef fillet 20 - 30 20 - 30 Veal loin 210 - 230 30 - 40 30 - 40 Lamb saddle 210 - 230 25 - 35 20 - 25 Whole fish, 0.5 kg - 1 210 - 230 15 - 30...
- Page 23 10.13 Defrost For large portions of food place an upturned empty plate on the bottom of the oven cavity. Remove the food packaging and put the food Put the food in a deep dish and set it on top on a plate. of the plate inside the oven.
- Page 24 VEG‐ VEGETA‐ ETABLES (min) (min) BLES (°C) Cooking Continue to Beans 60 - 70 6 - 8 time until cook at simmering 100 °C Peppers 60 - 70 5 - 6 Vegetables for soup 60 - 70 5 - 6 Carrots 50 - 60 5 - 10...
- Page 25 (°C) (min) Bread sticks, 0.5 kg in total 190 - 200 50 - 60 Baked scallops in shells 180 - 200 30 - 40 Whole fish in salt, 0.3 - 0.5 kg 190 - 200 45 - 50 Whole fish in parchment, 0.3 - 0.5 kg 190 - 200 50 - 60 Amaretti (20;...
-
Page 26: Care And Cleaning
BAKING ON ONE LEVEL. Biscuits Use the third shelf position. (°C) (min) Small cakes, 20 per tray, preheat Conventional Cooking 20 - 30 the empty oven MULTILEVEL BAKING. Biscuits (°C) (min) Short bread / Pastry strips True Fan Cooking 25 - 45 1 / 4 Small cakes, 20 per tray, pre‐... - Page 27 11.1 Notes on cleaning Clean the front of the oven with a soft cloth with warm water and a mild detergent. Use a cleaning solution to clean metal surfaces. Clean stains with a mild detergent. Do not apply it on the catalytic surfaces. Cleaning Agents Clean the cavity after each use.
- Page 28 Step 3 Pull the rear end of the shelf support away from the side wall and remove Step 4 Install the shelf supports in the oppo‐ site sequence. 11.4 How to use: Catalytic cleaning Spots or discolouration of the catalytic coating have no effect on the cleaning.
- Page 29 Step 3 Close the oven door to the first opening position (approximately 70° angle). Hold the door at both sides and pull it away from the oven at an upwards angle. Put the door with the outer side down on a soft cloth on a stable surface.
-
Page 30: Troubleshooting
......... 13. ENERGY EFFICIENCY 13.1 Product Information and Product Information Sheet* Supplier's name Electrolux Model identification KODEC60X 944184995 Energy Efficiency Index 95.3 Energy efficiency class Energy consumption with a standard load, conventional mode 0.99 kWh/cycle Energy consumption with a standard load, fan-forced mode 0.81 kWh/cycle... -
Page 31: Saudi Arabia - Customer Service
Number of cavities Heat source Electricity Volume 71 l Type of oven Built-In Oven Mass 33.0 kg * For European Union according to EU Regulations 65/2014 and 66/2014. For Republic of Belarus according to STB 2478-2017, Appendix G; STB 2477-2017, Annexes A and B. For Ukraine according to 568/32020. -
Page 32: Environmental Concerns
fax +966 11 243-9674 15. ENVIRONMENTAL CONCERNS appliances marked with the symbol with Recycle materials with the symbol . Put the household waste. Return the product to the packaging in relevant containers to your local recycling facility or contact your recycle it. - Page 36 electrolux.com...
Need help?
Do you have a question about the KODEC60X and is the answer not in the manual?
Questions and answers