Table of Contents
Advertisement
Quick Links
Advertisement
Table of Contents

Subscribe to Our Youtube Channel
Related Manuals for Insportline Numana


Summary of Contents for Insportline Numana
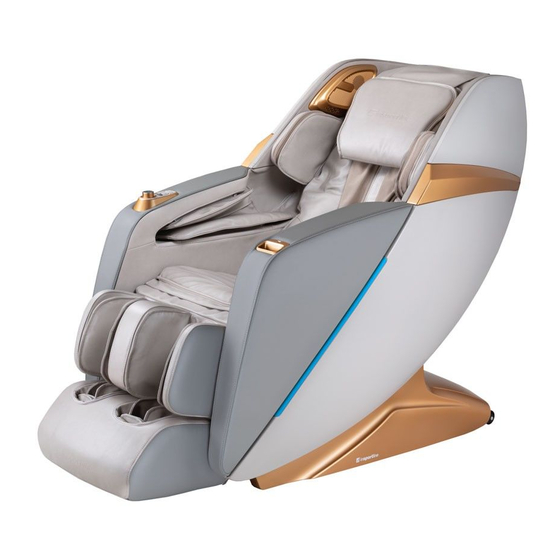
- Page 1 USER MANUAL – EN IN 23656 Massage chair inSPORTline Numana...
-
Page 2: Table Of Contents
CONTENTS SAFETY INSTRUCTIONS ........................3 WARNING ............................... 5 PRODUCT DESCRIPTION ........................6 FUNCTIONS ............................7 CONTROLLER ............................8 CONTROLLER BUTTONS ........................9 USE ............................... 10 POWER UP AND START-UP ......................10 STANDBY MODE ..........................10 STARTING THE MASSAGE ......................10 PAUSE ............................... -
Page 3: Safety Instructions
SAFETY INSTRUCTIONS IMPORTANT SAFETY WARNINGS • Place the product on flat and solid surface and keep at least 0.6 m free space around the product. • Kids can move around this product only under adult supervision. • Use only well-grounded socket and proper power cord. •... - Page 4 SAFETY • Maintenance should be done only by qualify person. Use should not disassemble the chair or do the maintenance by themselves. • After every use unplug the cord. • Do not use the product if the power cord, plug or socked are damaged. •...
-
Page 5: Warning
WARNING If the footrest rises, do not apply pressure to the Before sitting down, make sure that the massage footrest. You may damage the product or injure heads do not protrude from the seat. You may yourself. damage the heads or be injured. Never unplug the power cord during use or when Before using the angle adjustment function, the chair is in standby mode. -
Page 6: Product Description
PRODUCT DESCRIPTION 3D digital speakers with voice control on the left Pillow Anion generator Air cushions for upper arms Controller Air cushions for palms Quick control Massage magnetic tapes Seat Leg rest Footrest Backrest USB charging port Controller holder LED lighting Cover Side covers Backrest cover... -
Page 7: Functions
FUNCTIONS • This product is designed with a set of massage heads that can move up and down in quiet operation. • Five types of massages: Shiatsu, Kneading, Tapping, Knocking and simultaneous kneading and tapping. • This product is equipped with automatic shoulder detection and positioning. •... -
Page 8: Controller
CONTROLLER TFT color LCD display Adjusting the position of the shoulders Type of massage Bluetooth Anion generator Type of massage Timer Massage location Zero gravity Back and leg heating Massage of the back Width adjustment Arm cushion pressure Massage intensity The intensity of the air cushions of the Leg rest pressure arms... -
Page 9: Controller Buttons
CONTROLLER BUTTONS Lowering the backrest and raising the leg Switch rest Edit button Time setting Automatic massage Pause Menu Manual mode Navigation key up Return button Confirm button Right navigation button Navigation key left Lifting the leg rest Raising the backrest Lowering the leg rest Lowering the backrest Switching to zero gravity I... -
Page 10: Use
POWER UP AND START-UP 1. Plug in the socket 2. Plug in the chair 3. Turn the switch up STANDBY MODE No function can be selected in standby mode. STARTING THE MASSAGE Press the chair switch to start. The back and leg rests are adjusted to their default position. After sitting, the chair automatically detects the position of the shoulders and body. -
Page 11: Pause
Button Description Moves the shoulder massage head up Moves the massage head of the shoulders down In the interface below, you can select "Adjustment" or "Shoulder" to adjust the heads. Then confirm the adjustment by pressing "OK". PAUSE If the massage is running, you can pause the massage by pressing "pause". Press "pause" repeatedly to start the massage again. -
Page 12: Menu
In operation Paused massage MENU Press "menu" to enter the main menu, in the main menu you can select "auto" automatic massage, "manual" manual massage, "adjustment" adjustment, "customize" to adjust, "setting" settings, device information "device information". AUTOMATIC MASSAGE You can select an automatic massage via the main menu "menu" or via the "auto" button, which will take you to the automatic massage interface. -
Page 13: Manual Mode
Function Description Fast massage Quick massage Comfortable massage Comfortable massage Relax massage Gentle and comfortable full body massage for relaxation Stretch massage Stretching the legs, waist and back to restore energy Full body massage Deep full body massage Chiropractic massage Chiropractic massage for body relaxation Neck &... - Page 14 MANUAL MODE - SELECTION OF MASSAGE TYPE Techniques: "Kneading" kneading, "Tapping" tapping, "Kneading and tapping" kneading and tapping, "Shiatsu" and "tapping". In Shiatsu and tapping mode, you can adjust the width of the massage heads. Use the "Up" and "Down" buttons to select the technique, confirm with "Ok".
- Page 15 Note: Press "Stop" to stop all functions Function Settings Kneading Speed Tapping Speed and width 5 speed levels Kneading and tapping Speed 3 width levels Shiatsu Speed and width Knocking Speed and width MANUAL MODE - SELECTING THE MASSAGE LOCATION Fixation in one place, partial, whole back, upper and lower back.
- Page 16 Function Description In one place Massage in one place In these modes, use the up and down buttons to select a range Partial Partial massage on a small scale Upper back Upper back massage Lower back Lower back massage Whole back Total massage Air cushions Upper or lower limb air cushions...
- Page 17 Use the up and down buttons to select the function, confirm by pressing "ok". Press "confirm" to start / stop heating. Use the up and down buttons to select the function, confirm by pressing "ok". Press "confirm" to start / stop kneading the legs. Use the up and down buttons to select the function, confirm by pressing "ok".
- Page 18 Use the up and down buttons to select the function, confirm by pressing "ok". To start / stop anion generation, press "confirm". Use the up and down buttons to select the function, confirm by pressing "ok". Press "confirm" to turn Bluetooth on / off. You can use Bluetooth to play music.
-
Page 19: Speed, Width And Intensity Adjustment
SPEED, WIDTH AND INTENSITY ADJUSTMENT In the main menu, select "adjustment" An interface appears where you can select a function by pressing the up and down buttons and adjust their value by pressing the right and left buttons. After setting, confirm by pressing "ok" or return to the menu without changes by pressing "back"... - Page 20 SPEED AND WIDTH You can adjust the speed and width of the massage heads. Navigate in the menu using the Up and Down buttons, confirm the selection by pressing "Ok". Note: 5 speed levels can be set and for tapping, Shiatsu and knocking massages, 3 levels of shoulder massage head width can be set.
-
Page 21: Custom Massage
OTHER Adjust the operating time, press "ok" to add 5 minutes. After adding more than 40 minutes, the time is reset. The minimum operating time must be 5 min. Confirm the time by pressing "confirm". CUSTOM MASSAGE Press "menu" and select "customize". An interface with 2 positions for saving the massage is displayed. -
Page 22: Settings
SETTINGS Press "menu" and select "setting" to set the language, backlight, display power saving, etc. In the menu, use the up and down buttons to navigate, and to change the value of the right and left buttons. Press "back" to return. - Page 23 LANGUAGE Language: select English or China In the menu, use the up and down buttons to navigate. DISPLAY POWER SAVING Lock screen: you can set the time, never turn off the screen, or automatically turn off the display after 2 seconds of inactivity. To adjust the time, press "ok", you can set 15 seconds, 30 seconds, 1 min, 2 min, 3 min or never switch off.
- Page 24 DEVICE INFORMATION Press "menu" and select "Device information"...
- Page 25 ZERO GRAVITATION SETTING Press Zero I or Zero II Funkce Popis Zero gravity I: vybrání náklonu I Zero gravity II: vybrání náklonu II BACK BUTTON The "back" button is used to display information about the massage.
-
Page 26: Armrest Controller
ADJUSTING THE ANGLE OF THE RESTS Function Description To raise the footrest: hold for lifting, release the button to stop. When done, it automatically detects the length of the legs. Lowering the footrest: hold to lower, release the button to stop. When done, it automatically detects the length of the legs. -
Page 27: Voice Control
Function Description Power button: press to pause / start the massage, hold for 3 seconds to start / stop the chair. If the pause is longer than 20 minutes, the chair switches off automatically. Turning clockwise will lower the backrest and raise the footrest Turning counterclockwise will raise the backrest and lower the footrest To raise the leg rest: hold down the button to change, release the button to stop Lowering the leg rest: hold down the button to change, release the button to stop... -
Page 28: Switch Off The Chair
Open the air pressure. ok, open the air pressure Close the air pressure. ok, close the air pressure Up the seat position. ok, up the seat position Down the seat position. ok, down the seat position Stop adjustment. ok, stop adjustment SWITCH OFF THE CHAIR Press the power button to turn off the chair. - Page 29 Grasp the armrest on both sides and slide the armrest into the holder (Fig. 5). Push the armrest into the holder on the front and make sure that it is properly attached (Fig. 6). Fasten the front side with 2x screws M5x14 - 12.9 and 2x washers 6 x 12 x 1.5 (Fig. 7). Fasten the back side with 6x ST4.2 x 12 screws (Fig.
-
Page 30: Leg Rest Assembly
LEG REST ASSEMBLY Attach all hoses and connectors (Fig. 1). Attach the hoses and cables and then insert them into the chair frame. Be careful not to pinch the cables and hoses (Fig. 2). Attach the sleeves to the leg rest (the larger sleeve must be on the outside) (Fig. 3). Pull out the leg rest holder (Fig. -
Page 31: Pillows
Then attach the cover (Fig. 7). PILLOWS The cushions are fastened with a zipper for the backrest (1), the cushions for the headrest with Velcro (2). -
Page 32: Floor Protection
FLOOR PROTECTION We recommend using floor protection such as carpets or mats. The weight of the chair could damage the wooden floor. TRANSPORT Before moving, make sure that you have switched off the chair and pulled it out of the el. current. Push on the backrest, the chair will stand on the wheels. -
Page 33: Environment Protection
ENVIRONMENT PROTECTION After the product lifespan expired or if the possible repairing is uneconomic, dispose it according to the local laws and environmentally friendly in the nearest scrapyard. By proper disposal you will protect the environment and natural sources. Moreover, you can help protect human health. - Page 34 26847264 VAT ID: CZ26847264 Phone: +420 556 300 970 E-mail: eshop@insportline.cz reklamace@insportline.cz servis@insportline.cz Web: www.inSPORTline.cz inSPORTline s.r.o. Headquaters, warranty & service center: Električná 6471, Trenčín 911 01, SK CRN: 36311723 VAT ID: SK2020177082 Phone: +421(0)326 526 701 E-mail: objednavky@insportline.sk reklamacie@insportline.sk servis@insportline.sk...
Need help?
Do you have a question about the Numana and is the answer not in the manual?
Questions and answers