Table of Contents
Advertisement
Available languages
Available languages
Quick Links
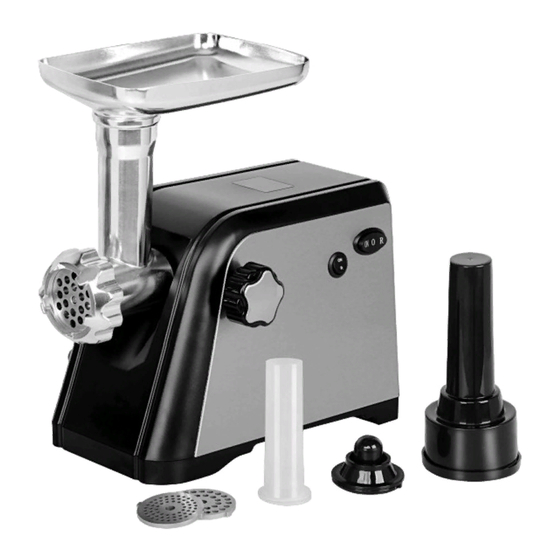
#8 2/3HP Electric Meat Grinder
Instruction Manual
4005755
WARNING:
Read carefully and understand all INSTRUCTIONS before operating. Failure to follow the safety
rules and other basic safety precautions may result in serious personal injury.
Save these instructions in a safe place and on hand so that they can be read when required.
Keep these instructions to assist in future servicing.
REV 02/13/17
Advertisement
Table of Contents

Subscribe to Our Youtube Channel
Summary of Contents for Kitchener 8
- Page 1 #8 2/3HP Electric Meat Grinder Instruction Manual 4005755 WARNING: Read carefully and understand all INSTRUCTIONS before operating. Failure to follow the safety rules and other basic safety precautions may result in serious personal injury. Save these instructions in a safe place and on hand so that they can be read when required.
-
Page 2: General Safety Regulations
GENERAL SAFETY REGULATIONS WARNING: The warnings, cautions, and instructions discussed in this instruction manual cannot cover all possible conditions or situations that could occur. It must be understood by the operator that common sense and caution are factors that cannot be built into this product, but must be supplied by the operator. -
Page 3: Technical Details
TECHNICAL DETAILS Item No. Capacity Power Supply Motor Power Dimension Weight MG-204185 198lbs./hr 120V 60Hz 2/3HP(500W) 500x445x410mm 40 lbs BEFORE USE • Before plugging in, ensure the “ON/OFF/ Reverse” switch is turned to "OFF" position. • Disassemble the grinder head and wash each part thoroughly in warm soapy water; •... - Page 4 • Slide one of the stuffing tubes through the funnel flange and place in Grinder ring cap (stuffing tube faces out). Stuffing tube size depends on the type of casing you have chosen to use (See Fig 8) • Firmly screw grinder ring onto Grinder head.
-
Page 5: After Use
AFTER USE Fig.10 DISASSEMBLING • Make sure that the motor has stopped completely. • Disconnect the plug from the power outlet. • Disassemble by reversing the steps from 6-1 pictures. • If the fixing ring is not easily removed by hands, please use tools(Fig.10). - Page 6 EXPLODED AND PARTS LIST Part No. Description Qty. Part No. Description Qty. Tray 1/8’’ Grinding plate Motor housing 3/16’’ Grinding plate ON/OFF/Reverse Switch 5/16’’ Grinding plate R/ON Switch Front ring nut Locking knob hole Cutting knife Locking knob Stuffing tubes...
- Page 7 #8 2/3HP Hache-Viande Electrique Manuel d'instructions 4005755 AVERTISSEMENT: Lisez soigneusement et comprenez toutes les INSTRUCTIONS avant le fonctionnement. Le fait de ne pas suivre les règles de sécurité et d'autres précautions de sécurité de base peut aboutir à la blessure personnelle sérieuse.
- Page 8 REGLES DE SECURITE GENERALES AVERTISSEMENT: Les avertissements, les prudences et les instructions discutées dans ce manuel d'instruction ne peuvent pas couvrir toutes les conditions possibles ou les situations qui pourraient arriver. Il doit être compris par l'opérateur que le sens commun et la prudence sont les facteurs qui ne peuvent pas être construits dans ce produit, mais doivent être fournis par l'opérateur.
-
Page 9: Détails Techniques
Détails Techniques Modèle No. Capacité Fourniture d'alimentation Puissance du moteur Mesure/mm Poids MG-204185 198lbs./hr AC 120V 60Hz 2/3HP(500W) 500x445x410mm 40lbs Avant l'Utilisation • Avant de brancher, assurez-vous que l'interrupteur "ON / OFF / Reverse" est en position "OFF". • Désassemblez la tête de hache viande et lavez attentivement chaque composant dans l'eau chaude savonnée;... - Page 10 Tête de CHAPEAU de Hache viande. Le remplissage de la taille de tube dépend du type d'enveloppe que vous avez voulue utiliser (Fig 8). • Vissez fermement l'écran de Tête de Hache viande dans la tête de Hache Viande (Fig 8). Directions Remplissage Saucisse •...
-
Page 11: Après L'utilisation
Fig.8 Fig.9 Après l'Utilisation Fig.10 DÉMONTAGE • S'assurer que le moteur est complètement arrêté. • Débranchez la fiche de la prise de courant. • Démonter en inversant les étapes de 6-1 images. • Si l'anneau de fixation n'est pas facile à retirer à la main, utiliser les outils (Fig.10). - Page 12 Diagramme et liste des composants Part No. Description Qty. Part No. Description Qty. Plateau de viande de trémie 1/8’’ Plaque de broyage Logement de moteur 3/16’’ Plaque de broyage ON/OFF/Reverse Interrupteur 5/16’’ Plaque de broyage R/ON Interrupteur Roue manuelle Trou de bouton verrou...


Need help?
Do you have a question about the 8 and is the answer not in the manual?
Questions and answers