
Related Manuals for Dynatech ASG-UD Series


Summary of Contents for Dynatech ASG-UD Series
- Page 1 REPLACEMENT OF SHOES SERIES ASG-XXX-UD/ ASG-XXX PR-2500 UD/PQ-3400 UD/ PQ-4000 UD PR-2000 UD INSTRUCTIONS FOR USE...
-
Page 2: Table Of Contents
INSTRUCTIONS: REPLACEMENT/SAFETY GEAR; Code: DYN 32.03.00 Date: 29/06/2016 Revision: 00 USAGE AND MAINTENANCE INSTRUCTIONS _____________________________________________________ BACKGROUND .............................. 3 SHOE REPLACEMENT ACCORDING TO SAFETY GEAR MODEL................ 3 SERIES ASG‐XXX ASG‐XXX .......................... 3 PR‐2500 PQ‐3400 PQ‐4000 UD ...................... 6 ... -
Page 3: Background
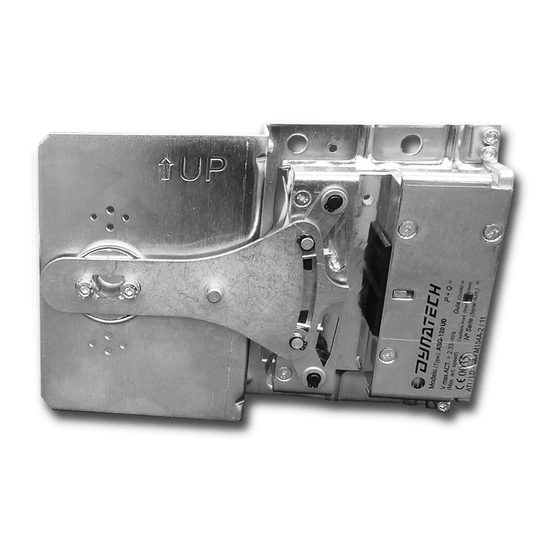
Dynatech equipment is assembled according to customer specifications, so handling is not necessary. If the shoe needs to be replaced, Dynatech offers customers this manual for the proper conduct of this work. However, under no circumstances will Dynatech be held responsible for any error or deterioration in the equipment following handling by non-Dynatech personnel, even if they follow the manual instructions. - Page 4 INSTRUCTIONS: REPLACEMENT/SAFETY GEAR; Code: DYN 32.03.00 Date: 29/06/2016 Revision: 00 Block fasteners of the type corresponding to the new shoe thickness, their type is identified by a letter marked on it. 2. Removing the sticker from the safety gear: Figure1Safety gear ASG UD/ ASG 3.
- Page 5 INSTRUCTIONS: REPLACEMENT/SAFETY GEAR; Code: DYN 32.03.00 Date: 29/06/2016 Revision: 00 4. Extracting the shoe with the aid of a tool (e.g. chisel), if necessary, being careful not to damage the block. Figure3 Removing the shoe 5. Insert the new shoe; followed by the shim, which can be hit with a mallet to make it fit, if necessary. Figure4 Inserting the replacement shoe 6.
-
Page 6: Pr-2500 Ud/ Pq-3400 Ud/ Pq-4000 Ud
The safety gear types refer to the guide rail centre position in relation to the frame attachment holes, which are in accordance with the measurement recommended in the safety gear usage and maintenance instructions. Thus, the gap between the shoe and guide rail established by Dynatech is observed. - Page 7 INSTRUCTIONS: REPLACEMENT/SAFETY GEAR; Code: DYN 32.03.00 Date: 29/06/2016 Revision: 00 The safety gear model PR-2500 UD V35 has 3 types depending on the thickness of the shoe assembled. TYPE THICKNESS (mm) 7-8-9-10 11-12-13 14-15-16 The steps for replacing the shoe to change the thickness are as follows: 1.
- Page 8 INSTRUCTIONS: REPLACEMENT/SAFETY GEAR; Code: DYN 32.03.00 Date: 29/06/2016 Revision: 00 Figure6 Safety gear PR-2500 UD V50/ PQ-3400 UD 3. Unscrew the DIN 912 M6 screws from the shoe according to Figure7. 4. Replace the shoe for one of the appropriate thickness. 5.
-
Page 9: Pr-2000 Ud
Thus, the gap between the shoe and guide rail established by Dynatech is observed. TYPE... - Page 10 INSTRUCTIONS: REPLACEMENT/SAFETY GEAR; Code: DYN 32.03.00 Date: 29/06/2016 Revision: 00 Stickers with the new guide rail thickness. 2. Removing the sticker from the safety gear Figure8 Safety gear PR-2000 UD V50 3. Unscrew the DIN 912 M6 screws from the shoe according to Figure9Figure7. 4.
-
Page 11: Warnings
3 WARNINGS If the safety gear is manipulated, Dynatech will no longer be responsible for this change. Whenever a shoe is replaced, it should be done on both sides of the safety gear, right and left. When replacing the component, avoid excessively dirty environments that may cause dirt or dust to...
Need help?
Do you have a question about the ASG-UD Series and is the answer not in the manual?
Questions and answers