Canon imageFORMULA DR-2020U Reference Manual
Canon photo scanner user manual
Hide thumbs
Also See for imageFORMULA DR-2020U:
- User manual (77 pages) ,
- Brochure & specs (2 pages) ,
- Pocket manual (32 pages)

Subscribe to Our Youtube Channel
Related Manuals for Canon imageFORMULA DR-2020U


Summary of Contents for Canon imageFORMULA DR-2020U
- Page 1 Reference Guide Please read this manual before using the scanner. After you finish reading this manual, keep it in a safe place for future reference.
- Page 2 AMENDMENT TO THIS AGREEMENT SHALL BE EFFECTIVE UNLESS SIGNED BY A DULY AUTHORIZED REPRESENTATIVE OF CANON. Should you have any questions concerning this Agreement, or if you desire to contact Canon for any reason, please write to Canon’s local affiliate.
-
Page 3: Checking The Accessories
Setup Guide Checking the Accessories If any of the items listed below are missing or damaged, contact your local authorized Canon dealer or service representative. DR-2020U AC Adapter/Power Cord Reference Guide (Connected length: 2.6 m) (this document) Software license USB Cable Type A/Type B... -
Page 4: Installing The Software
Installing the Software Before Installation If you connect the scanner and turn it ON before you install the ● Do not connect the scanner to the computer before software, the following wizard screen will appear. If this wizard is installing the software. displayed, click the [Cancel] button to exit the wizard, and turn the ●... - Page 5 ® ■ International ENERGY STAR Office Equipment Program ® As an ENERGY STAR Partner, Canon Electronics Inc. has determined that this machine meets the ® ENERGY STAR Program guidelines for energy efficiency. ® The International ENERGY STAR Office Equipment Program is an international program that promotes energy saving through the use of computers and other office equipment.
- Page 6 Document Scanner. DR-2020U: Model M11071 ■ Trademarks • Canon and the Canon logo are registered trademarks of Canon Inc. in the United States and may also be trademarks or registered trademarks in other countries. • Microsoft and Windows are registered trademarks of Microsoft Corporation in the United States and other countries.
-
Page 7: Table Of Contents
Power Supply ... 6 Moving the Scanner ... 7 Handling ... 7 Disposal... 8 Features of the DR-2020U Document Scanner ...9 Names and Functions of Parts ...10 Feeding Methods ...13 Placing Documents ...15 Placing Documents into the Feeder ... 15 Placing Documents on the Flatbed ... -
Page 8: Introduction
This provides complete and comprehensive information about the scanner. • CapturePerfect 3.0 Operation Guide (electronic manual) This is the operation guide for the Canon document scanner application, CapturePerfect 3.0. Hint Electronic manuals are installed to the following locations as PDF (Portable Documents Format) files during installation of the supplied software. -
Page 9: Important Safety Instructions
Important Safety Instructions To ensure the safe operation of this scanner, be sure to read the safety warnings and precautions described below. Installation Location The performance of this scanner is affected by the environment in which it is installed. Make sure that the location where the scanner is installed meets the following environmental requirements. -
Page 10: Power Supply
In addition, do not use the supplied AC adapter with devices other than the scanner. ● If you have any questions regarding the power supply, contact your local authorized Canon dealer or service representative for further information. -
Page 11: Moving The Scanner
OFF and disconnect the power plug from the power outlet. Then, contact your local authorized Canon dealer or service representative for further information. ● Do not drop the scanner, or subject it to impact or strong shock. -
Page 12: Disposal
OFF, and disconnect the power plug from the power outlet. Then, contact your local authorized Canon dealer or service representative to have the unit serviced. ● Do not locate the scanner in a humid or dusty location. Doing so may cause a fire or electric shock. -
Page 13: Features Of The Dr-2020U Document Scanner
Features of the DR-2020U Document Scanner The main features of the DR-2020U document scanner are described below. ● Multiple Methods for Documents Feeding Depending on the type of document you intend to scan, you can use the feeder, flatbed, or business card feeder. -
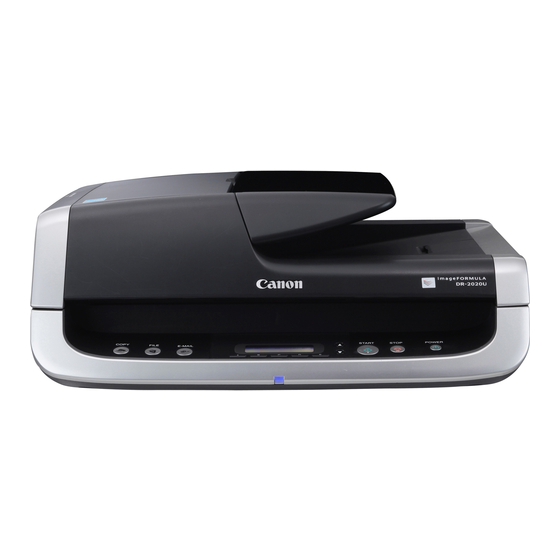
Page 14: Names And Functions Of Parts
Names and Functions of Parts Front Feeder Cover Open this to clear paper jams or to perform cleaning. Document Guides Adjust this to the width of the document. Document Feed Tray Open this when placing documents into the feeder. Document Eject Tray Documents scanned through the feeder are ejected here. -
Page 15: Operation Panel
Operation Panel Job Buttons Specific jobs are assigned to these buttons. Scanning will start when any of these buttons are pressed. The scanned images will be processed as follows for each button: COPY: Prints scanned images to a specified printer. FILE: Saves scanned images in a specified folder. -
Page 16: Usb Connector
Error Displays Communication error with computer. When an error occurs, a message indicating the nature of the error appears. You can use the scroll keys to scroll longer messages. For details on the error messages and their solutions, see page 29. Rear USB Connector Connect the supplied USB cable (or Hi-Speed USB 2.0 compatible... -
Page 17: Feeding Methods
Feeding Methods There are three feeding methods (feeder, flatbed, business card feeder) for scanning documents with this scanner. The types of documents that can be scanned with each method are as follows. Feeder (See p. 15.) Width: 140 mm to 216 mm Length: 100 mm to 356 mm Thickness: 52 to 128 g/m (0.06 mm to... -
Page 18: Documents That Cannot Be Scanned With The Feeder
• Documents with curled edges may result in folds and paper jams. Make sure to straighten out the curls before loading documents in the scanner. • Handle paper edges with care, and be careful not to cut your fingers when loading documents. Documents That Cannot Be Scanned with the Feeder Use the flatbed (platen glass) to scan the following types of... -
Page 19: Placing Documents
Placing Documents Placing Documents into the Feeder Fan the pages of the document to be scanned, and load the document into the feeder with the scanning side facing up. Adjust the document guides to the edges of the document. IMPORTANT •... -
Page 20: Placing Cards Into The Business Card Feeder
Placing Cards into the Business Card Feeder Open the business card feeder. Hold down the lever ( ) on the side of the business card feeder, and place the cards into the feeder with the scanning side facing up. Fully insert the cards until they reach the stoppers ( ) at the back of the feeder. -
Page 21: Supplied Software
Supplied Software Use the following software supplied with the scanner to scan documents. Select which software to use based on your intended purpose. Use this when you want to start scanning merely by pressing a button on the scanner. Easily scan without computer operations. ▼... -
Page 22: Scanning With Captureontouch
CaptureOnTouch is a scanning application that allows you to scan documents using easy-to-follow on-screen instructions. Save to folder Save to a specified folder. (Network) DR-2020U Send by (Attach to) E-mail* Start an e-mail application and send a new e-mail message with the scanned images. -
Page 23: Starting Captureontouch
(CaptureOnTouch), CaptureOnTouch starts and the main screen appears. Hint You can also start CaptureOnTouch from the Windows Start menu. Click [Start], point to [All Programs], point to [Canon DR-2020U], and then click [CaptureOnTouch]. Quitting CaptureOnTouch Click (CaptureOnTouch) in the notification area of the taskbar, and click [Exit] in the menu. -
Page 24: Scan First
Scan First Operation Flow Scan document ▼ Select output method ▼ Configure output settings ▼ Output scanned images Place the document in the scanner (See p. 15). Click the [Scan First] tab. The main screen for [Scan First] appears. Click [Scanner setting] to display the [Scanner setting] dialog box, and configure the scanner settings. -
Page 25: Continuous Scanning
Specify the output method. Configure settings for the output method, and click the output button to output the scanned images. The name of the output button differs depending on the selected output method. If you select [Save to folder] for the output method, for example, the output button appears as [Save]. -
Page 26: Output Method Settings
Output Method Settings CaptureOnTouch provides four output methods for processing scanned images. The output settings that appear differ depending on the output method selected. [Save to folder] Save scanned images to a specified folder. When this method is selected, you must configure settings for the image file to be saved. - Page 27 Starting [Scan First] with the START Button Under default settings, [Scan First] is assigned to the START button on the operation panel. When “Ready” appears on the display panel, press the START button after placing your document in the scanner. CaptureOnTouch starts up and [Scan First] begins.
-
Page 28: Select Scan Job
Select Scan Job Operation Flow Register jobs ▼ Select job ▼ Scan document ▼ Output scanned images Registering/Editing Jobs In CaptureOnTouch, you can register up to 10 jobs for use with [Select Scan Job]. Click the [Select Scan Job] tab. The main screen for [Select Scan Job] appears. - Page 29 [Output settings] tab Configure settings for the output method. The items that appear in this tab differ depending on the [Output method] selected. [File settings] tab This tab appears when [Send by E-mail] is selected in the [Output method] list box. The items that appear in this tab are the same as those in the [Output settings] tab.
-
Page 30: Selecting Scan Jobs
Click the [OK] button. The job is registered according to the configured settings and appears in the job list. To confirm the settings of a registered job or to change the settings, click the [Job list/edit] button. Selecting Scan Jobs Place the document in the scanner (See p. - Page 31 Click the [Start] button. The document is scanned. While scanning is in progress, the number of pages scanned is displayed in addition to the scanner settings. When all the pages of the document are scanned, the scanned images are output according to the registered job settings, and the completion screen appears.
-
Page 32: Troubleshooting
Troubleshooting This section describes the problems that may occur while using the scanner and how to resolve them. It you cannot resolve a problem, contact your local authorized Canon dealer or your service representative. Common Problems and Solutions Problem 1 The scanner will not turn on. - Page 33 Problem 8 Each scanned image of a multi-page document is saved as a separate document. Solutions With CaptureOnTouch, you can scan multiple pages into one image file when TIFF or PDF file format is selected. To do this, select [File type], click the [Detail Settings] button, and select [Save all pages as one file] in the displayed dialog box.
-
Page 34: Clearing A Paper Jam
Clearing a Paper Jam If a paper jam occurs while scanning from the feeder, an error message appears on the display panel. Follow the procedure below to clear the jam. CAUTION Be careful not to cut your fingers on the edges of the paper when clearing the paper jam. - Page 35 Press the STOP button to clear the error message on the display. Hint After clearing the paper jam, confirm whether the last document was scanned before you continue scanning.
-
Page 36: Appendix
Appendix Cleaning the Roller Unit and Separation Pad If streaks appear in scanned images, or if scanned documents become dirty, the roller unit and separation pad may be dirty. Be sure to clean them regularly. Hint The roller unit and separation pad are located inside the feeder cover. -
Page 37: Attaching The Roller Unit And Separation Pad
Grasp both sides of the separation pad with your fingers, and remove the separation pad. Use a cloth dampened with water and thoroughly wrung out to wipe the rollers and separation pad clean. Attaching the Roller Unit and Separation Attach the separation pad. Press the separation pad down gently until it snaps into place, and make sure it is securely attached. -
Page 38: Specifications
Contact your local authorized Canon dealer. When replacing the parts, first replace the separation pad. If performance does not improve, replace the roller unit as well. -
Page 39: Replacement Parts
Product Code: 4048B001 Separation Pad Product Code: 4048B002 • For details on replacing the roller unit and separation pad, see “Cleaning the Roller Unit and Separation Pad” on p. 32. For further details on replacement, contact your local authorized Canon dealer. - Page 40 CANON ELECTRONICS INC. 1248, SHIMOKAGEMORI, CHICHIBU-SHI, SAITAMA 369-1892, JAPAN CANON U.S.A. INC. ONE CANON PLAZA, LAKE SUCCESS, N.Y. 11042, U.S.A. CANON CANADA INC. 6390 DIXIE ROAD, MISSISSAUGA, ONTARIO L5T 1P7, CANADA CANON EUROPA N.V. BOVENKERKERWEG 59-61, P.O.BOX 2262, 1180 EG AMSTELVEEN, THE NETHERLANDS CANON LATIN AMERICA, INC.
Need help?
Do you have a question about the imageFORMULA DR-2020U and is the answer not in the manual?
Questions and answers