Advertisement
email: info@riverside-furniture.com
Long Canopy
∅
106*106*50
Allen Head Bolt
Metal
C-D
4 pcs.
1/4-20 x 3/4" Long
∅
Allen Head Bolt
Assembly Instructions
C-B
2 pcs.
1/4-20 x 1" Long
C-F
20 pcs.
C-E
63084
63085
63076 5/0-6/6 Canopy Bed rails
63087
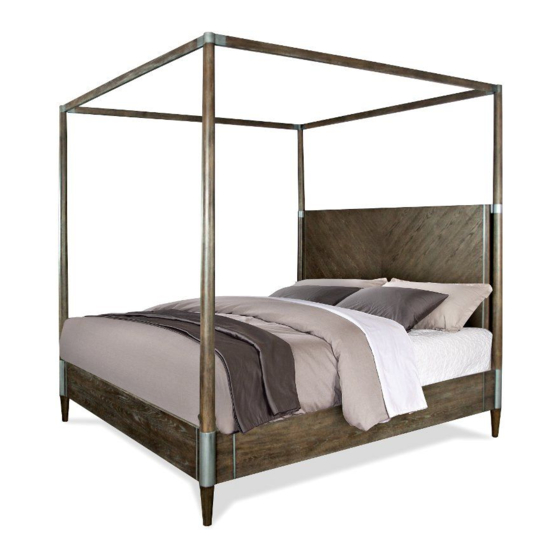
Joelle
King Bed
Headboard Leg
2 pcs.
Short Canopy
2 pcs.
F-D
Canopy Headboard
Canopy Footboard
Canopy top Rails
Made in Viet Nam
Headboard Post
6/6 Wood Slat
77" Long
F-E
Page 1 of 6
2 pcs.
Advertisement
Table of Contents

Related Manuals for Riverside Furniture Joelle King Bed


Summary of Contents for Riverside Furniture Joelle King Bed
- Page 1 Page 1 of 6 Joelle Made in Viet Nam King Bed Assembly Instructions email: info@riverside-furniture.com Headboard Post Headboard Leg 2 pcs. 2 pcs. Short Canopy Long Canopy 2 pcs. 2 pcs. ∅ 1/4-20 x 1" Long 106*106*50 Allen Head Bolt Metal 20 pcs.
- Page 2 Joelle Page 2 of 6 King Bed Made in Viet Nam Assembly Instructions email: info@riverside-furniture.com Headboard Assembly Detail: B Detail: A...
- Page 3 Joelle Page 3 of 6 King Bed Made in Viet Nam Assembly Instructions email: info@riverside-furniture.com Footboard Assembly Detail: D Detail: C...
- Page 4 Joelle Page 4 of 6 King Bed Made in Viet Nam Assembly Instructions email: info@riverside-furniture.com Steps: 1. Lean the back of the Headboard against the wall where the Bed will be assembled. 2. Install two All-Thread Bolts (R-B) into the metal threaded inserts installed in the Headboard Legs and into the metal inserts on the Footboard.
- Page 5 Joelle Page 5 of 6 King Bed Made in Viet Nam Assembly Instructions email: info@riverside-furniture.com 6. Attach the eight Slat Support Legs (F-E) to the bottom side of four Wood Slats (F-D). (See Detail F). 7. Position and attach the Slats to the Bed Rails using the Wood Screws (F-K) and your Phillips Screwdriver.
- Page 6 Joelle Page 6 of 6 King Bed Made in Viet Nam Assembly Instructions email: info@riverside-furniture.com 8. Attach the Long Canopy (C-A), Short Canopy (C-B) into the Metal (C-D) by using Allen Head Bolts (C-E), Tighten all Bolts using the Allen Wrench (C-F). (See Detail H). 9.
Need help?
Do you have a question about the Joelle King Bed and is the answer not in the manual?
Questions and answers