Table of Contents
Advertisement
Advertisement
Table of Contents

Related Manuals for InFocus IN3102


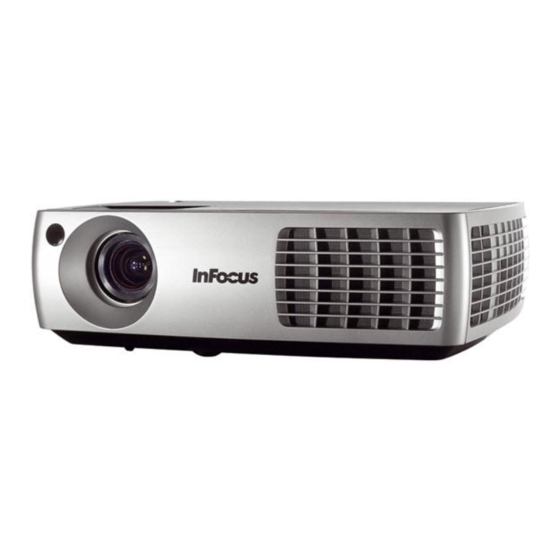
Summary of Contents for InFocus IN3102
- Page 1 IN3102 IN3104 IN3106 IN3108 Regulatory models W3220, W3240 and W3260 010-0710-03...
- Page 2 DisplayLink is a trademark of DisplayLink Corporation. Apple, Macintosh, and PowerBook are trademarks or registered trademarks Changes or modifications not expressly approved by InFocus Corporation may void authority to operate the equipment. of Apple Computer, Inc. IBM is a trademark or registered trademark of International Business Machines, Inc.
-
Page 3: Table Of Contents
• Only genuine InFocus lamps are tested for use in this projector. S-video connection InFocus is not liable for the performance, safety or certification of any VESA connection other lamps. The use of other lamps violates the projector warranty and Component video connection voids all certification marks on this projector. -
Page 4: Introduction
Your new digital projector is simple to connect, easy to use, and straightforward to maintain. It is a versatile projector that is flexible enough zoom (rear ring) for business presentations and home video viewing too. The IN3102/ touch keypad IN3104 has native XGA 1024x768 resolution, and the IN3106/IN3108 has focus (front ring) WXGA 1280x800 resolution. - Page 5 The 3.5mm mini-jack triggers provide a 5 volt, 2 amp DC output. It provides a constant output while the projector is on. It is designed to provide power for an InFocus LiteShow II wireless device, which allows wireless projection. More information can be found on our website at...
-
Page 6: Positioning The Projector
Diagonal Screen Maximum Distance (feet/ • The image exits the projector at a given angle. IN3102/IN3104 image Size (inches/m) distance (feet/m) offset is 115%; IN3106/IN3108 image offset is 112.4%. This means if you have an image 10’ high, the bottom of the image will be 1.5' 60/1.5... - Page 7 Table 2: (IN3106 & IN3108) Range of distance to the screen for a given screen size Distance to screen Minimum Diagonal Screen Maximum Distance (feet/ Size (inches/m) distance (feet/m) 80/2.0 9.7/2.9 8.7/2.7 90/2.3 10.9/3.3 9.8/3.0 150/3.8 18.1/5.5 16.3/5.0...
-
Page 8: Projector And Device Connector Guide
Projector and device connector guide The following illustration and table should help you find the connectors to use and obtain the best resolution possible from your input devices, such as computers, standard VCRs, DVD players (progressive and interlaced), HDTV sources (1080i, 1080p and 720p HDTV formats), TV and satellite tuners, camcorders, video games (progressive and interlaced), and laser disc players. - Page 9 Attach to Adapter or If Your Device Video Device Video Compatibility Labeled Connector For Setup Instructions, see Comments Connector Is on Projector NTSC, PAL, and Composite video Video 3 Composite video connection on Not for progressive Standard Broadcast TV (not SECAM formats or S-video or Video 2...
- Page 10 Attach to Adapter or If Your Device Video Device Video Compatibility Labeled Connector For Setup Instructions, see Comments Connector Is on Projector 1080i, 1080p, 720p Computer 3 or VESA connection on page 14 Computer 2 Component 480i Component video Computer 3 or Component video connection on HDTV Computer 2 via...
-
Page 11: Connecting A Computer Source
MOLEX MOLEX * For the latest information about support for other operating systems (including Apple), go to www.infocus.com/support/displaylink connect computer cable Or, connect one end of the provided computer cable to the Computer 2 or Computer 3 connector on the projector and the other to the VESA connector on your computer. -
Page 12: Displaying An Image
FN key ? No laptop image? Try pressing the Auto Image button on the keypad. Get help on page 16. ? Is your laptop connected to the projector's DisplayLink connector? See the InFocus DisplayLink Manager User's Guide for troubleshooting information. -
Page 13: Adjusting The Image
Adjusting the image adjust height If necessary, adjust the height of the projector by pressing the elevator foot release button to extend the foot. release button If necessary, rotate the leveling foot located at the rear of the projector. elevator Avoid placing your hands near the hot exhaust vent at the side of the foot projector. -
Page 14: Connecting A Video Device
Connecting a video device 4:3 screen 16:9 screen You can connect video devices such as VCRs, DVD players, camcorders, digital cameras, video game consoles, HDTV receivers, and TV tuners to the projector. You can connect the audio directly to the projector to get sound Do Not Use from the built-in speaker, or you can bypass the projector’s audio system mode... -
Page 15: Video Device Connections
No video cables are provided with the projector. You can order cables from computer cable into the VGA connector on your video source. This InFocus or provide your own. connector may be labeled “To Monitor” on the video source. Plug the... -
Page 16: Shutting Down The Projector
Contact Troubleshooting your setup Technical Support if the problem persists. Visit www.infocus.com/support to contact service. If your image appears correctly on the screen, skip to the next section. If it does not, troubleshoot the setup. - Page 17 Problem Solution Result No start up screen Correct image Plug power cord into the projector press power button If your computer is using the projector's DisplayLink Computer image projected Only start up screen appears connector, see the DisplayLink User's Guide for troubleshooting information.
- Page 18 Prolem Solution Result No computer image, just the words “Signal out of Press the Auto Image button on keypad adjust computer Computer image projected refresh rate in Control Panel > Display > Settings > Advanced range” > Adapter (location varies by operating system) You may also need to set a different resolution on your computer, as shown in the following problem, “image fuzzy or cropped”...
- Page 19 Prolem Solution Result Image fuzzy or cropped Set your computer’s display resolution to the native Image clear and not cropped resolution of the projector (Start > Settings > Control Panel > Display > Settings tab) For a laptop, disable laptop monitor or turn- on dual-display mode...
- Page 20 Prolem Solution Result Image not square Adjust Keystone on keypad Square image Image not sharp Adjust Sharpness in the Basic Picture menu Correct image Image does not fit 4:3 or 16:9 screen Change aspect ratio to 4:3 or 16:9 in Basic Correct image Picture>Aspect ratio menu...
- Page 21 Prolem Solution Result Image upside down Turn off Ceiling Mount in Setup menu Correct image Image reversed left to right Turn off Rear Project in Setup menu Correct image Projected colors don’t match source Adjust color, tint, brightness, contrast in the Basic Correct image Picture menu COLOR...
- Page 22 Prolem Solution Result The video embedded in my PowerPoint presentation If your computer is using the projector's DisplayLink Embedded video plays correctly does not play on the screen connector, see the DisplayLink User's Guide for video troubleshooting information. Turn off the internal LCD display on your laptop Lamp won’t turn on, Temperature light is on Make sure vents aren’t blocked, turn off the projector Lamp turns on...
- Page 23 Still need assistance? If you need assistance, visit our website at www.infocus.com/service or call us. Check out our HOW TO section there for additional information on using this projector for home theater or gaming applications. See the Quick Start Poster/Booklet for support contact information.
-
Page 24: Using The Remote Control
Using the remote control The remote uses two (2) provided AA batteries. They are easily installed by removing the cover from the remote’s back, aligning the + and - ends of the batteries, sliding them into place, and then replacing the cover. Caution: When replacing the batteries, be aware that using batteries other navigation than the type provided with the projector may risk severe damage to the... -
Page 25: Using The Audio
If you aren’t hearing the audio, check the following: • If your computer is using the projector's DisplayLink connector, see the InFocus DisplayLink Manager User's Guide for audio troubleshooting information • Make sure the audio cable is connected to the correct Audio In connector, Computer or Video. -
Page 26: Using The Keypad Buttons
Using the keypad buttons Most buttons are described in detail in other sections, but here is an overview of their functions: Power–turns the projector on and off (page 11). Auto Image–resets the projector to the source. Presets–cycles through the available preset settings (page 29). Keystone–adjusts squareness of the image (page 12). -
Page 27: Optimizing Computer Images
Once you have optimized the image for a particular source, you can save the settings using Presets. This allows you to quickly recall these settings later (page 29). • If your computer is using the projector's DisplayLink connector, see the InFocus DisplayLink Manager User's Guide for information about optimizing images. -
Page 28: Optimizing Video Images
Optimizing video images Customizing the projector After your video device is connected properly and the image is on the You can customize the projector for your specific setup and needs. See screen, you can optimize the image using the onscreen menus. For general page 31 to page 32 for details on these features. -
Page 29: Using The Menus
Using the menus keypad navigation To open the menus, press the Menu button on the keypad or remote. (The buttons menus automatically close after 60 seconds if no buttons are pressed.) Use the arrow buttons to move up and down to highlight the desired menu, then press the Select button. -
Page 30: Basic Picture Menu
Basic Picture menu To adjust the following settings, highlight the setting, press Select, use the up and down arrows to adjust the values, then press Select to confirm the changes. Brightness: changes the intensity of the image. Contrast: controls the degree of difference between the lightest and darkest parts of the picture and changes the amount of black and white in the image. -
Page 31: Advanced Picture Menu
Advanced Picture menu BrilliantColor™: produces an expanded on-screen color spectrum that delivers enhanced color saturation for bright, true-to-life images. Choose Normal Look for most video sources and Bright Look for most computer sources. White Peaking: (video sources only) increases the brightness of whites that are near 100%. -
Page 32: Setup Menu
Setup menu Lamp Low Power: toggles between on and off. Turn it on to lower the light output of the lamp. This also lowers the fan speed, making the projector Language: allows you to select a language for the onscreen display. quieter. - Page 33 If you lose or forget your custom PIN: Show Messages: displays status messages (such as “Searching”) in the lower- Contact InFocus support. Go to www.infocus.com/support left corner of the screen. Computer 2 SCART: Selects SCART connection type between RGB and Menu Offset: allows you to change the position of the On Screen Display composite.
-
Page 34: Status And Service Menu
Status and Service menu Source Info: a read-only display of current source settings. Projector Info: a read-only display of current projector settings. Reset Lamp Hours: resets the lamp hours used counter in the Projector Info menu to zero. Do this only after changing the lamp. Factory Reset: restores all settings to their default. -
Page 35: Maintenance
Maintenance Cleaning the lens Apply a non-abrasive camera lens cleaner to a soft, dry cloth. • Avoid using an excessive amount of cleaner, and don’t apply the cleaner directly to the lens. Abrasive cleaners, solvents or other harsh chemicals might scratch the lens. Lightly wipe the cleaning cloth over the lens in a circular motion. -
Page 36: Replacing The Projection Lamp
Only genuine InFocus lamps are tested side of the lamp door, (b) turning the lamp cover knob (labeled “2”) for use in this projector. Use of non InFocus lamps may cause electrical counterclockwise to push up the lamp cover, and (c) lifting the door off. - Page 37 Loosen the captive screws that attach the lamp housing to the projector. Carefully remove the lamp housing. Dispose of the lamp in an loosen screw environmentally proper manner. Install the new lamp module and tighten the screws. Replace the lamp door by sliding it into place. Plug in the power cord and press the Power button to turn the projector back on.
- Page 38 12 Menu button 27 Connector on Projector 7, 8 menu usage 27 Connector panel 4 Monitor Out connector 9 contacting InFocus 21 Mute 30 Contrast 28 Custom Key 30 Optimizing images 25 Custom key 25 Optimizing video 26...
- Page 39 Overscan 29, 30 Search Screen 31 security lock 33 Phase 29 Service 32 Picture menu 28 Service Code 32 Power connector 9 Sharpness 28 power cord 9 shutting down the projector 14 Power Sounds 30 Source 30 Power-up Source 30 Source Info 30 Presentation features 25 speakers, connecting external 23...
Need help?
Do you have a question about the IN3102 and is the answer not in the manual?
Questions and answers