Table of Contents
Advertisement
Advertisement
Table of Contents

Related Manuals for InFocus Work Big IN10


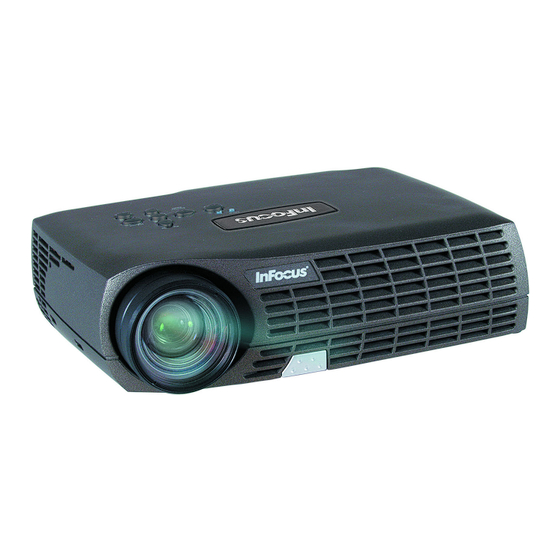
Summary of Contents for InFocus Work Big IN10
- Page 1 Reference Guide...
- Page 2 Agency Approvals UL, CUL, TUV Other specific Country Approvals may apply, please see product certification label. This user’s guide applies to models IN10, M6, LP70+, and M2+. InFocus reserves the right to alter product offerings and specifications at any time.
-
Page 3: Table Of Contents
Locate the projector in a well-ventilated area without any obstructions to intake or exhaust vents. Do not place the projector on a tablecloth or other soft covering that may block the vents. Locate the projector at least 4' (1.2 m) away from any heating or cooling vents. -
Page 4: Introduction
It is easy to connect, easy to use, easy to transport, and easy to maintain Product specifications To read the latest specifications on your multimedia projector, be sure to visit our website at www.infocus.com, as specifications are subject to change. Accessories focus ring The standard accessories that came with your projector are listed in the included user’s guide. - Page 5 Connector Panel The projector provides computer and video connectors: • one M1-D/A (HD, DVI, and computer) • one S-video • one composite RCA video • one audio in Connector panel S-video Audio in Composite video Computer...
-
Page 6: Connecting A Computer
Connect the black end of the computer cable to the Computer connector on the projector. Connect the blue end to the video port on your computer. If you are using a desktop computer, you first need to disconnect the monitor computer cable from the computer’s video port. -
Page 7: Displaying A Computer Image
Displaying a computer image Remove the lens cap. Press the Power button on the top of the projector or the remote. The LED blinks green and the fans start to run. When the lamp comes on, the start up screen displays and the Power light is steady green. It can take a minute for the image to achieve full brightness. -
Page 8: Adjusting The Image
Rotate the leveling foot (located at the bottom back left corner), if necessary. Position the projector the desired distance from the screen, so that the lens is perpendicular to the screen. See page 29 for a table listing screen sizes and distances. -
Page 9: Connecting A Video Device
If your video device uses a round, four-prong S-video connector, plug the S-video cable into the S-video Out connector on the video device and into the Video 1 connector on the projector. If the device uses a composite video connector, plug the composite video cable into the Composite Out connec- tor on the video device and into the Video 2 connector on the projector. -
Page 10: Shutting Down The Projector
When Power Save is enabled, Screen Save is disabled. See page 24. Turning off the projector To turn off the projector, press the Power button and verify that you want to turn the projector off by pressing the Power button again within 3 seconds. - Page 11 • Problem No startup screen Only startup screen appears No computer image, just the words “Signal out of range” Source Troubleshooting Solution Plug power cable in, press Power button. Remove lens cap. Press the Source button Activate laptop’s external port or restart laptop Adjust computer refresh rate in Control Panel>Display>Settings>Advanced>...
- Page 12 For PC: Image fuzzy or cropped For Macintosh: Image fuzzy or cropped Set your computer’s display resolution to the native resolution of the projector (Start>Settings>Control Panel>Display>Settings tab, select 1024x768) For a laptop, disable laptop monitor or turn-on dual- display mode Set your computer’s display resolution to...
- Page 13 Only my laptop’s background appears, not the Desktop icons The video embedded in my PowerPoint presentation does not play on the screen Disable “Extend my Windows Desktop” in Control Panel>Display>Settings>Display 2 (location varies by operating system) Uncheck this option, then click Apply Turn off the internal LCD display on your laptop...
- Page 14 Projector troubleshooting Problem Image not square Image not sharp Image does not fit 16:9 screen Solution Adjust keystone on keypad or Picture menu Adjust the focus lens or Sharpness in the Picture>Advanced menu Change aspect ratio to 16:9 in Picture>Aspect ratio menu...
- Page 15 Adjust horizontal or vertical position in Picture>Advanced menu Make sure vents aren’t blocked; allow projector to cool for one minute Correct image Correct image COLOR Correct image Unplug projector; wait one minute; plug in projector and turn it on: lamp lights...
- Page 16 This product is backed by a limited warranty. An extended warranty plan may be purchased from your dealer. When sending the projector in for repair, we recommend shipping the unit in its original packing material, or having a professional packaging company pack the unit. Please insure your shipment for its full value.
-
Page 17: Using The Keypad Buttons
Most buttons are described in detail in other sections, but here is an over- view of their functions: power–turns the projector on (page 6) and off. menu–opens the on-screen menus (page 19). source/select–confirms choices made in the menus and selects sources (page 19). -
Page 18: Using The Remote Control
When disposing of the batteries, be sure to do so in an environmen- tally proper manner. To operate, point the remote at the front of the projector (not at the com- puter). The range of optimum operation is about 15 feet (4.5m). -
Page 19: Optimizing Computer Images
• Adjust the Color Control or White Peaking settings. See page 22. Customizing the projector You can customize the projector for your specific setup and needs. See page 23 for details on these features. • For rear projection, turn Rear mode on in the Settings>System menu. -
Page 20: Using The Menus
• The Source Info menu provides a read-only display of information about the projector and source. Certain menu items may be grayed out until a particular source is con- nected. For example, Sharpness is only available for video sources and will be hidden when a computer source is active. -
Page 21: Picture Menu
Tint: (NTSC video sources only) adjusts the red-green color balance in the image. Auto Image: resynchs the projector to the source. Aspect Ratio Aspect Ratio: Aspect ratio is the ratio of the image width to image height. - Page 22 Presets: Presets are provided that optimize the projector for displaying computer presentations, film images, and video images. Film input is mate- rial originally captured on a film camera, like a movie; video input is mate- rial originally captured on a video camera, like a TV show or sporting event.
- Page 23 (The video standard options may vary depending on your region of the world.) If the projector is unable to detect the correct standard, the colors may not look right or the image may appear “torn.” If this happens, manually select a video standard by selecting NTSC, PAL, or SECAM from the Video Standard menu.
-
Page 24: Settings Menu
When Autosource is checked, Power-up Source determines which source the projector defaults to at startup. If no signal is present, the projector checks the sources in order until a source is found or until power down. Sources>Power-up Source: this determines which source the projector checks first for active video during power-up. - Page 25 (page 5). Power Save: automatically turns the lamp off after no signals are detected for 20 minutes. After 10 additional minutes with no signal, the projector powers down. If an active signal is received before the projector powers down, the image will be displayed.
- Page 26 Auto Image: resets the projector to the source. • Freeze: pauses the projected image. • Source Info: the default effect. It opens a window with projector and source information. • Service Info: opens a window with projector and source information.
-
Page 27: Maintenance
3 Replace the lamp module. Using the security lock The projector has a security lock for use with a cable lock system. Refer to the information that came with the lock for instructions on how to use it. -
Page 28: Replacing The Projection Lamp
When the expected lamp life has been reached, the Lamp indi- cator icon lights red. NOTE: You can order new lamp housings from www.infocus.com (in select areas), your retailer or your dealer. Use only a replacement lamp with the same type and rating as the original lamp. - Page 29 Carefully remove the lamp housing. Dispose of the lamp in an environ- mentally proper manner. Install the new lamp housing. Be careful to attach the connector on the lamp housing to the connector inside the projector. These connectors are located near the leveling foot. Tighten all three screws.
-
Page 30: Appendix
Appendix Projected image size Table 1: Image Size, Width and Height for Lens at Maximum Image Size Distance to Diagonal Width Screen (feet/m) (inches/m) (inches/m) 4.9/1.5 40/1 32/.8 7.4/2.3 60/1.5 48/1.2 9.9/3.0 80/2 64/1.6 12.3/3.8 100/2.5 80/2 18.5/5.6 150/3.8 120/3 32.8/10.0 266/6.8 213/5.4... - Page 31 18 troubleshooting 10 connecting computer 5 video device 8 connector panel 4 contacting InFocus 15 Contrast 7, 20 Custom key 18 customer service contact information 15 Display Messages 23 displaying, image 6 elevator foot 7 Factory Reset 25...
- Page 32 Picture menu 20 Position 22 power cable 5, 8 Power Save 9, 24 Power-up Source 23 presentation features 18 projected image sizes 29 projector adjusting the height 7 connector panel 4 customizing 18 positioning 7 registering 3 safety considerations 2...
- Page 33 Screen Save 9, 24 security lock 26 Service 25 Settings menu 23 Sharpness 22 shutting down the projector 9 Sources 23 Startup Logo 24 Sync Threshold Adjust 22 Tint 20 Tracking 22 Troubleshooting 9 Turning off the projector 9 using the keypad buttons 16...
Need help?
Do you have a question about the Work Big IN10 and is the answer not in the manual?
Questions and answers