
Related Manuals for Westinghouse WGen7500c


Summary of Contents for Westinghouse WGen7500c
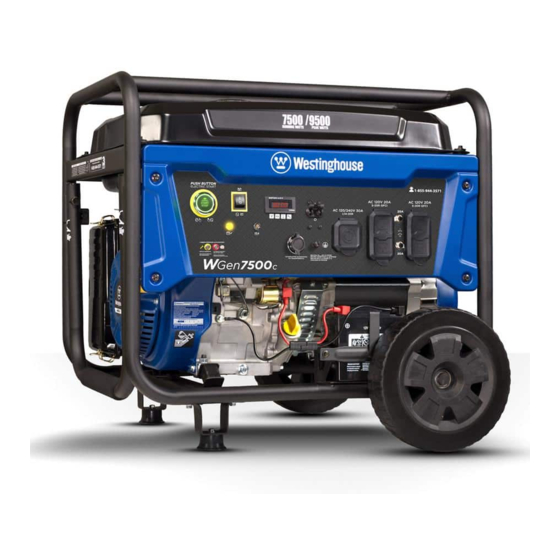
- Page 1 USER MANUAL WGen7500c Portable Generator 7500 Running Watts | 9500 Peak Watts DO NOT RETURN THIS PRODUCT TO THE STORE If you have questions or need assistance, please call customer service at 855-944-3571.
-
Page 2: Table Of Contents
The illustrations used in this manual are intended as representative reference views only. We reserve the right to make any specification or design change without notice. 2 | Westinghouse Outdoor Power Equipment, LLC... -
Page 3: Introduction
Model Number: westinghouseoutdoorpower.com/pages/manuals Serial Number: Or scan the following QR code with your smartphone camera to be directed to the link. Place of Purchase: IMPORTANT: Keep your purchase receipt for trouble-free warranty coverage. Westinghouse Outdoor Power Equipment, LLC | 3... -
Page 4: Safety
Note: Indicates a procedure, practice or condition that should be followed for the generator to function in the manner intended. 4 | Westinghouse Outdoor Power Equipment, LLC... -
Page 5: Safety Instructions
The connection must isolate the generator power from utility power and must comply with all applicable laws and electrical codes. Westinghouse Outdoor Power Equipment, LLC | 5... - Page 6 • NEVER remove the fuel cap when the generator is ignitions. running. Shut off the engine and allow the unit to cool 6 | Westinghouse Outdoor Power Equipment, LLC...
-
Page 7: Co Sensor
A CO sensor air immediately. Call emergency services. You may have fault can only be diagnosed and repaired carbon monoxide poisoning. by an authorized Westinghouse service ACTION LABEL center. Westinghouse Outdoor Power Equipment, LLC | 7... -
Page 8: Gfci
To avoid nuisance tripping, a GFCI should not supply: fluorescent or other types of electric-discharge lighting fixtures or permanently installed electric motors, like air conditioners, furnaces or refrigerators. 8 | Westinghouse Outdoor Power Equipment, LLC... -
Page 9: Safety Labels And Decals
SAFETY SAFETY LABELS AND DECALS Westinghouse Outdoor Power Equipment, LLC | 9... -
Page 10: Components
12. CO Sensor Indicator Lights: The CO Sensor 20 Amps. monitors for the accumulation of poisonous carbon monoxide gas. If increasing levels of CO gas are detected, the CO Sensor automatically shuts down the engine. 10 | Westinghouse Outdoor Power Equipment, LLC... -
Page 11: Generator Components
COMPONENTS GENERATOR COMPONENTS Westinghouse Outdoor Power Equipment, LLC | 11... -
Page 12: Assembly
Note: The wheels are only intended for hand transport. The wheels are not suitable for towing the generator • Washer either on or off-road. • Cotter pin If any parts are missing, contact our service team at service@wpowereq.com or call 1-855-944-3571. 12 | Westinghouse Outdoor Power Equipment, LLC... -
Page 13: Initial Oil Fill
3. Replace the oil dipstick and hand-tighten. gasoline in an approved gasoline container before fueling the generator. Run the generator for five minutes to allow the stabilizer to treat the entire fuel system. Westinghouse Outdoor Power Equipment, LLC | 13... -
Page 14: Connect The Battery
Damage caused by spilled fuel is not covered under warranty. NOTICE Clean the fuel screen filter of debris before and after each fueling. Remove the fuel screen filter by slightly compressing it while removing it from the fuel tank. 14 | Westinghouse Outdoor Power Equipment, LLC... -
Page 15: Operation
(regular, flat, or otherwise), under stairs, next to walls or buildings, or in any other location that will not allow for adequate cooling of the generator and/or the muffler. DO NOT contain generators during operation. Westinghouse Outdoor Power Equipment, LLC | 15... -
Page 16: High Altitude Operation
5. Push the Pairing button on the side of the control panel be attached to the recoil handle or control panel. If your until the START/STOP button illumination turns OFF. unit was shipped without a key fob, contact Westinghouse Release the button. customer service. -
Page 17: Break-In Period
START/STOP button for two seconds. c. Recoil Start: Manually close the choke if the engine is cold. Firmly grasp and pull the recoil handle slowly until you feel increased resistance, then pull rapidly. Westinghouse Outdoor Power Equipment, LLC | 17... -
Page 18: Generator Capacity
*Wattages listed are approximate. Verify actual wattage. Running Highest Watts* Starting Watts* Total Running Watts 2590 Highest Starting Watts + 1600 Total Starting Watts Needed 4190 *Wattages listed are approximate. Verify actual wattage. 18 | Westinghouse Outdoor Power Equipment, LLC... -
Page 19: Extension Cords
• Make sure the electrical rating of the tool or appliance does not exceed the rated power of the generator or the receptacle being used. Westinghouse Outdoor Power Equipment, LLC | 19... -
Page 20: Transporting
NOT use the handle to lift the generator entirely off the ground, tow it, or up-end it.. CAUTION Fire hazard. DO NOT up-end the generator or place it on its side. Fuel or oil can leak and damage to the generator may occur. 20 | Westinghouse Outdoor Power Equipment, LLC... -
Page 21: Maintenance
• Change engine oil and warm water. Slowly squeeze the foam to thoroughly • Clean air filter clean. P100 • Fuel valve maintenance • Inspect/adjust valve clearance Westinghouse Outdoor Power Equipment, LLC | 21... -
Page 22: Engine Oil Level Check
Check the engine oil level before each use or every 8 hours of operation. 1. Place the generator on a level surface and allow the engine to cool for several minutes. 22 | Westinghouse Outdoor Power Equipment, LLC... -
Page 23: Spark Plug Maintenance
Replace the spark plug after 300 hours of use or every year. NOTICE ALWAYS use the Westinghouse OEM or compatible non-resistor-type spark plug. Use of resistor-type spark plug can result in rough idling, misfire, or may prevent the engine from starting. -
Page 24: Battery Maintenance
NOT use a plastic sheet as a dust cover. Non-porous connection hardware. materials trap moisture and promote rust and corrosion. 6. Install the battery into the generator. Reinstall the battery hold-down plate and tighten the bolt. 24 | Westinghouse Outdoor Power Equipment, LLC... -
Page 25: Fuel Valve Maintenance
4. Start the generator and allow it to run until the generator engine stops. 5. Push the battery switch to the OFF position. 6. Disconnect the battery quick-connect plugs. 7. Remove the spark plug. Westinghouse Outdoor Power Equipment, LLC | 25... -
Page 26: Valve Clearance
Hold the rocker arm pivot and re-tighten the pivot adjusting nut to the specified torque. Torque: 106 inch-pound (12 N•m) 8. Perform this procedure for the other valve. 9. Install the gasket, rocker arm cover, and spark plug. 26 | Westinghouse Outdoor Power Equipment, LLC... -
Page 27: Troubleshooting
No power at AC receptacles Replace or repair tool or appliance. Stop and Faulty power tool or appliance. restart the engine. Contact Westinghouse customer service toll- Faulty generator. free at 1 (855) 944-3571. Westinghouse Outdoor Power Equipment, LLC | 27... -
Page 28: Exploded Views And Parts Lists Exploded View A
EXPLODED VIEWS EXPLODED VIEWS AND PARTS LISTS EXPLODED VIEW A 28 | Westinghouse Outdoor Power Equipment, LLC... - Page 29 5205 AIR FILTER ELEMENT 97108 SPARK PLUG IGNITOR ASSEMBLY CYLINDER HEAD ASSEMBLY 13.1 97518 IGNITOR 271005 CYLINDER HEAD 13.2 91331 BOLT M6X25 271702 INTAKE VALVE FLYWHEEL ASSEMBLY 275902 EXHAUST VALVE 14.1 260407 FLYWHEEL Westinghouse Outdoor Power Equipment, LLC | 29...
- Page 30 STARTER MOTOR ASSEMBLY 16.1 97415 STARTING MOTOR 16.2 91348 BOLT M8*35 91817 OIL DRAIN BOLT 94004 OIL DRAIN BOLT WASHER 96075 CYLINDER HEAD COVER SEAL WASHER 96081 CARBURETOR GASKET 96086 AIR FILTER GASKET 30 | Westinghouse Outdoor Power Equipment, LLC...
-
Page 31: Exploded View B
EXPLODED VIEWS EXPLODED VIEW B Westinghouse Outdoor Power Equipment, LLC | 31... - Page 32 DUST BOARD 10.3 94204 SPRING WASHER 91322 BOLT M5X12 10.4 532301 ALTERNATOR TAIL BRACKET 90016 NUT M6 10.5 96813 GASKET 539602 CRANKCASE COVER 10.6 91717 BOLT M10X1.25X275 CARBON CANNISTER ASSEMBLY 10.7 91614 BOLT M6X190 32 | Westinghouse Outdoor Power Equipment, LLC...
- Page 33 BOLT M6X12 CO MODULE ASSEMBLY 12.1 599064 CO MODULE 12.2 92270 CROSS SLOTTED HEAD SCREW M4*16 519215 FUEL CAP 511008 BATTERY 99504 FUNNEL 99010 SPARK PLUG WRENCH 99546 OIL BOTTLE 511076 CHARGER 99025 WRENCH Westinghouse Outdoor Power Equipment, LLC | 33...
-
Page 34: Schematics
SCHEMATICS SCHEMATICS SCHEMATICS 34 | Westinghouse Outdoor Power Equipment, LLC...
Need help?
Do you have a question about the WGen7500c and is the answer not in the manual?
Questions and answers