
Related Manuals for Ladybug USB PowerSensor+ LB A Series

Summary of Contents for Ladybug USB PowerSensor+ LB A Series
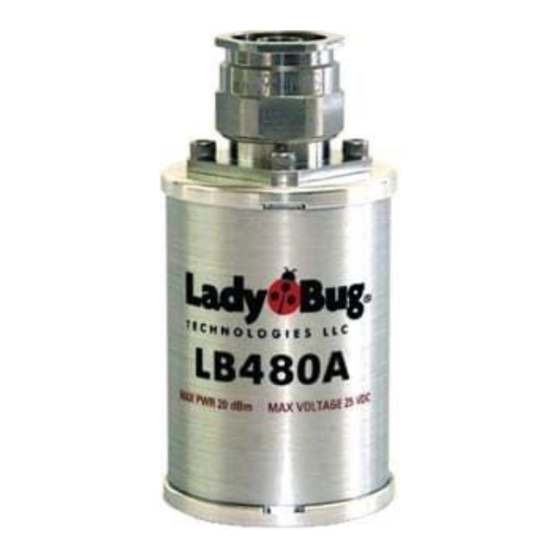
- Page 1 LBXXXA Series USB PowerSensor+™ Product Manual PMA (Power Meter Application) Product Manual for the POWER METER APPLICATION MODELS LB478A/479A/480A/559A/579A/589A/679A/680A Revision: 08/02/11 - 1 -...
-
Page 2: Table Of Contents
LBXXXA Series USB PowerSensor+™ Product Manual PMA (Power Meter Application) Table of Contents TABLE OF CONTENTS ......................................2 NOTICES ............................................ 3 1. GENERAL INFORMATION ....................................4 ......................................... 4 NTRODUCTION ........................................... 4 ESCRIPTION USB C ......................................4 ONSIDERATIONS More information related to USB ..................................5 How to identify the type of USB port ................................... -
Page 3: Notices
: 02/24/09 ....................................... 45 : 03/27/09 ....................................... 45 : 04/09/09 ....................................... 46 NOTICES © 2007 - 2011 LadyBug Technologies LLC This document contains information which is copyright protected. Do not duplicate without permission or as allowed by copyright laws. SAFETY A WARNING indicates a potential hazard that could completely damage the product. -
Page 4: General Information
LBXXXA Series USB PowerSensor+™ Product Manual PMA (Power Meter Application) 1. General Information Introduction This manual provides information about the installation and operation of the LB478A/479A/480A/LB679A/LB680A and LB559A/579A/589A model USB power sensors when using the Power Meter Application software. The LB4XXA series (reference to models LB478A/79A/80A and LB679A/80A) of sensors make CW and pulse measurements. -
Page 5: More Information Related To Usb
LBXXXA Series USB PowerSensor+™ Product Manual PMA (Power Meter Application) More information related to USB 1. Supplied voltage by a host or a powered hub port is between 4.75 V and 5.25 V. 2. Maximum voltage drop for bus-powered hubs is 0.35 V from its host or hub to the hub output port. 3. -
Page 6: Applications
LBXXXA Series USB PowerSensor+™ Product Manual PMA (Power Meter Application) Applications The PowerSensor+™ line of products is designed specifically for the following measurement applications: General Average and Pulse Power Measurements Power Measurements Requiring High Accuracy: CW & Pulsed Signals ... -
Page 7: Specifications
LBXXXA Series USB PowerSensor+™ Product Manual PMA (Power Meter Application) Specifications Refer to the data sheet by individual model number for a complete listing of product specifications to include pulse profiling capability (LB480A/LB680A only). Data sheets are available on-line at the company website – see Contact Information. -
Page 8: Options
– see Contact Information. Warranty The warranty on the LadyBug PowerSensor+™ series of products is one year, return to factory. Extended warranty and calibration service options are available. Please see the Order Guide for details. SPECIAL NOTE: The RF input connector is field replaceable if the connector type remains the same, regardless of sex. -
Page 9: Installation
Product Manual PMA (Power Meter Application) 2. Installation Initial Inspection Check the shipment for any damage to the shipping container or the components inside. Support Contact Information LadyBug Technologies LLC 3317 Chanate Rd. Suite 2F Santa Rosa, CA 95404 Phone 707.546.1050 Fax 707.237.6724 www.ladybug-tech.com... -
Page 10: Basic Operating Instructions - Getting Started
LBXXXA Series USB PowerSensor+™ Product Manual PMA (Power Meter Application) 3. Basic Operating Instructions – Getting Started Operating Precautions Observe the cautions and warnings about maximum input power in the specifications section. Insure that the RF input connector on the sensor is clean and undamaged as well as the mating connector. The following procedures assume the software and hardware have been installed according to the installation process outlined in the preceding section of this manual. -
Page 11: Configuring The Sensor
LBXXXA Series USB PowerSensor+™ Product Manual PMA (Power Meter Application) Configuring the Sensor Measurement Update Rate The measurement rate can be adjusted by selecting Meas Update Rate from the Measurement menu as shown below. Other items on the Measurement menu are explained in the GUI Functions section of this document. The application will take longer to respond to mouse clicks and data entry as the measurement rate is increased. -
Page 12: Making Basic Measurements
The design of the power sensor does not require zeroing or power calibration and there is no provision for zeroing or calibration. NOTE: While zeroing is not required for any LadyBug sensor, the LB5XXA sensors require time to thermally stabilize. Little if any warm-up time is required for measurements above -40.0 dBm. However, to make accurate measurements below -40 dBm the LB5XXA sensor should be allowed to thermally stabilize for one hour. -
Page 13: Display Preferences And Measurement Units
LBXXXA Series USB PowerSensor+™ Product Manual PMA (Power Meter Application) Display Preferences and Measurement Units Select the display preferences and the measurement units (power and frequency) from the Display menu as shown below. There are selections for digital or analog presentations of frequency and power; an analog frequency scale; and an analog power scale. -
Page 14: Measurement Resolution
LBXXXA Series USB PowerSensor+™ Product Manual PMA (Power Meter Application) The power and frequency units are also selectable from the toolbar as shown below. Or you can change the power units by clicking on the units label to the right of the power reading itself. And you can change the center frequency by clicking anywhere on the frequency reading in the active display. -
Page 15: Making An Average Power (Cw) Measurement
LBXXXA Series USB PowerSensor+™ Product Manual PMA (Power Meter Application) Making an Average Power (CW) Measurement Complete the following steps to make a typical CW measurement (all models): 1. Using a signal generator or other appropriate source, provide a signal source with the following parameters: CW Frequency: 1 GHz Power Level:... -
Page 16: Making A Pulse Power Measurement
LBXXXA Series USB PowerSensor+™ Product Manual PMA (Power Meter Application) Making a Pulse Power Measurement Complete the following steps to make a typical pulse power measurement (LB4XXA models only): 1. Using a signal generator or other appropriate source, set the RF source for a pulse modulated output as indicated below: Power Level: 0 dBm (1 mW) -
Page 17: Alternate Pulse Measurement Using Duty Cycle
LBXXXA Series USB PowerSensor+™ Product Manual PMA (Power Meter Application) 3. Connect the sensor to the RF source and turn the RF power on. 4. The GUI display should now indicate the source power at 1 GHz: ~0 dBm pulse power; ~50% DC; ~0 dBm peak; ~-3 dBm average;... - Page 18 LBXXXA Series USB PowerSensor+™ Product Manual PMA (Power Meter Application) Follow the steps below demonstrating this more traditional pulse measurement using duty cycle: 1. Setup the interface by selecting the following parameters as shown below. Select: Measurement > CW Power (or activate the CW button on the toolbar - not required for LB5XXA) Select: Offsets &...
-
Page 19: Detailed Operating Instructions
Constant path switching can produce a noticeable jump in power level readings. Another and perhaps more detrimental effect is that this approach guarantees that the full dynamic range of the sensor is not available to any given measurement. Ladybug has resolved these range transition problems. -
Page 20: Pulse Measurement Criteria (Lb4Xxa Models Only)
LBXXXA Series USB PowerSensor+™ Product Manual PMA (Power Meter Application) Pulse Measurement Criteria (LB4XXA/LB6XXA models only) This value determines the portion of the pulse to be used to measure pulse power. Select Measurement > Measured Pulse Setup from the menu bar to access this facility as shown below. The default or automatic value is 3 dB below the measured peak value or the 50% down points. -
Page 21: Pulse Peak Criteria (Lb4Xxa Models Only)
LBXXXA Series USB PowerSensor+™ Product Manual PMA (Power Meter Application) In diagram B, the peak value remains -30 dBm and the darkly shaded area represents the portion of the pulse that will be used to determine pulse power and duty cycle using a 6 dB peak criteria. You can see that the average in diagram B will be lower than the average in diagram A. -
Page 22: Measurement Example: Ofdm Pilot Tone (Lb4Xxa Models Only)
LBXXXA Series USB PowerSensor+™ Product Manual PMA (Power Meter Application) Measurement Example: OFDM Pilot Tone (LB4XXA/LB6XXA models only) Pilot tones for some wireless devices can operate at very low PRF (well below 100Hz); very low duty cycles (<0.05%); and at a variety of carrier frequencies. Making peak power or pulse power measurements under these circumstances can be difficult without expensive equipment. - Page 23 LBXXXA Series USB PowerSensor+™ Product Manual PMA (Power Meter Application) This helped to stabilize the measurements. However, you have to wait several seconds between updates. Now try connecting and disconnecting the RF source. You will see that each reading is independent of the previous reading – so that when power is disconnected the meter responds appropriately.
- Page 24 LBXXXA Series USB PowerSensor+™ Product Manual PMA (Power Meter Application) Extended averaging can be very helpful in many situations. But, like any measurement you must have a general idea of what the measurement is doing in order to properly manage the results. An alternative solution in this case might be to make a more reasoned tradeoff between the number of averages and extended averaging.
-
Page 25: Measurement Example: Gsm (Lb4Xxa Models Only)
LBXXXA Series USB PowerSensor+™ Product Manual PMA (Power Meter Application) Measurement Example: GSM (LB4XXA models only) GSM (Global System for Mobile Communication) is a TDMA (Time Division Multiple Access) world standard and the most widely used for mobile phones. The modulation technique is 0.3 GMSK (Gaussian Minimum Shift Keying) with a modulation data rate of 270.8 kb/s. -
Page 26: Gui Functions
However, the states are not held in the instrument but reside on the local PC in a basic text file. The files are named by model number and address and are retained in the Ladybug application directory. -
Page 27: The Toolbar
LBXXXA Series USB PowerSensor+™ Product Manual PMA (Power Meter Application) The Toolbar The toolbar is shown below. Notice that each toolbar button has a label if you hover over it with the mouse cursor. The toolbar buttons are like hot keys that duplicate many of the menu selections or actions and make it easier to manipulate the meter settings. - Page 28 LBXXXA Series USB PowerSensor+™ Product Manual PMA (Power Meter Application) The toolbar button is toggle on/off and determines the pulse on/off time at a specified rate and Duty Cycle Correction: duration when in average power or CW mode only. The button is inactive when in pulse power mode as the duty cycle is determined automatically.
-
Page 29: Averaging
LBXXXA Series USB PowerSensor+™ Product Manual PMA (Power Meter Application) Averaging Averaging sets the number of data buffers that are averaged. The default state is 75 averages and it takes about 0.25 msec to collect one buffer of data. The number of averages or buffers is settable from the Measurement menu shown below or alternately, by clicking the averaging button on the toolbar and entering a value from 1 to 30000. -
Page 30: Anti-Alias Control
LBXXXA Series USB PowerSensor+™ Product Manual PMA (Power Meter Application) Anti-alias Control The toolbar button is toggle on/off. Enable anti-alias control for input modulation bandwidths greater than 200 kHz. Disable it for modulation bandwidths less than 200 kHz. This button is used for CW and continuous pulse power measurements only to provide the greatest measurement accuracy. -
Page 31: Offset Correction
LBXXXA Series USB PowerSensor+™ Product Manual PMA (Power Meter Application) Offset Correction Offsets can compensate for signal loss or gain in the measurement path outside the sensor. For example, the offset function is helpful when an attenuator or amplifier is in front of the sensor. This offset is fixed and is not a function of frequency. -
Page 32: Making A Relative Power Measurement
LBXXXA Series USB PowerSensor+™ Product Manual PMA (Power Meter Application) Making a Relative Power Measurement The Offsets & Response menu allows comparison of an input to a reference value. The relative difference can be displayed in dB. Complete the following steps to set a reference value: 1. -
Page 33: Frequency Response Correction
LBXXXA Series USB PowerSensor+™ Product Manual PMA (Power Meter Application) Frequency Response Correction The Response setup menu shown below allows frequency dependent gain or loss offsets to be entered as part of the measurement setup. Response is a frequency sensitive offset so as you change the measurement frequency the response changes accordingly. -
Page 34: Impedance Matching
LBXXXA Series USB PowerSensor+™ Product Manual PMA (Power Meter Application) Graph of frequency response below. The frequency response (RSP) annunciator will appear when response correction is on as shown below. The frequency response correction button on the toolbar can be toggled on/off. The response feature can also be enabled from the Offsets &... -
Page 35: Triggering
LBXXXA Series USB PowerSensor+™ Product Manual PMA (Power Meter Application) Triggering The Triggering menu (standard and option 003) allows for a number of triggering capabilities as shown below. The single input trigger is controlled by the Single Meas button on the display. Trigger In and Recorder Out share a bi- directional connector labeled TI/RO on the sensor body and their operation is mutually exclusive. - Page 36 LBXXXA Series USB PowerSensor+™ Product Manual PMA (Power Meter Application) The toolbar trigger drop down shown below works in conjunction with the triggering configurations just described. It allows the user to conveniently switch between internal/external continuous trigger and internal/external single sweep trigger.
-
Page 37: Recorder
LBXXXA Series USB PowerSensor+™ Product Manual PMA (Power Meter Application) Recorder The Recorder output function (option 001) is a 0 – 1 VDC settable output that is proportional to the measured RF input power. Recorder only works in CW mode. A window will appear to indicate the meter is in record mode if enabled. The meter display will be inaccessible until you exit this function. -
Page 38: Data Logging
LBXXXA Series USB PowerSensor+™ Product Manual PMA (Power Meter Application) Data Logging Select Measurement > Logger > Setup to display and record data to file as shown below. Browse to and enter a path and file name to log data. There is provision to overwrite an existing file or append data to file by checking the appropriate box. - Page 39 LBXXXA Series USB PowerSensor+™ Product Manual PMA (Power Meter Application) An example of tabular data saved to file is shown below when in pulse power mode. The file will indicate date/time, frequency, and offsets in addition to the measured values with time stamp. NOTE: There is a separate High Speed Logger application available for the LB4XXA series PowerSensor+™.
-
Page 40: Limits Pass/Fail
LBXXXA Series USB PowerSensor+™ Product Manual PMA (Power Meter Application) Limits Pass/Fail Select Display > Limits > Setup to establish test limit lines, either single or double sided as shown below. Limits are fixed values against which a measured value is compared, then an evaluation is expressed as pass or fail. This evaluation is done during a measurement and the limits come in two types. - Page 41 LBXXXA Series USB PowerSensor+™ Product Manual PMA (Power Meter Application) The appropriate PASS/HIGH/LOW annunciator will appear in the active display below when the measurement limits have been enabled. The annunciator will be “OFF” when not enabled, and if the limits are indeterminate the annunciator will indicate “Ind”.
-
Page 42: Measurement Accuracy
LBXXXA Series USB PowerSensor+™ Product Manual PMA (Power Meter Application) NOTE: Selecting dB Relative as the units of measurement will disable limits. The Limits Setup diaglog box does not include a dB Relative selection. Measurement Accuracy The sources of measurement uncertainty associated with the LB series of power sensors consist of the following error terms: 1. -
Page 43: Sensor Technology
LBXXXA Series USB PowerSensor+™ Product Manual PMA (Power Meter Application) Sensor Technology The (patent pending) design of the PowerSensor+™ allows for internal error correction and eliminates the need to zero the sensor. Additionally, no separate power reference calibration is required which reduces system errors and increases overall accuracy. -
Page 44: Functional Block Diagram
LBXXXA Series USB PowerSensor+™ Product Manual PMA (Power Meter Application) Functional Block Diagram A block diagram is shown below and is representative of the PowerSensor+™ line of products. Notice that the Trigger Input and Recorder Output options are mutually exclusive and share a connector. Refer to the product Order Guide for a complete listing of available options. -
Page 45: Error Messages
LBXXXA Series USB PowerSensor+™ Product Manual PMA (Power Meter Application) 5. Error Messages Various error windows will appear if there is a hardware or software problem or conflict. Follow the message instructions to correct the problem. 6. Errata and User Updates – by date Subsequent revisions to the user interface and other product changes are listed in this section by date. - Page 46 LBXXXA Series USB PowerSensor+™ Product Manual PMA (Power Meter Application) Rev Date: 04/09/09 1. Change "Average Power" to "CW Power" when referenced in the measurement setups that were not corrected previously. 2. Add Zero Offset error term to Measurement Accuracy section (as per data sheets). Rev Date: 08/02/11 1.
Need help?
Do you have a question about the USB PowerSensor+ LB A Series and is the answer not in the manual?
Questions and answers