Advertisement
Quick Links
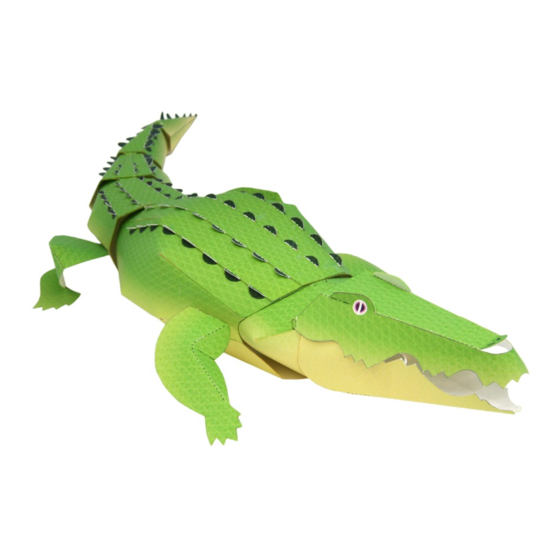
Crocodile : Assembly Instructions
Crocodile (Nile crocodile)
Reptilia Crocodilia Crocodylidae Crocodylus
Length: Up to 6 m
Weight: Up to 1 t
Habitat: Rivers, lakes, ponds and marshes in Africa
Assembly Instructions
1. Carefully cut out the parts.
2. Fold along the dotted lines, making mountain
or valley folds as indicated.
3. Attach the glue spots on each part together.
4. Join the parts together to assemble the model.
5. Your Paper craft model is finished.
*Please read the Assembly Instructions
carefully before you begin.
Tools
Scissors, Glue (We recommend craft glue.)
How to assemble your model neatly
Scoring along the fold lines in advance with a dried
up pen or a ruler with slightly sharp corners will result
in a neater model.
*Be careful not to press too hard as the paper may tear.
*This photo shows a model which uses the optional parts.
Notation Key
Scissors line
Cut in line
Glue spot
Glue spot with symbol
Attach the part that matches
the symbol on the glue spot.
Caution
Keep scissors and glue away from small children.
Be careful not to cut your fingers when using scissors.
Mountain fold
Valley fold
Advertisement

Related Manuals for Canon Creative Park Crocodile


Summary of Contents for Canon Creative Park Crocodile
- Page 1 Crocodile : Assembly Instructions Crocodile (Nile crocodile) Reptilia Crocodilia Crocodylidae Crocodylus Length: Up to 6 m Weight: Up to 1 t Habitat: Rivers, lakes, ponds and marshes in Africa *This photo shows a model which uses the optional parts. Assembly Instructions Notation Key 1.
- Page 2 Crocodile : Assembly Instructions Assemble the head Align the corners and attach together. Attach the glue spots to the edge of the adjacent pieces. Glue it so it becomes a cylinder. Fold the left and right joints as shown, and insert them into the hole marked *Open up the folded parts from the inside, to prevent the pieces from becoming detached.
- Page 3 Crocodile : Assembly Instructions Assemble the body 1. Carefully make a mountain fold on the fold line with the mark on it, and make a hole by cutting in a V shape. Then, make a valley fold on the line to get rid of the crease.
- Page 4 Crocodile : Assembly Instructions If you wish, attach the Attach it so it becomes optional parts. a cone shape. How to attach the optional parts Adding the optional parts can make your crocodile look even more realistic. Use whichever ones you like. After folding along the fold lines of the optional parts, attach them to the crocodile by aligning them with the glue spots, scales, or holes.
-
Page 5: Complete Assembly
Crocodile : Assembly Instructions Complete assembly 1. Attach both the front legs to the body. 2. Attach the head and body by inserting the body's movable joint through shaped holes, first at the bottom and then at the top. * Open up the folded parts from the inside, to prevent the pieces from becoming detached.