Advertisement
Quick Links
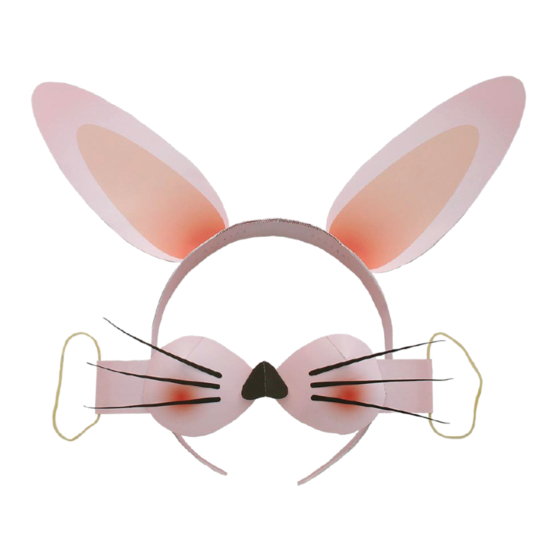
Completed Photo
HOW TO MAKE
1. Assemble the parts that will become the inner frame (parts A and B).
Part A
Link them together and attach.
2. Make the inside part of the headband.
Part C
After applying glue
to the back, make the
first mountain fold.
order of mountain folds
Dress Up Items : Rabbit [Assembly Instructions]
When it looks like this, fold it
Make part B in the same way.
in half and glue it together.
After applying glue to the back,
fold the second mountain fold,
and cut along the cut in line.
Fold along the mountain fold line,
and apply glue. At this point, be careful
not to put glue on the zig zag part.
You will need:
Explanation of symbols:
Assembly tip:
Caution:
This craft requires the use of glue, scissors, and other tools which may be
dangerous to young children. Please keep them out of reach of children while you work.
Part D
Part C
Part D
Attach parts D to part C.
Scissors, glue, ruler, a used ball-point pen,
rubber bands
Mountain fold
Valley fold
Cut line
Glue tab
Cut in line
Trace along the folds with a ruler and a used
pen (no ink) to get a sharper, easier fold.
Glue the two completed parts together.
Attach the completed part to the frame part
that you just made. Adding a slight curve to
the parts at this point will result in a neater finish.
After gluing, add a slight curve
and leave to dry.
Part A
Part B
Part A,B
Part C,D
Advertisement

Related Manuals for Canon Creative Park Rabbit


Summary of Contents for Canon Creative Park Rabbit
- Page 1 Dress Up Items : Rabbit [Assembly Instructions] Completed Photo You will need: Scissors, glue, ruler, a used ball-point pen, rubber bands Explanation of symbols: Mountain fold Valley fold Cut line Glue tab Cut in line Assembly tip: Trace along the folds with a ruler and a used pen (no ink) to get a sharper, easier fold.
- Page 2 Dress Up Items : Rabbit [Assembly Instructions] HOW TO MAKE 3. Make the outside part of the headband (ears). Insert the ears and stand them up, adjusting them so they are balanced. Cut a slot. Part E Part H Part I Part F Part G Insert the ears into the slots.
Need help?
Do you have a question about the Creative Park Rabbit and is the answer not in the manual?
Questions and answers