Sony S-Frame DPF-HD1000 Handbook
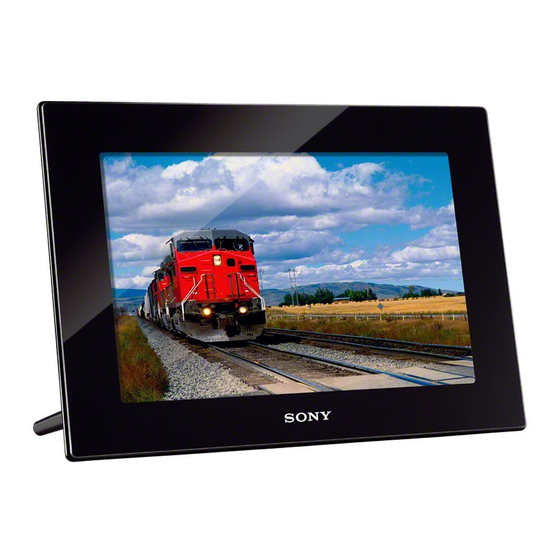
25.7cm (10.1-inch) wsvga lcd, hd video and audio, 2gb memory, remote control, energy saving timer
Hide thumbs
Also See for S-Frame DPF-HD1000:
- Limited warranty (1 page) ,
- Specification sheet (3 pages) ,
- User manual (2 pages)
Table of Contents
Advertisement
Advertisement
Table of Contents

Related Manuals for Sony S-Frame DPF-HD1000


Summary of Contents for Sony S-Frame DPF-HD1000
-
Page 1: Digital Photo Frame
4-295-278-12(1) Digital Photo Frame Handbook DPF-HD1000/HD800/HD700... -
Page 2: Read This Before Using
Recorded content not guaranteed Sony shall assume no responsibility for any accidental or consequential damages or loss of recorded content which may be caused by use or malfunction of the digital photo frame or memory card. -
Page 3: Table Of Contents
Table of Contents Let’s Use Identifying the parts ············································································ 4 Compatible Memory Card/USB memory ············································ 6 Preparation: 1 Checking included items ··········································· 8 Preparation: 2 Attaching the stand ··················································· 9 Preparation: 3 Turning on the photo frame····································· 11 Preparation: 4 Setting up the photo frame······································ 13 Enjoying a slideshow ········································································... -
Page 4: Let's Use
Let’s Use Identifying the parts Front A Remote sensor B LCD screen C Sony logo (page 9) Rear A Speaker B MENU button (enter) button D v/V/B/b buttons E BACK button F Holes for hanging the unit on a wall... -
Page 5: Remote Control
The supplied lithium battery (CR2025) has already been inserted into the remote control. Pull out the protective sheet before use, as illustrated below. Protective sheet Remote sensor Remote control A MENU button (page 38) B BACK button (page 20) MARKING button (page 29) D SORT button (page 30) E SELECT DEVICE button (page 23) F VIEW MODE buttons... -
Page 6: Compatible Memory Card/Usb Memory
Compatible Memory Card/USB memory You can view images only by inserting a memory card (“Memory Stick Duo” or SD memory card) or USB memory removed from a digital camera or equivalent, into the photo frame. Memory cards/USB memory supported by the photo frame •... - Page 7 • The photo frame has been demonstrated to be operable with “Memory Stick Duo” with a capacity of 32 GB or less manufactured by Sony Corporation. • “M2” is an abbreviation for “Memory Stick Micro”. In this section, “M2” is used to describe a “Memory Stick Micro”.
-
Page 8: Preparation: 1 Checking Included Items
Preparation: 1 Checking included items Make sure that the following items are included. • Digital photo frame (1) • Remote control (1) • Stand (1) • AC adaptor (1) • Operating Instructions (1) • CD-ROM (Digital Photo Frame Handbook) (1) •... -
Page 9: Preparation: 2 Attaching The Stand
• When the photo frame is placed in portrait orientation or when you turn off the power, the Sony logo doesn’t light up. • The photo frame does not detect and rotate the orientation of images when [Auto display orientation] of [General Settings] under the •... - Page 10 • Connect the DC cable of the AC adaptor to the photo frame and hang the photo frame on the wall. Then plug the AC adaptor into the wall outlet. • Sony takes no responsibility for any accidents or damage caused by defects of attachment, misuse, natural disasters, etc.
-
Page 11: Preparation: 3 Turning On The Photo Frame
Preparation: 3 Turning on the photo frame Connecting the AC adaptor Connect the AC adaptor as illustrated below. The photo frame is automatically turned on. To DC IN jack Initial display When using it for the first time c Proceed to “Preparation: 4 Setting up the photo frame” (page 13). If the initial settings have already been made c Proceed to “Enjoying a slideshow”... - Page 12 Turning on/off the power To turn on the power Press 1 (on/standby). The standby indicator changes from red to green. To turn off the power Hold 1 (on/standby) pressed until the power turns off. The standby indicator changes from green to red. •...
-
Page 13: Preparation: 4 Setting Up The Photo Frame
Preparation: 4 Setting up the photo frame Press MENU with the initial display. Press B/b to select the Press v/V to select [Language Setting] then press Press v/V to select the language for display on the LCD screen then press (enter). -
Page 14: Enjoying A Slideshow
Enjoying a slideshow Insert a memory card or USB memory. Insert the memory card or USB memory firmly into the corresponding slot with its front facing away from the screen. Playback automatically begins, and images in the memory card or USB memory are displayed one after another as a slideshow. USB memory •... - Page 15 • If playback does not start even if you insert a memory card, check the direction and reinsert • When no memory card is inserted, if no image is stored in internal memory, the demonstration display appears automatically. The demonstration display closes when a memory card with image data is inserted, or when any button other than 1 (on/satndby) is pressed.
-
Page 16: Changing The View Mode
Changing the view mode You can change the view mode to another one except with a slideshow or change the display style as you prefer. Press VIEW MODE on the remote control to select the desired view mode. Operation button slideshow Displays a single screen, one after another. - Page 17 Slideshow styles Style Displays a single screen, one after another. Single View Displays multiple images at the same time. For a movie file, only the first frame of the file is Multi image displayed. View Displays a clock with the current date and time while showing images one after another.
- Page 18 Single View styles Style Displays an entire image on the screen. Entire Image Displays an image over the whole screen. Fit to Screen Displays image information, such as the image number, file name, and shooting date, while Entire Image displaying the entire image. (with Exif) Displays image information, such as the image number, file name, and shooting date in “Fit to...
- Page 19 Overview of the information display The following information is displayed: 1 Display style (In Single View mode) – Entire Image – Fit to Screen – Entire Image (with Exif) – Fit to Screen (with Exif) 2 Ordinal number of the displayed image/Total number of images The input media source indication of the displayed image is shown as follows:...
-
Page 20: Playing A Movie
Playing a movie Press Select a movie file you want to play. Press (enter). The selected movie file starts playback. To adjust the volume Press VOL +/VOL – during playback or playback pause of the movie file. Function To pause playback Press To resume playback, press Press B/b. -
Page 21: Saving Images In Your Photo Frame (Import)
Saving images in your photo frame (import) Saving still images If you save the data of a memory card in internal memory, the still images can be displayed on this photo frame without the memory card. • When saving images to internal memory, you can use [Image import size] of the menu to preset whether to resize images to the optimum size or save them as-is without compressing them (page 41). - Page 22 Select the folder in which you want to save the files then press (enter). A confirmation screen for importing images is displayed. A new folder is created automatically when you select [New folder]. Select [Yes] and press The image(s) is (are) imported to the specified folder. Press (enter) when confirmation screen is displayed.
-
Page 23: Specifying The Playback Memory
Specifying the playback memory You can specify the device among a memory card, internal memory, etc, the contents of which you want to have displayed. Press SELECT DEVICE. To operate using the buttons on the photo frame • Press MENU then select the If the memory card you want to select is not inserted, insert it now. -
Page 24: Enjoying More
Enjoying More Playing a slideshow with background music Press MENU, select BGM Settings]. Select [Import BGM] and press Select a music file you want to play from the built-in music file list then press (enter). ✔ A check mark ( ) is displayed next to the selected file. -
Page 25: Importing A Music File
Importing a music file You can use your favorite music file as background music by importing it to the photo frame. • Before importing a music file, make sure that the file can be played with the photo frame. For files that can be played, see “Background music”... - Page 26 • Playback of the imported music file is enabled only as background music for a slideshow. • The music files provided in the internal memory at the factory as BGM1, BGM2, and BGM3 cannot be deleted. • Up to 40 music files can be imported to internal memory of the photo frame. •...
-
Page 27: Adjusting Image Size And Orientation
Adjusting image size and orientation Enlarging/reducing an image To enlarge an image, press an enlarged image, press You can enlarge an image from 1.5 times to 5 times (maximum) the original scale. You can pan an enlarged image. To operate using the buttons on the photo frame MENU Press in Single View mode. -
Page 28: Rotating An Image
Rotating an image Press ROTATE on the remote control. The image rotates 90 degrees counterclockwise each time you press the button. To operate using the buttons on the photo frame Press MENU in Single View mode. Press B/b to select the (Editing) tab. -
Page 29: Registering A Favorite Mark
Registering a favorite mark You can produce a slideshow with only the images preselected bearing the marks. You can easily check for images with marks using the index image display or single view mode. Press MARKING when an image for which you want to register a mark is displayed on the screen. -
Page 30: Sorting Images (Filtering)
Sorting images (Filtering) You can sort images stored in internal memory or a memory card according to date, folder, image orientation (vertical/horizontal), marks, or movies/still images. Press SORT when an image is displayed on the screen. To operate using the buttons on the photo frame MENU Press with an image displayed on the screen. -
Page 31: Deleting An Image
Deleting an image Press DELETE when an image you want to delete is displayed on the screen. To operate using the buttons on the photo frame Press MENU with an image you want to delete displayed on the screen. Press B/b to select the Select an item then press [Delete This Image]: The image currently displayed is deleted. - Page 32 To format the internal memory Press MENU button. Press B/b to select the Press v/V to select [Initialize] then press Select [Format Internal Memory] then press A confirmation screen for initializing the internal memory is displayed. Select [Yes] then press •...
-
Page 33: Exporting An Image From Internal Memory
Exporting an image from internal memory You can export images in internal memory to a memory card. Press MENU when an image stored in internal memory is displayed on the screen. Press B/b to select the Press v/V to select [Export] then press (enter). - Page 34 Select a destination folder then press (enter). A confirmation screen for exporting the image is displayed. When you select [New folder] the folder in which the image will be stored is created automatically. Select [Yes] then press The image is exported. Press (enter) when the confirmation screen is displayed.
-
Page 35: Using The Auto Power On/Off Timer
Using the auto power on/off timer You can use the timer function to turn the photo frame on or off automatically. Press MENU. Press B/b to select the Press v/V to select [Auto Power ON/OFF] then press (enter). Select [Setup Method] then press (enter). -
Page 36: Setting The Time
Setting the time Perform the setting according to the Setup Method selected in step 4 of “Using the auto power on/off timer” (page 35). When [Advanced] is selected: Press v/V/B/b to set the time after which you want the power automatically turned on then press (enter) You can set the time by one-hour units independently... - Page 37 When [Simple] is selected: Select an item for which you want to set the time. Select [Power-ON timer] or [Power-OFF timer] then press and press (enter). Set the time. 1 Select [Auto ON time] or [Auto OFF time] and press 2 Press B/b to select the hour or minute, press v/V to adjust it, and press (enter).
-
Page 38: Changing The Settings
Changing the settings Press MENU. Press B/b to select the Press v/V to select the item you want to change then press (enter). The setting screen for the selected item is displayed. Select the setting you want to change then press This enables you to change the setting (page 39). -
Page 39: Slideshow Settings
Overview of the available settings : Items with asterisks are the factory default settings. (Some default settings vary by region.) Slideshow Settings Setting Photo Interval Selects 3 sec., 7 sec.*, 20 sec., 1 min., 5 min., 30 min., 1 hour, 3 hours, 12 hours, or 24 hours for the interval for switching still images. - Page 40 • The image may not be changed to the next one at the specified interval, depending on the slideshow style, image size, or color effect. • While a movie is being played, the movie image is always displayed in color, regardless of the Color Effect setting.
-
Page 41: General Settings
Original: Saves images to internal memory without compressing them. There is no deterioration, but you can save fewer images. Sony logo ON/OFF ON*/OFF: Sets whether the photo frame’s Sony logo is to light or not. System Information Setting Version Displays the version of the firmware of the photo frame. -
Page 42: Connecting To A Computer
Connecting to a computer Connecting to a computer allows you to view images in the internal memory of the photo frame with a computer and copy them to a computer and to copy images from a computer to the photo frame. Connect the AC adaptor to the photo frame and to the AC outlet then turn the photo frame on. -
Page 43: System Requirements
System requirements Windows Recommended OS: Microsoft Windows 7 SP1/ Windows Vista SP2 /Windows XP SP3 Port: USB port Macintosh Recommended OS: Mac OS X (v. 10.4 or later) Port: USB port To disconnect from a computer Unplug the USB cable or turn the photo frame off after disconnecting the photo frame from your computer as follows: 1 Click on (Safely Remove Hardware) on the Task Tray. -
Page 44: Copying Images And Music From A Computer
Move the cursor in this window and right- click then click on [New] then on [Folder]. Name this new folder. In this manual, the folder name “sony” is used as an example. Double-click to open this “sony” folder. Open the folder that contains the image files you want to copy then copy the image files by drag-and-drop. - Page 45 Copying a music After performing step 2 of “Copying images and music from a computer” (page 44), proceed as follows: Move the cursor in this window and double-click on the [MUSIC] folder. Open the folder that contains the music you want to copy then copy the file to [MUSIC] folder by drag-and-drop.
-
Page 46: Troubleshooting
Troubleshooting Before submitting the photo frame for repair, try using the following guidance to solve the problem. If the problem persists, consult with your Sony dealer or Sony service facilities. Power supply The power is not turned on. • Is the AC power plug inserted correctly? c Insert the power plug properly. - Page 47 Images are not played back in the order of shooting date. • Were these images edited on a computer? c If you edited or saved an image file on a computer, the date of the file was modified. Images are thus displayed in order of modification date instead of shooting date. Some images are not displayed.
- Page 48 Playing a movie file A movie file is not played. • Does the mark appear in index or single view mode? c The movie file is not supported by the photo frame (page 55). Fast forward/backward playback is not available. c Fast forward/backward playback of some movie files may not be available with the photo frame Saving and deleting images...
- Page 49 An image cannot be deleted. • Is the memory card write-protected? c Use the device you are using to cancel write-protection and try deleting again. • Is the write-protect switch of the memory card in the LOCK position? c Slide the write-protect switch to the enable position. •...
-
Page 50: Photo Frame
Photo Frame Nothing happens even if you operate the photo frame. c Turn off the power (page 12) and turn it back on again. The message “Do you wan to refresh the internal memory?” is displayed. c For the refreshing operation, see “About refresh mode” (page 51). A memory card cannot be ejected. - Page 51 About refresh mode Owing to one of the characteristics of the device, images stored in the internal memory for a long time or read many times may be subject to data error. The photo frame refreshes the internal memory automatically to prevent these errors, depending on the status of the internal memory.
- Page 52 • When the lithium battery becomes weak, the operating distance of the remote control may shorten, or the remote control may not function properly. In this case, replace the battery with a Sony CR2025 lithium battery. Use of another battery may present a risk of fire or explosion.
-
Page 53: Precautions
“Memory Stick Duo” • For the latest information on the “Memory Stick Duo” types supported by the photo frame, see the “Memory Stick” compatibility information on the Sony Web site. • The photo frame supports FAT32. However, we do not guarantee the operations of all the “Memory Stick... -
Page 54: Sd Memory Card
• When you initialize a “Memory Stick Duo”, use the initialization function of your digital camera. If you initialize it with your computer, images may not be displayed properly. • When you perform initialization, all the protected images are erased. Take care to avoid accidental erasure of important data. -
Page 55: Specifications
Specifications Photo frame DPF-HD1000 Model name LCD screen 25.7 cm/10.1-inches, TFT active matrix LCD panel 1,843,200 dots Total number of dots (1,024 × 3 (RGB) × 600 dots) Effective display area Display aspect ratio Actual viewable size 23.4 cm/9.2-inches 1,628,748 dots (914×3 Total number of dots (RGB) ×... - Page 56 Model name DPF-HD1000 MP3: Extension: mp3 Bit rate: 32 kbps to 320 kbps, Supports variable bit rate (VBR) Sampling frequency: 32 kHz, 44.1 kHz, 48 kHz AAC: Extension: m4a Background music* Bit rate: 32 kbps to 320 kbps, Supports variable bit rate (VBR) Sampling frequency: 8 kHz, 11.025 kHz, 12 kHz, 16 kHz, 22.05 kHz, 24kHz, 32 kHz, 44.1 kHz, 48 kHz Linear PCM:...
- Page 57 : Some of the files may not be compatible depending on the type of data. : Files cannot be displayed in 3D. Representative images are displayed in 2D. α : RAW files of a Sony camera are displayed as thumbnail preview. : Files with copyright protection cannot be played.
- Page 58 , “Memory Stick Micro”, Stick-ROM”, “MagicGate”, and trademarks or registered trademarks of Sony Corporation. • Microsoft , Windows, and Windows Vista are registered trademarks of Microsoft Corporation in the United States and/or other countries. • Macintosh and Mac OS are registered trademarks of Apple Inc..
- Page 59 (ii) DECODE AVC VIDEO THAT WAS ENCODED BY A CONSUMER ENGAGED IN A PERSONAL AND NON- COMMERCIAL ACTIVITY AND/OR WAS OBTAINED FROM A VIDEO PROVIDER LICENSED TO PROVIDE AVC VIDEO. NO LICENSE IS GRANTED OR SHALL BE IMPLIED FOR ANY OTHER USE.
-
Page 60: Index
Index Index Symbols (Associated file)...19 (Clock and calendar) mode...16 (Editing) tab...21 (Favorite mark)... 19 (Index) mode ...16 (Movie file)...19 (Protected file) ...19 (Select device) tab ...23 (Settings) tab... 13 (Single image display) mode ...16 (Slideshow) mode ...16 AC adaptor ...11 Attaching the stand ...9 [Auto Power ON/OFF] ...35 Advanced...36... - Page 61 Included items ...8 Information display...19 Initial display ...11 [Initialize]...41 Internal memory ...32 Setting...38 Inserting Memory card ...14 USB memory...14 [Language Setting]...41 Marking...29 Memory card Adaptor...6 Inserting...14 “Memory Stick Duo” ... 14 Removing ...14 SD memory card... 6 Music Deleting ...25 Importing...25 Playing...24 MUSIC folder ...45...
- Page 62 View mode ...16 Clock and calendar ...16 Index...16 Single image display ...16 Slideshow ...16 Volume... 20 Zoom in ...27 Zoom out...27...
- Page 63 © 2011 Sony Corporation http://www.sony.net/...
Need help?
Do you have a question about the S-Frame DPF-HD1000 and is the answer not in the manual?
Questions and answers