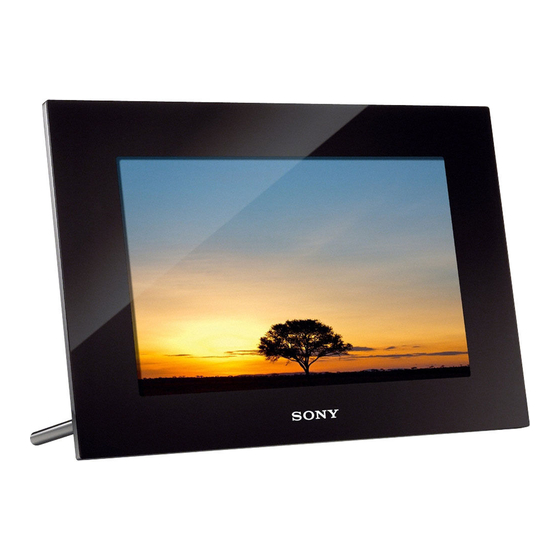
Sony S-Frame DPF-VR100 Handbook
25.9cm (10.2-inch) swvga lcd, full hd video, stereo sound, 2gb memory, bionz
Hide thumbs
Also See for S-Frame DPF-VR100:
- Operating instructions manual (44 pages) ,
- Specifications (2 pages) ,
- Limited warranty (1 page)

Related Manuals for Sony S-Frame DPF-VR100


Summary of Contents for Sony S-Frame DPF-VR100
-
Page 1: Digital Photo Frame
Digital Photo Frame DPF-XR100/VR100 Digital Photo Frame Handbook © 2010 Sony Corporation 4-259-436-13 (1) Before operation Basic operations Advanced operations Using with a computer Error messages Troubleshooting Additional information... -
Page 2: Table Of Contents
Table of Contents Before operation Enjoying your photo frame in various ways ...4 Features ...5 Identifying the parts ...8 x Digital photo frame ... 8 x Remote control ... 9 Basic operations Preparing the remote control ...10 Setting the stand ...12 Turning the photo frame on ...13 Setting the current time ...14 Inserting a memory card ...15... - Page 3 Using with a computer Connecting to a computer ...51 System requirements ...51 Copying an image file from a computer to the photo frame ...51 Disconnecting your computer ...52 Error messages If an error message appears ...53 Troubleshooting If trouble occurs ...55 Additional information About memory cards ...61 “Memory Stick”...
-
Page 4: Before Operation
Before operation Enjoying your photo frame in various ways The Sony DPF-XR100/VR100 is a digital photo frame for easily displaying images taken with a digital camera or other device, without using a computer. -
Page 5: Features
Features x Support for various memory cards* Supports various memory cards and other devices, such as a “Memory Stick”, CompactFlash card, SD memory card, xD- Picture Card, and USB memory. Just insert a memory card removed from a digital camera, and you will be able to view the images immediatel (pages 15, 61). - Page 6 x Exporting images You can export images in the internal memory to your memory card (page 33). * When using a miniSD/miniSDHC 1, microSD/microSDHC 2 or “Memory Stick Micro” media 3, be sure to insert it in an appropriate adaptor. x Playback of video files/playback of background music (BGM) with photos You can enjoy viewing a video file shot with...
- Page 7 x Hanging on a wall You can hang the photo frame on the wall (supplied Operating Instructions, “Stand – To display the photo frame on the wall”).
-
Page 8: Identifying The Parts
Front Rear VIEW MODE button (page 16) Memory card slot (page 15) Direction (B ) buttons /b/v/V LCD screen Remote sensor Sony logo (page 13) 1 (on/standby) button Standby indicator Access lamp MENU button ENTER ( ) button BACK button... -
Page 9: Remote Control
x Remote control SLIDE-SHOW ( ) button CLOCK ( ) button MENU button BACK button MARKING ( ) button SORT button SELECT DEVICE button About descriptions in this manual The operations described in this manual are based on remote control operation. When an operation is performed differently, for example, with the remote control and the buttons on the photo frame, it will be explained in a tip. -
Page 10: Basic Operations
Basic operations Preparing the remote control The supplied lithium battery (CR2025) has already been inserted into the remote control. Pull out the protective sheet before use as shown in the figure. Protective sheet Using the remote control Point the top end of the remote control towards the remote sensor on the photo frame. - Page 11 • Incorrect use of the battery may cause leaking and corrosion. – Do not recharge the battery. – When the remote control will not be used for a long period of time, remove the battery from the remote control to prevent leaking and corrosion. –...
-
Page 12: Setting The Stand
• Check whether the stand is stable. If the stand is not set properly, the photo frame may fall over. • The Sony logo does not light up when the photo frame is placed vertically or turned off. • You can also rotate the image manually (page 38). -
Page 13: Turning The Photo Frame On
Press 1 (on/standby) on the photo frame or remote control to turn on the power. The standby indicator turns to green from red. The Sony logo on the front panel lights up. Turning off the power Hold down 1 (on/standby) on the photo frame or remote control until the power turns off. -
Page 14: Setting The Current Time
Setting the current time Press MENU. Press B/b to select the (Settings) tab. Press v/V to select [Date/time Settings] and press Set the World clock. Press v/V to select [World Clock Settings] and press Press v/V to select [Local Time] and press Press v/V to select the region where you are living and press... -
Page 15: Inserting A Memory Card
Inserting a memory card Insert the memory card firmly into the corresponding slot with its label side facing toward you (when you are facing the back side of the photo frame). The access lamp flashes when the memory card is inserted correctly. If the access lamp does not flash, reinsert the memory card after checking the label side of the memory card. -
Page 16: Changing The Display
Changing the display You can change the view style by pressing the VIEW MODE buttons. Press the button corresponding to view mode you want to select. VIEW MODE buttons The display changes to selected view mode. When using the buttons on the photo frame, press VIEW MODE on the upper back of the LCD screen. -
Page 17: Slideshow Display
Slideshow display Display Style Slideshow Single view Multi image view Clock view/World Clock Calendar view Time Machine Scrap-book/Creative Random view Description Images are displayed on a single screen, one after another. Displays multiple images at the same time. Displays images, one after another, while showing the current date and time. - Page 18 Display Style Slideshow Lunar Calendar view (when you select [Simplified Chinese] in [Language Setting]) Arabic Calendar view (when you select [Arabic] in [Language Setting]) Farsi Calendar view (when you select [Persian] in [Language Setting]) Tips • If no memory card is inserted, or no images are saved in internal memory, demonstration mode starts automatically.
-
Page 19: Clock And Calendar Display
Clock and Calendar display Clock1 Clock2 Clock6 Clock7 Calendar1 Calendar2 World Clock 1 World Clock 2 Lunar Calendar Arabic Calendar (when you select (when you select [Simplified [Arabic] in Chinese] in [Language [Language Setting]) Setting]) Note You can select only the Settings or Slideshow tab when the Clock and Calendar display is shown. Clock3 Clock4 Clock8... -
Page 20: Single View Mode (Single Image Display)
Single view mode (single image display) Display Style Entire image Fit to screen Entire image (with Exif) Fit to screen (with Exif) Tips • If no memory card is inserted or no images are saved in internal memory, demonstration mode starts automatically. - Page 21 About the information displayed on the screen The following information is displayed. Setting information Icons Meaning Protect indication Associated file indication (Displayed when there is an associated file such as a video file or a miniature e-mail image file.) Displays when you have registered a mark.
-
Page 22: Index Image Display
Index image display Press (INDEX) while the photo frame is in single image or slideshow display mode. A list of thumbnails is displayed. Press B/b/v/V to move the cursor to an image you want to display and press The selected image is displayed in single view mode. - Page 23 To stop playback Press BACK while a video file is being played. Notes • You cannot play the following type of video file: – Video files with copyright protection – Video files that exceed the maximum number of pixels either in width or height •...
-
Page 24: Advanced Operations
Advanced operations Enjoying a slideshow Press (SLIDE-SHOW). When using the buttons on the photo frame, press VIEW MODE on the upper back of the LCD screen and press v/V to select Slideshow. Press B/b to select the desired style and press See “Slideshow display”... - Page 25 Item Setting Slideshow Photo Interval Settings Video Duration Note An image may not switch at the intervals you set on the menu, depending on the style of the slideshow, color effect, or image size. Sound Settings Select BGM Import BGM Delete BGM Shuffle Color effect...
- Page 26 Item Setting Slideshow Optimize Settings Speaker Output Description Digital signal processing optimizes audio output. Audio output is not optimized. *: Factory default settings...
-
Page 27: Playing A Slideshow With Background Music
Playing a slideshow with background music Importing a music file Before importing music files, check if the music files are playable on this unit. For details on importing music files and on playable music files, see “Background music” in “Specifications” in the supplied Operating Instructions. -
Page 28: Refresh Mode
Press v/V to select [Sound for Photos] or [Sound for Videos] then press Make the BGM setting. Sound for Photos [BGM ON]: Background music is played while a slideshow of photos is run. [BGM OFF]: Background music is not played while a slideshow of photos is run. Sound for Videos [Video sound]: Audio recorded in a video file is played while a slideshow of a video... -
Page 29: Maintenance Mode
System initialization: When your photo frame does not start properly, initialize the system of the photo frame. If the symptom persists, consult with your Sony dealer. Activating maintenance mode Confirm that the photo frame is turned off. Press 1 while holding down VIEW... -
Page 30: Importing Images From A Memory Card To Internal Memory
Press the reset switch on the rear panel of the photo frame using a small, thin object, etc. The system of the photo frame starts. It may take 1minute for the system to start for the first time after initialization. Importing images from a memory card to internal memory... - Page 31 Slideshow display Press v/V to select [Import this image], [Import multiple images] or [Import all images] and press If you select [Import this image], the image currently displayed is imported to the internal memory. Go to step 5. (This item cannot be selected on the slideshow display.) If you select [Import multiple images], you can select the image you want to...
-
Page 32: Specifying The Playback Device
A new folder is created automatically when you select [New folder]. Press v/V to select [Yes] and press The image is saved in the specified folder in the internal memory. Press when the confirmation screen is displayed. Notes • “Import to the internal memory” is not available for images in the internal memory. -
Page 33: Exporting An Image From The Internal Memory To A Memory Card
Exporting an image from the internal memory to a memory card You can export the images in the internal memory to a memory card. Press MENU when an image stored in the internal memory is displayed on the screen. Press B/b to select the tab. -
Page 34: Deleting An Image
Press v/V to select a destination folder and press The confirmation screen for exporting the image is displayed. A new folder is created automatically when you select [New folder]. Press v/V to select [Yes] and press The image is exported. Press when the confirmation screen is displayed. -
Page 35: Registering A Mark
Press MENU. The delete confirmation screen is displayed. Press v/V to select [Yes] and press The image is deleted. Press when the confirmation screen is displayed. Notes • Avoid doing the following while an image is being deleted. Doing so may damage the photo frame, memory card, or data: –... - Page 36 Press /b/v/V to select the image to be marked from the image list, and press A check mark (✔) is added to the selected image. If you want to mark multiple images at a time, repeat this step. If you want to clear the selection, select the image and press .
-
Page 37: Sorting Images
Sorting images You can sort images stored in the internal memory or on a memory card by event, folder, image orientation, marks, etc. Press SORT when an image is displayed on the screen. When using the buttons on the photo frame, press MENU, select the (Editing) tab with B/b, select [Sort] with v/V, and press... -
Page 38: Adjusting Image Size And Orientation
Adjusting image size and orientation Enlarging/reducing an image You can enlarge or reduce an image in single view mode. To enlarge an image, press on the remote control. To reduce an enlarged image, press Each press of the button enlarges the image further. -
Page 39: Changing The Settings Of The Auto Power On/Off Function
• You can rotate the image of the index image display. • You cannot rotate a video file. Changing the settings of the auto power on/off function You can use the timer function to turn the photo frame on or off automatically when the photo frame is turned on. - Page 40 Press v to select [Time Setting], and press [Advanced] Press B/b/v/V to select the time you want to use the auto power on/off function. You can select the time in one-hour increments for each day of the week (from Monday to Sunday). When you select the time and press selected time zone changes to blue.
-
Page 41: Using The Alarm Function
Press v/V to select [2 hour] or [4 hour] and press Press MENU. Using the alarm function You can use the photo frame as an alarm clock. An alarm will sound and an alarm screen will be displayed to notify you when the specified alarm time on the specified day of the week arrives. -
Page 42: Changing The Settings
Changing the settings You can change the following settings. • Picture mode • Alarm Settings • Auto Power ON/OFF • Date/time Settings • General Settings (Listing Order, Sony logo ON/OFF, etc.) • Language Setting • Initialize Setting procedure Press MENU. - Page 43 Press v/V to select the item you want to change and press This enables you to set each of the items (page 44). Note When the photo frame is, for instance, displaying a slideshow, some settings of some items cannot be changed. They are displayed in gray and cannot be selected.
-
Page 44: Items To Set
Items to set Item Setting Picture mode Portrait Standard* Vivid Alarm Settings Sets the alarm function (page 41). Auto Power Sets the timer function which turns the power of the photo frame on or off automatically. ON/OFF You can use this function with the following settings (page 39). Note The default Auto Power ON/OFF setting may differ in some regions. - Page 45 The photo frame can be operated with the remote control of the TV. ON*/OFF: You can set whether the photo frame’s Sony logo lights or not. Displays the version of the firmware of the photo frame.
- Page 46 Item Setting Initialize Format internal memory Initialize settings Description You can format the internal memory. Notes • All the images added to the internal memory will be deleted. • Do not format the internal memory by using other devices such as a computer.
-
Page 47: Connecting To A High-Definition Tv (Dpf-Xr100 Only)
“PhotoTV HD” is a function for expressing subtle textures and color tones in high definition, giving the appearance of real photos. You can combine Sony devices that support “PhotoTV HD” together to enjoy photos at beautiful full HD quality. Note Depending on the original images, high-definition display may not be possible. - Page 48 Notes • We cannot guarantee operation with all types of TVs. • When the remote control of your Sony TV is equipped with a link menu button, you can use the remote control to operate the photo frame. • To operate the photo frame, the %5$4, [Enter], [Return] buttons support the control for HDMI.
-
Page 49: Operating An External Device Connected To The Photo Frame
What is “BRAVIA Sync” The “BRAVIA Sync” is a name of a feature of Sony products that uses the HDMI control signals and enables you to control linked operations of a “BRAVIA Sync”-ready product from a BRAVIA control unit. - Page 50 • Do not disconnect the USB cable or turn the photo frame and external device off while the access lamp on the external device is flashing. Doing so may damage the data stored in the external device. Sony assumes no responsibility for any damage or loss of data.
-
Page 51: Using With A Computer
• The photo frame has been demonstrated as operable when connected to a computer or Sony digital photo printer. When other devices are connected to the photo frame, these devices may not recognize the internal memory of the photo frame. -
Page 52: Disconnecting Your Computer
Move the cursor in this window and right-click, then click [New] - [Folder]. Name this new folder. In this manual, the folder name “sony” is used as an example. Double click to open this “sony” folder. Open the folder that contains the image file you want to copy, and copy the image file to the “sony”... -
Page 53: Error Messages
Error messages If an error message appears If an error occurs, one of the following error messages may be displayed on the LCD screen of the photo frame. Follow the corresponding solution below to solve the problem. Error message No Memory Stick. / No CompactFlash card. - Page 54 Error message Error reading the Memory Stick. / Error reading the CompactFlash card. / Error reading the SD Memory Card. / Error reading the xD-Picture Card. / Error reading the internal memory./ Error reading the External Device. Write error on the Memory Stick. / Write error on the CompactFlash card.
-
Page 55: Troubleshooting
Troubleshooting If trouble occurs Before submitting the photo frame for repair, try using the following guidance to solve the problem. If the problem persists, consult with your Sony dealer or Sony service facilities. Power supply Symptom Check item The power is not •... - Page 56 Symptom Check item Some images are • Are the images displayed in not displayed. the index view? • Does the mark displayed below appear in the index view? • Were the images created with an application on a computer? • Does the mark displayed below appear in the index view? •...
-
Page 57: Saving And Deleting Images
Symptom Check item The file name is • Did you rename the file with not displayed a computer or other device? properly. Saving and deleting images Symptom Check item Cannot save an • Is the memory card write- image. protected? •... - Page 58 Symptom Check item Cannot delete an • Is the memory card write- image. protected? • Is the write-protect switch of the memory card in the [LOCK] position? • Are you using a “Memory Stick-ROM”? • Is this image protected? An image was deleted accidentally.
-
Page 59: Photo Frame
Symptom Check item Images are not • Is the input of the TV set to displayed on the external input? TV screen or LCD screen. Photo frame Symptom Check item Nothing happens even if you operate the photo frame. The photo frame does not start. -
Page 60: Remote Control
Remote control Symptom Check item Nothing happens • Is the battery inserted in the even if you operate remote control properly? the remote control. • Is there a protective sheet inserted? Cause/Solutions c Replace the battery (page 10). c Insert a battery (page 10). c Insert a battery in the proper orientation (page 10). -
Page 61: Additional Information
• For the latest information on the “Memory Stick” types that the photo frame supports, see the “Memory Stick” compatibility information on the Sony web site (supplied Operating instructions, back cover). • Do not insert more than one “Memory Stick”... -
Page 62: Sd Memory Card
SD memory card The SD memory card slot of the photo frame allows you to use the following: • SD memory card • miniSD card, microSD card (An adaptor is necessary.) • SDHC memory card • miniSDHC card, microSDHC card (An adaptor is necessary.) •... - Page 63 – Locations subject to static electricity or electrical noise Notice on license The photo frame contains software that Sony uses under a licensing agreement with the owner of its copyright. We are obligated to announce the contents of the agreement to customers under requirement by the owner of copyright for the software.
-
Page 64: Index
Index Access lamp 8, 15 Adjusting the volume 28 Alarm 41, 44 Associated file 21 Auto Power ON/OFF 39, 44 Advanced 40 Auto off 40 Simple 40 Changing the settings 42 Clock and calendar display Color effect 25 Connecting Computer 51 External device 49 TV 47 Control for HDMI 45... - Page 65 Sony Corporation...
Need help?
Do you have a question about the S-Frame DPF-VR100 and is the answer not in the manual?
Questions and answers