
Related Manuals for Russell Hobbs RHBC48


Summary of Contents for Russell Hobbs RHBC48
- Page 1 Beverage Cooler Instruction Manual Model number: RHBC48 (B) (SS) For Customer Services & Spare Parts please call 0345 208 8750 or visit us at mda.russellhobbs.com IMPORTANT: RETAIN FOR FUTURE REFERENCE...
-
Page 2: Table Of Contents
Contents Safety Instructions ………………………………………. Electrical Safety ………………………………………. Transportation & Handling ………………………………………. Installing & Switch on your Appliance ………………………………………. Before Switching On ………………………………………. Product Overview ………………………………………. Unit & Spare Parts ………………………………………. Usage ………………………………………. Interior Light ………………………………………. Bulb replacement ………………………………………. Shelves ………………………………………. Door reversal ………………………………………. -
Page 3: Safety Instructions
Safety Instructions Important note: Please read this booklet before installing and switching on this appliance. The manufacturer assumes no responsibility for incorrect installation and usage as described in this booklet. Warning: When positioning the appliance, ensure the supply cord is not trapped or damaged. - Page 4 • D o not plug in damaged plugs. • D o not pull, twist or damage the power cable. • D o not plug-in or un-plug the appliance with wet hands to prevent electrical shock. • T his appliance can be used by children aged from 8 years and above and persons with reduced physical, sensory or mental capabilities or lack of experience and knowledge if they have been given supervision or instruction concerning use of the appliance in a safe way and understand the hazards...
-
Page 5: Electrical Safety
Electrical Safety THIS APPLIANCE MUST BE PLUGGED INTO AN EARTHED SOCKET • B efore switching on, make sure that the voltage of your electricity supply is the same as that indicated on the rating plate. This product is designed to operate on 220 –... -
Page 6: Installing & Switch On Your Appliance
Installing and Switching on Your Appliance • Operating voltage for your appliance is 220-240V at 50Hz. • Before plugging in the power supply, ensure that the voltage on the rating label corresponds to the working voltage of your electrical system in your home. •... -
Page 7: Before Switching On
WARNING! During use, service and disposal of the appliance, please pay attention to symbol similar to the one shown, which is located on rear of the appliance (rear panel or compressor) and with a yellow or orange colour. It’s risk of fire warning symbol. There are flammable materials in refrigerant pipes and compressor. -
Page 8: Product Overview
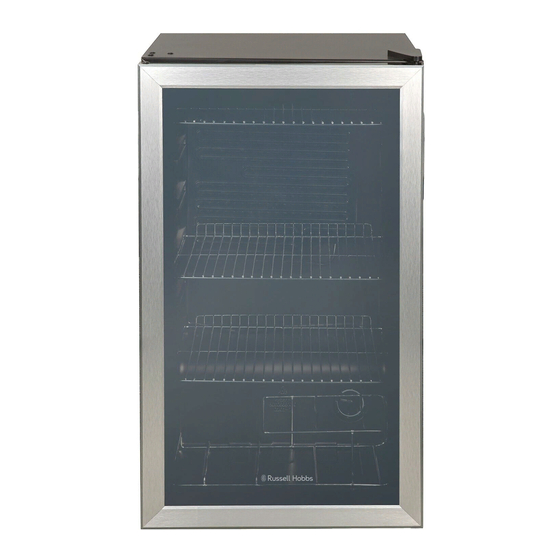
Product Overview Light & light switch Recessed handle Shelves (3 x flat & 1 x wine) Thermostat dial Adjustable feet Partsmay vary accordingto the appliance model. Unit Parts & Spare Parts Before installation, check that all parts detailed in the product overview are present. -
Page 9: Usage
Usage Allow to stand for a minimum of 3 hours before plugging in to the mains The temperature in the appliance is controlled by the temperature control dial located inside the appliance at the bottom of the back wall on the right side. Rotate the control dial left or right to regulate the temperature inside the cooler. -
Page 10: Interior Light
Interior Light • The appliance has an interior light and this can be turned on and off, by pressing the light button that is located inside the appliance at the top. Bulb Replacement The light is an energy efficient, long life LED. Therefore should not need replacing throughout the life of the product however if it does it has to be replaced by a qualified engineer. -
Page 11: Shelves
Shelves • Any of the shelves can be removed, to accommodate larger bottles. • Removing a shelf – remove all of the bottles from the shelf that you want to remove. Lift the shelf upwards and then gently pull the shelf away from the appliance. -
Page 12: Door Reversal
Door Reversal You will need to tilt the cooler backward to access the lower hinge which holds screws. Do not tilt more than 45 degrees and do not lay the cooler flat on its side. For your own safety, a minimum of 2 people should lift or tilt this product. Tools Required: Cross headed screwdriver, flat headed screwdriver and hexagonal spanner. - Page 13 Door Reversal 2. Tilt the appliance carefully and remove the bottom hinge by removing the screws with a Phillips head screwdriver or a spanner. Also remove the adjustable foot on the opposite side. Bottom hinge 3 x screws Adjustable foot 3.
- Page 14 Door Reversal 4. On the bottom of the door swap the bottom door stopper over to the opposite side, the hinge plug will need to be swapped to the opposite side on the door stopper. On the top of the door swap the hinge plug over to the opposite side. Door stopper Hinge plug 1 x screw...
-
Page 15: Energy Saving Advice
Energy Saving Advice • Do not install the appliance close to sources of heat, such as a cooker, dishwasher or radiator. • Locate the appliance in a cool well-ventilated room and make sure that the air vents are clear. • Try to avoid keeping the doors open for a long time, warm air will enter the cabinet and may cause a build-up of ice as well as affecting the energy consumption. -
Page 16: Cleaning And Maintenance
Maintenance & Cleaning Disconnect the appliance from the power supply before cleaning. Internal Cleaning • Do not pour water over the appliance. • The cavity should be cleaned periodically using a solution of bicarbonate of soda and lukewarm water (5ml to 0.5 litre of water) •... -
Page 17: Connection To The Mains Supply
Connection to the mains supply For UK use only – Plug fitting details (where applicable): As the colours of the wires in the mains lead of this appliance may not correspond with the coloured markings identifying the terminals in your plug, proceed as follows: The GREEN/YELLOW wire is the EARTH and must be connected to the terminal which is marked with the letter E or by the earth symbol or coloured GREEN or GREEN/YELLOW. -
Page 18: Troubleshooting
Troubleshooting Problem Solution Check that the appliance is switched on. Check that there has not been a power cut. Check that the plug is not faulty. The appliance doesn't work Check that the fuse has not blown. Check that the voltage is correct for the appliance. Check the keypad is not locked Check that there are not too many bottles in the appliance. - Page 19 Troubleshooting Problem Solution Check that the appliance is on a flat, level surface and is stable. Unusual noises Check the spacing's around the appliance and ensure it is not touching other items. Check that no bottles have leaked or any stagnant liquid Smell/odour is at the bottom of the appliance.
-
Page 20: Guarantee
Guarantee This product is guaranteed for 12 months from the date of the original purchase. If any defect arises due to faulty materials or workmanship the faulty product must be returned to the place of purchase. Refund or replacement is at the discretion of the retailer. The following conditions apply: •... -
Page 21: Technical Specification
Technical Specification Model number RHBC48 (B) (SS) Rated Voltage 220V – 240V ~ 50Hz Capacity External Dimensions(HxWxD) 842mm x 480mm x 440mm... -
Page 22: Product Fiche
Product Fiche Model RHBC48 (B) (SS) Fresh Food Storage Compartment Volume (L) Frozen Food Storage Volume (L) Storage Temperature ( ° C) 5 - 18 Energy Consumption (kWh/per year) Energy Consumption (kWh/per year), based on standard test results for 24 hours... -
Page 23: Notes
Notes... - Page 24 Russell Hobbs is a registered trademark used under license from Spectrum Brands (UK) Ltd. Made under license by G2S Limited, Wigan, WN2 4AY/G2S (NI) Ltd, Belfast, BT5 5AD. Russell Hobbs Support: call 0345 208 8750 or visit: mda.russellhobbs.com The ‘wheelie bin’ symbol is known as the 'Crossed-out wheelie bin Symbol'.
Need help?
Do you have a question about the RHBC48 and is the answer not in the manual?
Questions and answers