Table of Contents
Advertisement
Available languages
Available languages
Quick Links
Advertisement
Table of Contents

Related Manuals for Sable SA-HF033


Summary of Contents for Sable SA-HF033
- Page 1 成品尺寸:100*145mm 公差:±1mm 材质:封面128G铜版纸 内页80克书纸 成型方式:装订成册...
- Page 2 EU Importer: ZBT International Trading GmbH Address: Halstenbeker Weg 98C, 25462 Rellingen, Deutschland ASIA PACIFIC support.jp@sable.co Tel : 03-5542-0238 ( 10-18時/土日祝除く) SABLE AIR MATTRESS WITH BUILT IN ELECTRIC PUMP JP Importer: 株式会社SUNVALLEY JAPAN User Guide Address: 〒104-0032東京都中央区八丁堀3丁目18-6PMO京橋東9F...
- Page 3 CONTENTS English 01/07 Deutsch 08/14 Français 15/21 Español 22/28 Italiano 29/35 日本語 36/42...
-
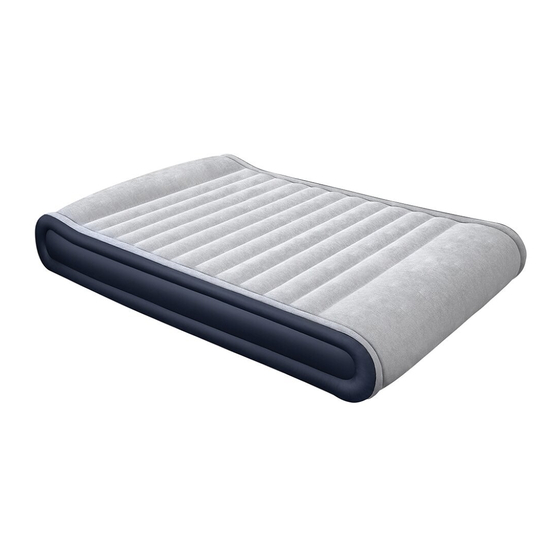
Page 4: Package Contents
· Air inside the air mattress may vary with the ambient temperature. Reinflate the air mattress if necessary. · Do not sleep on one side of the air mattress to avoid tilt or deformation. 1. Sable Air Mattress WARNING 2. Built-in Electric Pump ④... -
Page 5: Cleaning And Maintenance
Note: Deflating the Air Mattress 1. To deflate, make sure nothing is on top of the mattress. Take out the cord and plug Do not drag the Do not rub the folding place. deflated air mattress into a power source. Turn the knob counterclockwise to the DEFLATE position. on the ground. -
Page 6: Troubleshooting Guide
Storage Troubleshooting Guide PVC Smell Bottom There may be some PVC smell when you receive the air mattress, which will be gone Folding Folding Direction in 1 to 2 days. Direction Air Leakage Folding Check whether the extra safety valve is securely tightened first, if air leakage occurs. Direction Place Bed into the Carry Bag Folding Direction... -
Page 7: Customer Service
3. Cut a suitable size of repair patch, press it firmly over the leaking area. Achtung · Nur für den Haushaltsgebrauch. · Die verwendete Spannung muss für US/CA bei AC 110 - 120V, für EU/UK bei AC 220 - 240V und für Japan bei AC 100V liegen. -
Page 8: Im Lieferumfang Enthalten
Sie die Lasche hineindrücken. SA-HF033 SA-HF046 SA-HF047 (Das erhaltene Produkt funktioniert gemäß dem Produkt in der Anleitung) 1. Sable Luftmatratze 2. Integrierte elektrische Pumpe 1. Öffnen Sie das Kabelfach und schließen Sie das Kabel an einer Stromquelle an. 3. Extra-Sicherheitsventil ④... -
Page 9: Reinigung Und Pflege
Luft aus der Luftmatratze ablassen Aufbewahrung 1. Um die Luft abzulassen, stellen Sie sicher, dass nichts auf der Matratze liegt. Nehmen Sie das Kabel heraus und schließen Sie es an einer Stromquelle an. Drehen Boden Sie den Knopf gegen den Uhrzeigersinn auf die ABLASS-Position. Faltrichtung 2. -
Page 10: Problembehandlung
3. Schneiden Sie einen passenden Reparaturflicken zu und drücken Sie ihn fest auf die Problembehandlung Austrittstelle. PVC-Geruch Wenn Sie die Luftmatratze erhalten, kann sie einen gewissen PVC-Geruch verströmen. Dieser verschwindet nach 1 bis 2 Tagen. Luftlecks Sobald Luft auszutreten scheint, überprüfen Sie zuerst, ob das Sicherheitsventil 4. -
Page 11: Contenu De La Boîte
· Le voltage requis est AC 110-120V pour les US / Canada, AC 220-240V pour EU / UK, et AC 100V pour le Japon. · En utilisant le produit, ne pas laisser de sable, gravier ou petits objets rentrer dans les ports de gonflage et de dégonflage. Tenir l’ o uverture de la pompe dégagée en tout temps. -
Page 12: Nettoyage Et Entretien
Note: Dégonflage du matelas gonflable 1. Pour dégonfler, assurez-vous que rien n’est posé sur le dessus du matelas. Sortez le Ne pas traîner le Ne pas frotter les pliures. matelas dégonflé câble et branchez-le à une source d’alimentation. sur le sol. 1.5m / 59.1in 2. -
Page 13: Résolution Des Problèmes
Rangement Résolution des problèmes Odeur de PVC Surface inférieure Une odeur de PVC peut être sentie lorsque vous recevez le matelas gonflable, elle Direction Direction du pliage disparaîtra sous 1 à 2 jours. du pliage Fuite d’air Direction Vérifiez d’abord si la valve de sécurité est bien fermée, si une fuite survient. du pliage Placez le matelas dans sa sacoche Direction du pliage... -
Page 14: Service Client
3. Découpez un morceau de rustine de taille adéquate, et collez-la fermement sur la zone de la fuite. Precaución · Uso doméstico solamente. · El voltaje utilizado debe ser AC 110-120V para US/CA, AC 220-240V para EU/UK, y AC 100V para especificaciones japonesas. ·... -
Page 15: Contenidos Del Paquete
SA-HF033 SA-HF046 SA-HF047 (El producto recibido está sujeto al producto real) 1. Colchón de Aire de Sable 2. Bomba eléctrica Integrada 1. Abra el soporte de almacenamiento del cable, enchúfelo a una fuente de 3. Válvula de Seguridad Adicional ④... -
Page 16: Limpieza Y Mantenimiento
Desinflando el Colchón de Aire Almacenamiento 1. Para desinflar, asegúrese de que no haya nada encima del colchón. Retire el cable y el enchufe de la fuente de poder. Gire la perilla a la izquierda hacia (DEFLATE). Fondo 2. Cuando termine, gire la perilla a la posición de apagado (OFF) y vuelva a colocar el Dirección cable en el soporte del cable. -
Page 17: Servicio Al Cliente
3. Corte el parche de reparación al tamaño adecuado, presione firmemente sobre el Guía Para Resolver Problemas área de la fuga. Olor a PVC Puede haber un olor a PVC cuando reciba el colchón de aire, que desaparecerá en 1 o 2 días. -
Page 18: Contenuto Della Confezione
· Il volume dell’ a ria all’interno del materasso ad aria può variare in base alla temperatura dell’ a mbiente. Gonfiare nuovamente il materasso se necessario. · Non dormire sul lato del materasso ad aria per evitare di piegarlo o di deformarlo. 1. Materasso ad Aria Sable Air 2. Pompa Elettrica incorporata ATTENZIONE ④... -
Page 19: Pulizia E Manutenzione
Nota: Sgonfiaggio del Materasso ad Aria 1. Per sgonfiare, assicurarsi che non ci sia nulla sul materasso. Estrarre il cavo di Non trascinare il Non strofinare il materasso ad aria alimentazione e collegarlo ad una presa di corrente. Ruotare la manopola in senso posto pieghevole. -
Page 20: Guida Alla Risoluzione Dei Problemi
Conservazione Guida alla Risoluzione dei Problemi Odore di PVC Fondo Potrebbe esserci dell’odore di PVC quando riceverai il materasso ad aria. L’odore Direzione scomparirà nel giro di 1-2 giorni. della Piega Perdite d’ A ria Direzione Direzione Se si verificano perdite d’aria, controllare innanzitutto che la valvola aggiuntiva di della Piega della Piega sicurezza sia ben chiusa. - Page 21 3. Tagliare un pezzo di toppa delle dimensioni adatte e premerla con forza sull’area della perdita. 注意 · この製品は家庭用と してのみご使用いただけます。 · 利用電圧は、 アメリカ/カナダのAC 110-120V、 EU /イギリスのAC 220-240V、 日本のAC 100Vに限り ます。 · 製品を利用する際、 空気の出入ポートから、 砂や小石など小さなものが入らないよう注意してく だ さい。 · ポンプを10分間連続利用したら、 少なく とも5分間は利用せず休ませてく ださい。 4. Attendere 1 ora prima di procedere nuovamente al gonfiaggio. · 空気の出入ポートへ指や手を入れることは絶対にしないでく...
- Page 22 マッ トレスを地面で引 をこすらないでください。 きずらないでく ださい。 1.5m / 59.1in ① ① ① エアマッ トレスに空気を入れる ② ③ ② ③ ② ③ 空気を入れる前にタブを強く押し下げて、 安全バルブがしっかり閉まっていることを確認してくだ さい。 SA-HF033 SA-HF046 SA-HF047 (受け取った製品が実際の製品であることを前提とします) 1. Sable エアーマッ トレス 2. 内蔵電気ポンプ 3. 安全バルブ ④ ⑤ 1. コード収納ホルダーを開け、 電源コードを取り出し電源につなげます。 ダイヤルを回して 4. キャリーバッグ “INFLATE”に合わせます。 3〜5分で空気が入ります。 5. 修理用パッチ (SA-HF047には含まれていません)...
- Page 23 エアマッ ト レスから空気を抜く 収納 1. 空気を抜く 際は、 マッ トレスの上に何も置かないでく ださい。 電源コードをホルダーから出して、 電 源につなげます。 ダイヤルを左に回し、 “DEFLATE”に合わせます。 ボトム 2. 空気を抜き終わったら、 ダイヤルを回して“OFF”に合わせ、 ケーブルをコードホルダーに戻します。 折りたたみ 3. バルブを開き、 残った空気を外へ出し、 エアーマッ トを丸めながら、 収納サイズにたたみます。 折りたたみ 方向 方向 折りたたみ 方向 マッ トレスをキャリーバッグへ入れる 折りたたみ方向 注意 掃除とメンテナンス 1. 湿った布で拭き取り、 掃除後は広げたまま乾かしてください。 · 尖ったものなど、...
- Page 24 3. 修理用パッチを適切なサイズに切り、 空気もれの箇所に貼り、 しっかり押さえます。 トラブルシ ューテ ィ ングガイ ド ビニール臭 エアーマッ トがお手元に届いた際、 PVCの臭いが気になることがあるかもしれませんが、 臭いは 1〜2日で消えます。 空気もれ 空気もれが生じた場合は、 まず安全バルブがしっかり閉まっているかどうか確認してください。 4. 修理後、 空気を入れて利用するまでは、 1時間お待ちください。 1時間待つ 5. 修理用パッチは、 ビニールの表面にだけ貼り付きます。 空気もれの修繕 6. 問題が起こ った場合は、 アフターセールサポートへご連絡ください。 24時間以内にご連絡させ 1. エアマッ トレスに耳を近づけたり、 手で探ったり して空気が漏れている場所を特定します。 特定 ていただきます。 できない場合は、 薄い石鹸水でエアマッ トレスを拭き、 泡が出る場所を確認してください。 エア マッ...
Need help?
Do you have a question about the SA-HF033 and is the answer not in the manual?
Questions and answers